Operation
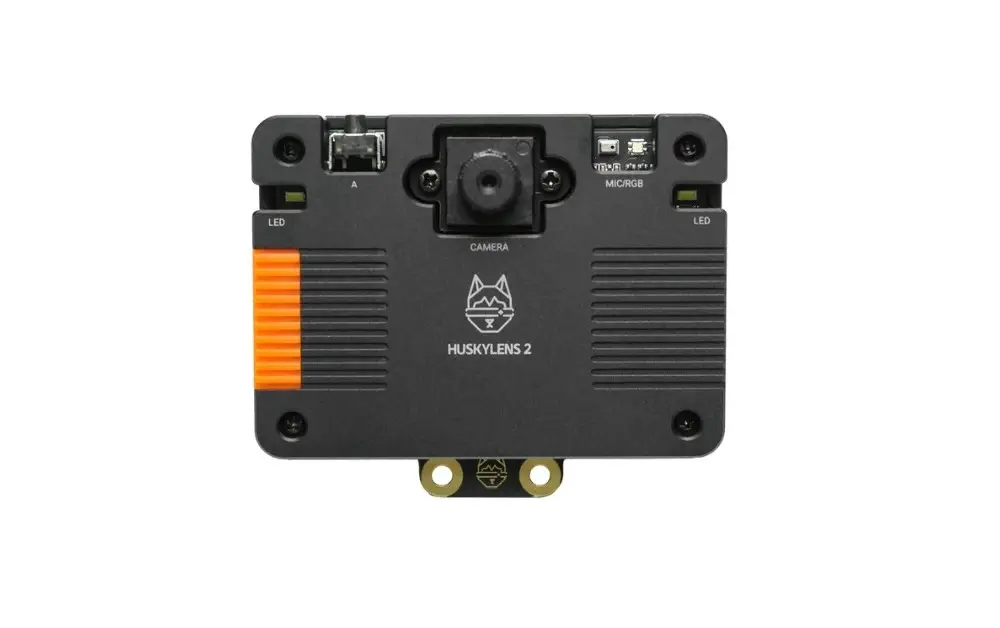
This hardware can be operated in two main ways: either as a standalone device without connecting to external hardware like an SBC (Single Board Computer) or controller, or by using I2C or UART interfaces and connecting them through the provided cables included in the kit.
Standalone mode
In this mode, without any assistance of a PC or integration of external hardware, users access over 20 AI models built into the device firmware, all available through an intuitive easy to operate display. There’s also an option to import additional models, and the company frequently introduces new ones, broadening the range of applications. Since the AI algorithms are stored locally, there are some limitations without server access. Occasionally, the device might struggle to recognize simple objects during object recognition.
On the bright side, it includes a self-learning classifier that allows you to teach it to recognize new objects by showing them to the camera and assigning labels. For more advanced scenarios and improved accuracy in recognition, you can pair it with local or cloud-based LLMs, ensuring you’re covered with both options.
Self-Learning Capabilities (A partial list)
- Learn Any Object: HuskyLens 2 features a self-learning classifier that allows you to teach it to recognize new objects simply by showing them to the camera and assigning labels.
- Assign IDs and Names: When an object is learned, it’s saved with an ID and an optional name, enabling the device to identify it later and provide relevant information.
- No Coding Required: You can train objects right on the device using its touchscreen interface—no coding or external tools required.
YOLO-Style Workflow
Developed by DFrobot, the YOLO-style workflow on HuskyLens 2 lets you train and deploy custom object detection models using the popular YOLO (You Only Look Once) architecture, allowing recognition of objects beyond the built-in AI models.
How It Works on HuskyLens 2
- Collect Training Data:
- Capture or gather images of the objects you want to detect.
- Annotate them using tools like LabelImg or Roboflow to create bounding boxes and labels.
- Train the Model:
- Use a YOLO-compatible framework (e.g., YOLOv5 or YOLOv8) to train your model on a computer.
- Export the trained model in a format compatible with HuskyLens 2 (usually ONNX or a converted binary format).
- Deploy to HuskyLens 2:
- Transfer the model to the device via USB or SD card.
- Use the touchscreen interface to load and activate the model.
- Real-Time Detection:
- Once deployed, HuskyLens 2 can detect and classify objects in real time using your custom model.
- It outputs object ID, position, size, and confidence score, which can be used to trigger actions via microcontrollers.
Connecting with external hardware
The HuskyLens 2 connects easily to controllers and single-board computers through standard protocols like UART and I2C. During our test, we paired it with the Orange Pi RV2 SBC and chose the GPIO interface for the connection, as it seemed like the simplest option.
Interfacing with the Orange Pi RV2
Orange Pi RV2 to HuskyLens 2 Wiring (I2C Mode)
HuskyLens 2 uses a 4-pin connector labeled:
| HuskyLens Pin | Wire Color | Function | Orange Pi RV2 GPIO Pin |
|---|---|---|---|
– | Black | Ground (GND) | Pin 9 (GND) |
+ | Red | Power (VCC) | Pin 1 (3.3V) or Pin 2 (5V) |
T | Doesn’t matter | I2C Data (SDA) | Pin 3 (SDA) |
R | Doesn’t matter | I2C Clock (SCL) | Pin 5 (SCL) |
Connecting to the Orange Pi RV2 board through the GPIO header pins.
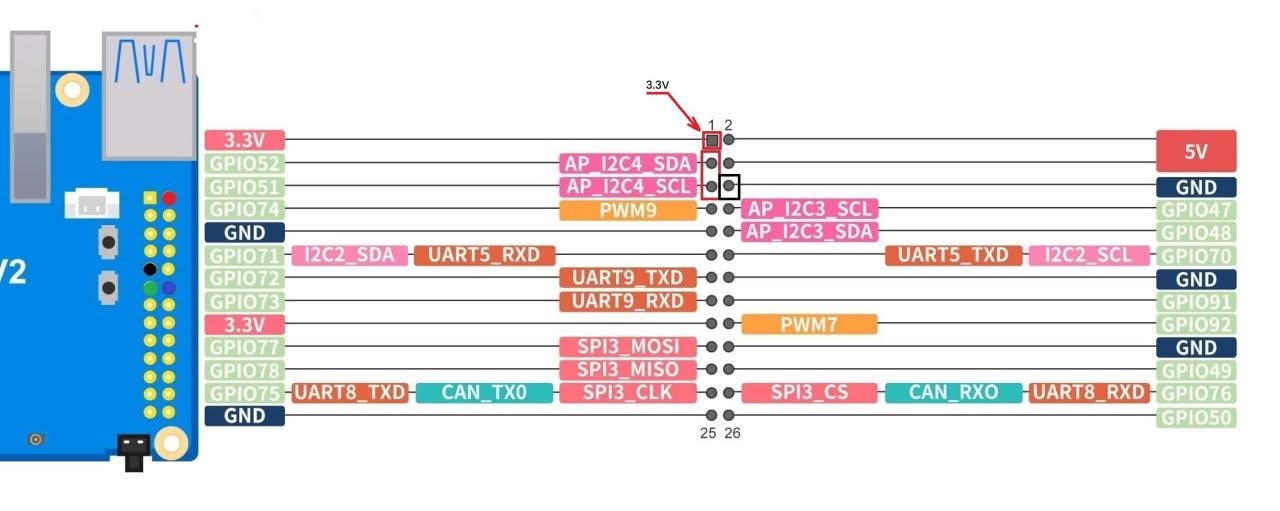
Orange Pi RV2 to HuskyLens 2 Wiring (UART Mode)
Use the 4-pin connector on HuskyLens labeled T (TX), R (RX), –, +:
| HuskyLens Pin | Wire Color | Function | Orange Pi RV2 UART Pin |
|---|---|---|---|
– | Black | GND → | Orange Pi GND |
+ | Red | VCC → | Orange Pi 5V or 3.3V |
T | Green | TX → | Orange Pi RX |
R | Blue | RX → | Orange Pi TX |
⚠️Notes!
- Please check voltage compatibility: HuskyLens 2 works with both 3.3V and 5V, but the Orange Pi RV2 GPIO may vary based on your OS and settings.
- HuskYLENS 2 needs a stable 5V power supply and can draw up to 230 mA or more. Make sure to connect VCC to one of the 5V GPIO pins.
- If you choose the UART option, because the Orange Pi RV2 uses a 3-pin header for UART without VCC, you will likely need to use one of the RV2 GPIO pins.
Since the Orange Pi RV2’s UART header only includes TX, RX, and GND pins without a VCC (power output) pin, you can try a workaround by interfacing with the RV2 GPIO pins.
Connecting the Orange Pi RV2 to the HuskyLens 2 in I2C mode.
After identifying the I2C pins on the Orange Pi RV2 GPIO header and connecting them, we installed the latest Ubuntu image from the Orange Pi website and resolved a few issues.
Switching the repositories from China to a U.S.-based server for faster download speeds.
mv /etc/apt/sources.list.d/docker.list /etc/apt
mv /etc/apt/sources.list /etc/apt/sources.list.backup
truncate -s 0 /etc/apt/sources.list
Next, we modified the file /etc/apt/sources.list.d/ubuntu.sources and set it up to:
Types: deb
URIs: http://ports.ubuntu.com/ubuntu-ports
Suites: noble noble-updates noble-backports
Components: main universe restricted multiverse
Signed-By: /usr/share/keyrings/ubuntu-archive-keyring.gpg

## Ubuntu security updates. Aside from URIs and Suites,
## this should mirror your choices in the previous section.
Types: deb
URIs: http://ports.ubuntu.com/ubuntu-ports
Suites: noble-security
Components: main universe restricted multiverse
Signed-By: /usr/share/keyrings/ubuntu-archive-keyring.gpg
Disabling services that fail
systemctl disable dnsmasq
systemctl disable orangepi-zram-config
systemctl disable smartmontools
Software Setup
1. Enabling the I2C3 interface
Enabling the interface under OrangePi config –> system –>Hardware And rebooting the RV2 board for the setting to take effect.
2. Installing I2C Tools
sudo apt update
sudo apt install i2c-tools
sudo apt install pipx
pipx install smbus2
3. Installing the HuskYLENS Python library
Installing the Python file that contains the HuskyLensLibrary class and all the code needed to communicate with your HuskYLENS device.
# Cloning the GitHub repository
git clone https://github.com/HuskyLens/HUSKYLENSPython.git
Note: The HuskyLensPython library is compatible with HuskyLens 2.
4. Checking for available I2C devices connected to the HUSKYLENS 2
# Checking for a connection by scanning for I2C devices.

i2cdetect -y 3

You should see the HuskyLens address (default is 0x32).
5. Final result?
Not great—it couldn’t connect to our Orange Pi RV2. After talking with the company, we learned the board is probably only compatible with Arduino boards, ESP32 microcontrollers, and Raspberry Pi 4 or 5 SBCs (single-board computers). That means you’re pretty limited if you want to use it with other Chinese-brand SBCs like Orange Pi or Banana Pi, unless they’re based on the Raspberry Pi chipset.