Maybe you missed it? Banana Pi R3 Router Board Review
Banana Pi BPI M3
The Banana Pi BPI-M3 is SinoVoip latest single-board computer equipped with an Octa-Core processor using the A83T TSMC 28 nm chip, based on eight ARM Cortex-A7 CPU cores operating at high frequency up to 2.0 GHz. Board hardware specs include 2G DDR3 memory operating frequency up to 800 MHz capable of smooth playback at 1920 × 1200 HD resolution, Onboard SATA II interface for external hard drive and PowerVR SGX544 GPU that runs at frequencies up to around 700 MHz with high image processing performance ensuring the ultimate gaming experience and fluency.
In Multimedia processing, A83T is capable of playing 1080p@60fps including 1080P @30fps videos with H.265 codec support, more than sufficient to meet the needs of end-users daily audiovisual entertainment. A83T built ISP image signal processor can support 8Mp camera interface and also integrates a full-colour display Lai Chip technology that enhances image display quality.
An integrated full hardware security system is another major feature of the A83T supports DRM solutions which include high-grade Widevine Level 1, HDCP 2.X for Miracast supports secure boot / secure storage capabilities to ensure the security of the systems and data. In the power saving area, 28 nm advanced technology uses high energy-efficient Cortex-A7 architecture, performance and power consumption is very balanced in the PowerVR 5 GPU series due to software optimization.
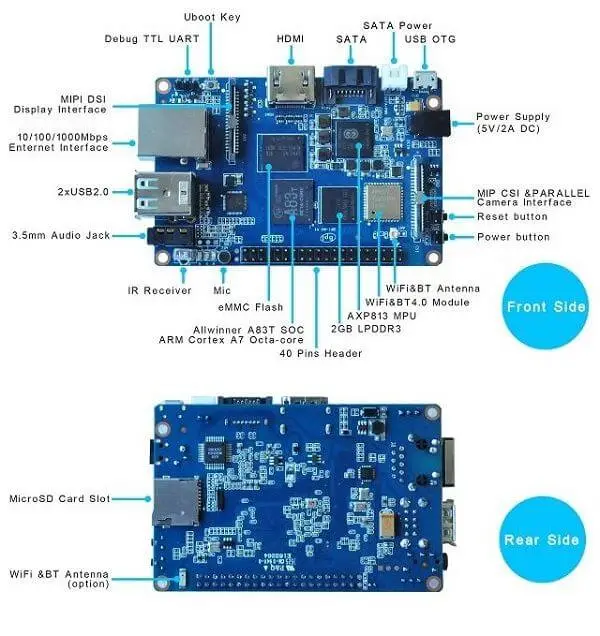
Main Features:
- SoC: Allwinner A83T eight processor cores (Octa-core) Cortex A7 at 2.0 GHz
- GPU: SGX544MP1 PowerVR graphics OpenGL ES 2.0 / 1.1, OpenCL 1.1, 9.3 DX
- 2 GB of RAM DDR3
- 10/100/1000 Gigabit Ethernet
- WiFi 802.11 b/g/n and Bluetooth 4.0
- SATA II interface
- 8 GB eMMC flash memory
- Audio output 3.5 mm
- And Parallel Interface MIPI CSI camera
- Infrared receiver
- 40-pin GPIO support Raspberry Pi
| CPU | A83T ARM Cortex-A7 octa-core,512 KB L1 cache 1 MB L2 cache |
| GPU | PowerVR SGX544MP1· Comply with OpenGL ES 2.0, OpenCL 1.x, DX 9_3 |
| Memory | 2GB LPDDR3 (shared with GPU) |
| Storage Support | Micro SD Card(up to 64GB)/SATA (up to 2TB USB-to-SATA; GL830)/eMMC (8GB onboard) |
| Onboard Network | 10/100/1000Mbps Ethernet (Realtek RTL8211E/D) |
| WiFi | 802.11 b/g/n (AP6212) |
| Bluetooth | BT4.0 (AP6212) |
| Video In | A parallel 8-bit camera interface MIPI Camera Serial Interface (CSI) |
| Video Out | HDMI 1.4 DHCP 1.2 with resolutions from (640×640 to 1920×1080) MIPI DSI for RAW LCD panels |
| Audio Out | 3.5 mm Jack and HDMI |
| Audio In | Onboard microphone |
| Power Source | Micro USB, optional 5V DC port (center positive 1,6 x 4,4 mm) |
| USB Ports | 2x USB 2.0, USB OTG (Micro USB) |
| Buttons | Reset button, Power button, U-boot button |
| GPIO | 40 Pins: GPIO, UART, I2C bus, I2S bus, SPI bus, PWN, +3.3v, +5v, ground |
| LED | Power LED(red), RJ45 LED(blue), user define LED(green) |
| OS | Android and Linux etc.OS |
| Dimensions | 92 mm x 60 mm |
| Weight | 45g |
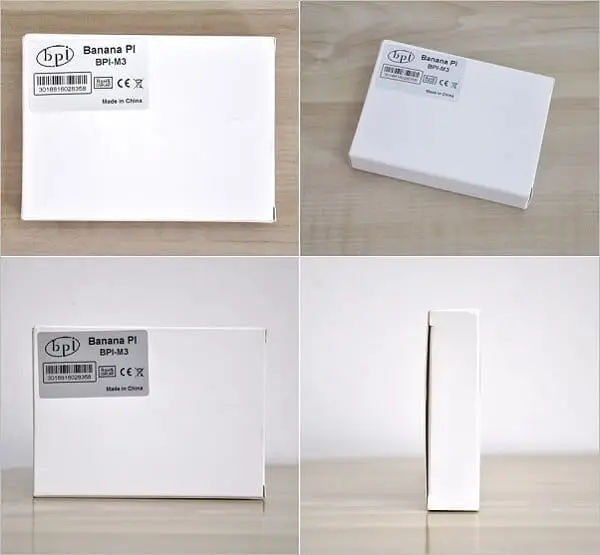
Banana Pi M3 Package
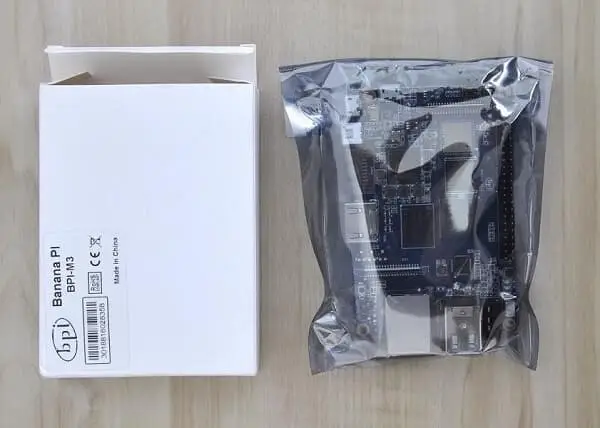
Banana Pi M3 Unboxing
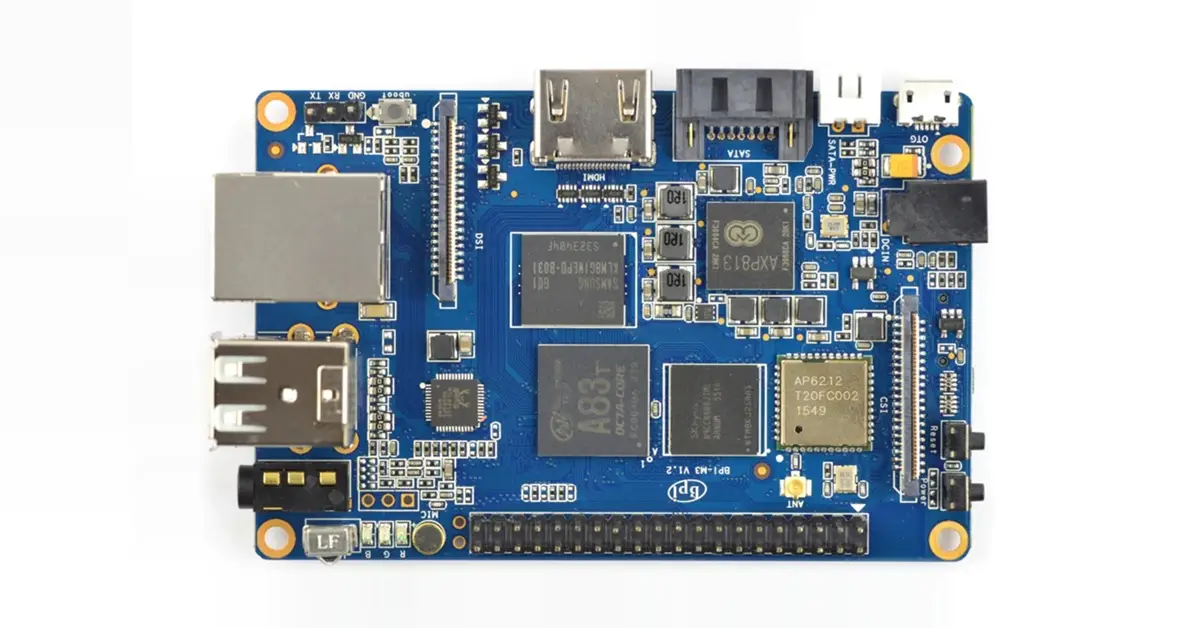
A Closer Look at the Banana Pi M3
- HDMI 1.4
- SATA interface
- SATA Power
- OTG
- OTG (Power Supply)
- Micro SD Card Socket
- APX813 MPU
- eMMC Flash
- A83T Processor
- 2GB LPDDR3
- WiFi & BT4.0 Module
- Camera Interface
- Reset button
- Power button
- External WiFi Antenna Socket
- 40 Pins GPIO
- Microphone
- IR Remote
- CVB – Audio / Video
- Realtek (LAN) Chip.
- 2x USB 2.0
- Ethernet LAN
- Debug TTL UART
- Uboot Key
- Display Interface.
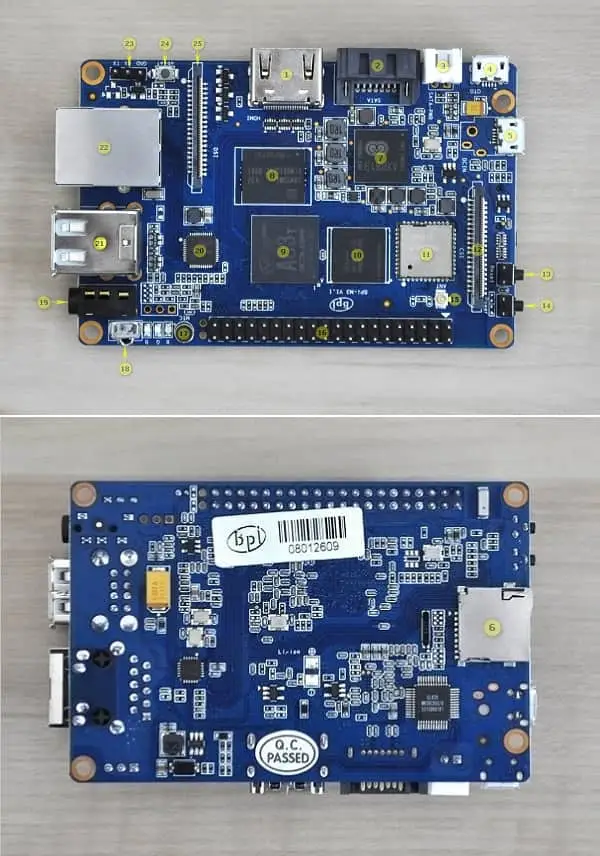
Banana Pi M3 | Full View
Accessories
The items I received, in addition to the BPI-M3 board, are the acrylic plastic case and the external 2db Antenna, which are both not included for free with the board and cost a few extra dollars. All items came in excellent condition and I didn’t have any issues. That being said, the case is composed of six segments (parts) assembled and mounted together to form the box housing envelope using a series of technology cuts and strengthened with four screws and bolts.
Banana Pi M3: Case and Accessories
Hardware
The platform of the Banana Pi BPI-M3 is based on the Allwinner A83T Octa-core SoC. Hardware Tested with Ubuntu MATE 16.04 image file, loaded from a Class 10 Micro SD Card. From the first impression, hardware was strong enough to run applications smoothly and also used as a low-cost Mini PC running Ubuntu Linux, which is considered to be very popular among Linux distributions. The PowerVR 5 GPU provided above decent performance, and it was able to play and stream 1080P (1920×1080 PX) videos.
System Temperatures
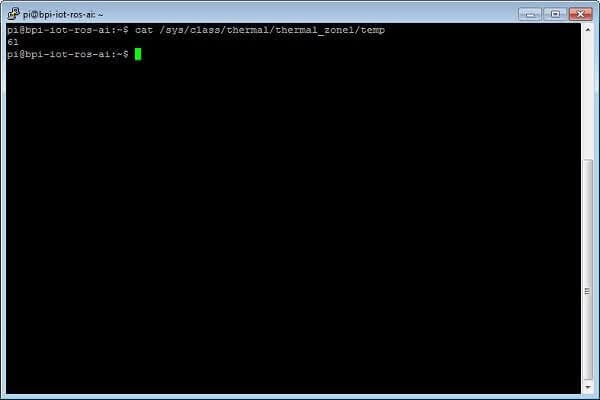
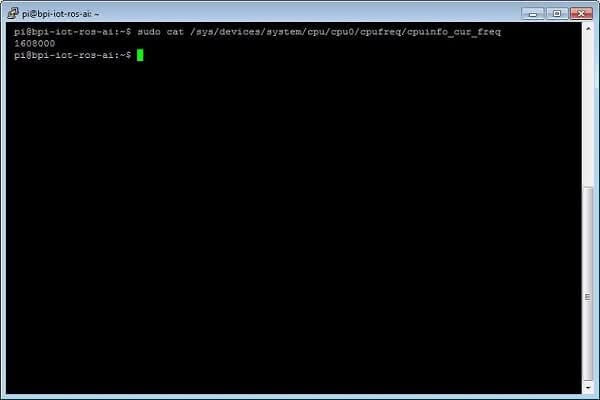
The A83T Processor nominal clock frequency measured under Ubuntu was 1.6GHz. At this frequency, it tends to heat up, but based on my tests, running apps it can still operate well in temperatures up to 75C depending on typical usage. CPU Temperatures measured were approximately between 61-75C for moderate system usage with few applications opened in the background, such as the Firefox browser and doing simple tasks like surfing the internet, watching YouTube. It’s also important to mention that in my tests the BPI-M3 board was assembled inside the acrylic case without any heat-sink and tested with a 5V-2A Power supply adapter.
Ubuntu OS System Information
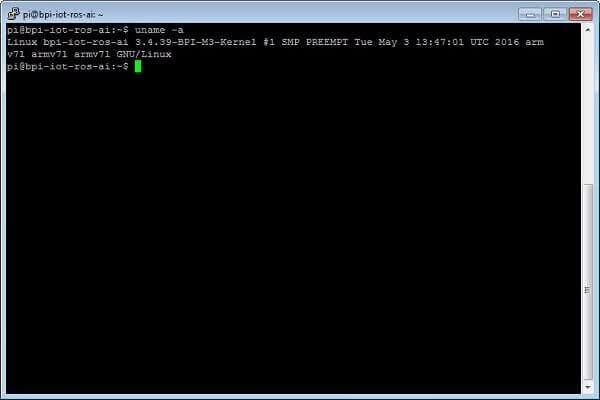 Banana Pi M3 Ubuntu 1
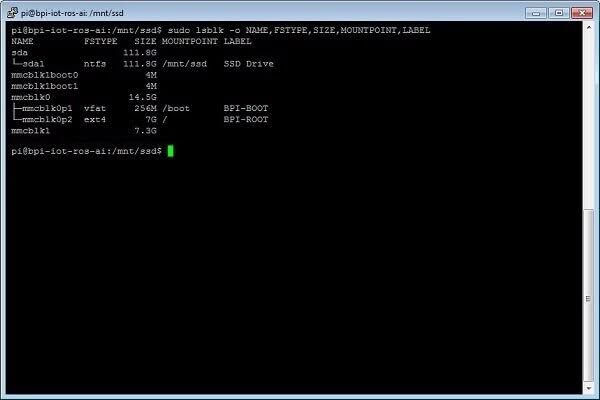
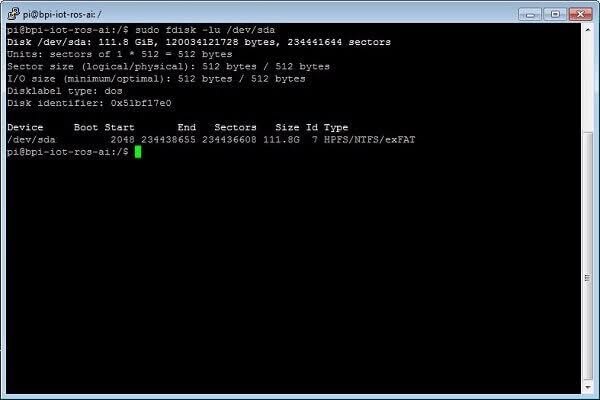
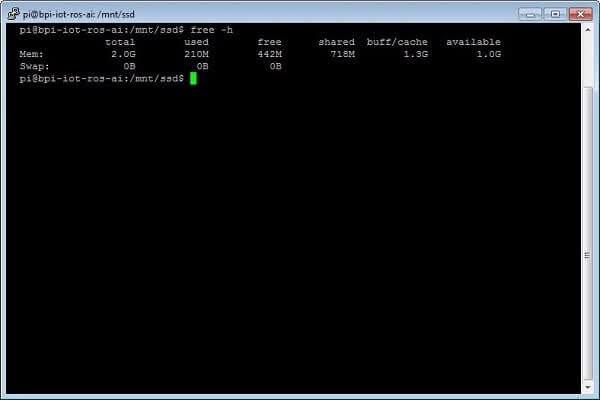
Testing SSD Performance
Drive Parameters:
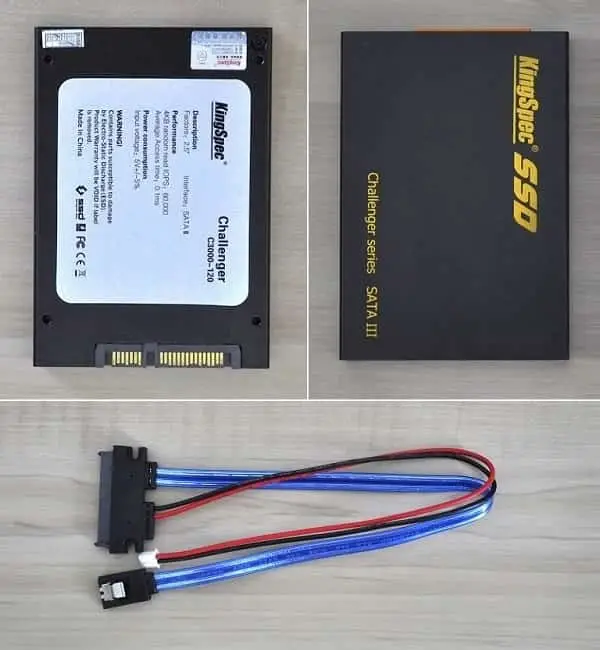
- Model: Kingspec C3000-120
- Capacity: 120GB
- Flash: MLC NAND Flash
- SSD Interface: SATA-III
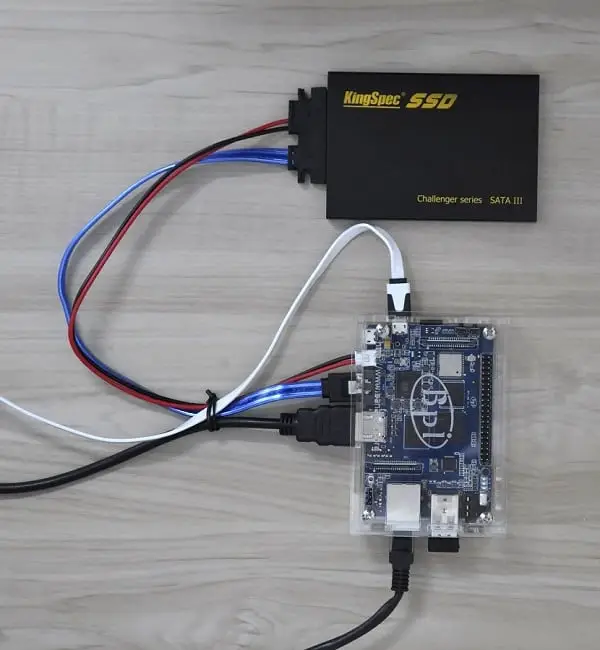
- Interface Connection: SATA II with Power Cable
- File System: NTFS
- Cluster Size: 4KB
Maximum Data Transfer Rate (Based on Kingspec Specs):
- Maximum sustained read: 500MB/s
- Maximum sustained write: 470MB/s
Kingspec C3000-120 SSD
Kingspec C3000-120 Connected to the Banana Pi M3
pi@bpi-iot-ros-ai:~$ df -h
Filesystem      Size  Used Avail Use% Mounted on
/dev/root       6.9G  4.5G  2.1G  70% /
devtmpfs        750M     0  750M   0% /dev
tmpfs          1006M  540K 1006M   1% /dev/shm
tmpfs          1006M   12M  995M   2% /run
tmpfs           5.0M  4.0K  5.0M   1% /run/lock
tmpfs          1006M     0 1006M   0% /sys/fs/cgroup
/dev/sda1       112G   1.3G 111G  2% /mnt/ssd
/dev/mmcblk0p1  256M  209M   48M  82% /boot
tmpfs           202M   32K  202M   1% /run/user/1000


# Changing to directory where the SSD Drive is mounted
i@bpi-iot-ros-ai:/$ cd /mnt/ssd


# Write to SSD
$ dd if=/dev/zero of=./largefile bs=1M count=1024
1024+0 records in
1024+0 records out
1073741824 bytes (1.1 GB, 1.0 GiB) copied, 71.3493 s, 15.0 MB/s

# Clear the Memory Cache
$ sh -c "sync && echo 3 > /proc/sys/vm/drop_caches"

# Read from SSD

$ dd if=./largefile of=/dev/null bs=4k
262144+0 records in
262144+0 records out
1073741824 bytes (1.1 GB, 1.0 GiB) copied, 36.0159 s, 29.8 MB/s
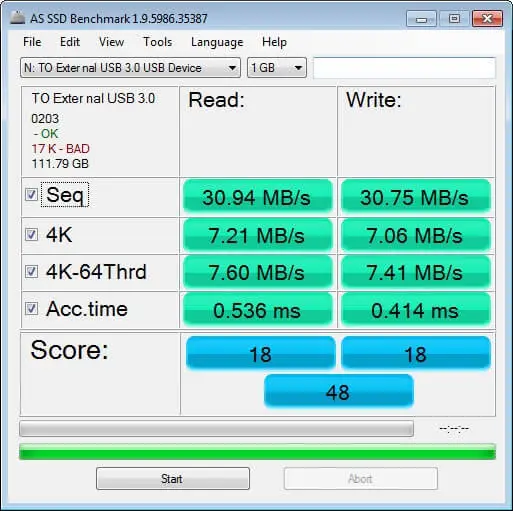
Testing SSD in Windows 7 OS (64-Bit)
Test Software: AS SSD Benchmark Software
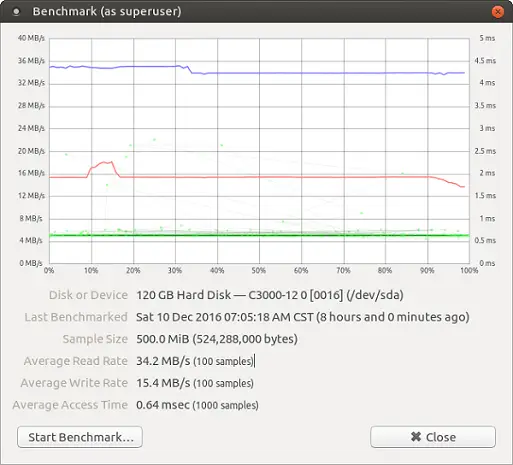
Testing SSD in Ubuntu OS
Test Software: Gnome Disk Utility
Conclusions and Results
Despite the external SATA II interface built on the M3 board and the separated power connector, we are talking about a NATIVE SATA (AHCI) interface with misleading appearance because it’s actually a type of USB II interface and not a “real” SATA with high transfer speeds from 200MB/s and above as you may expect.
As for the actual test results, the Kingspec C3000-120 Read / Write Performance under both Linux and Windows operating systems were pretty much the same. For the first test, the SSD was connected with SATA II trough a USB cable to a PC USB Host, and on the second it was tested under Ubuntu Linux. Average read transfer speeds for both operating systems were between ~30 – 36MB/s. The write speed under Ubuntu was much lower compared to tests done under Windows 7 64-bit Operating system, but I am sure that with additional tweaking the write rate can be improved.
HOWTO: Building an Ubuntu File Server ( Samba file Server )
Step 1: Selecting a Preferred configuration where system files will be installed.
- Option #1: Burn Image on Micro SD Card (Minimum Storage required: 16GB).
- Option #2: Burn Image to 8GB eMMC and Mount the Micro SD Card.
Step 2: Checking Windows machine is set on Domain WORKGROUP or other
net config workstation
Step 3: Giving the Server a Static IP for your server that won’t ever change.
To get your gateway’s IP address, right-click the network/connection icon in your Notification Area (i.e. ”Task Bar” for Windows users) and select ”Connection Information”.
or
Finding the LAN Gateway Address:
You will see an address that will look like G next to IP 192.168.1. X, where the first three numbers separated by dots are the same as the first 3 of your gateway and the X is a number between 2 and 254.
pi@bpi-iot-ros-ai:~$ route -n
Kernel IP routing table
Destination  Gateway      Genmask       Flags Metric Ref Use Iface
0.0.0.0      192.168.0.1  0.0.0.0       UG    100    0   0   eth0
192.168.0.0  0.0.0.0      255.255.255.0 U     100    0   0   eth0
You now know see your gateway address, which is probably something like 192.168.X.X ‘
- Go to System > Preferences > Network Connections
- find the server’s active connection to the router, in the appropriate tab, select it and click ”Edit”.
- Go to the IPV4 tab
- change the Method to ”Manual”
- Click ”Add” next to the ”Addresses” box
- Type your chosen server IP address (”192.168.10.4”) in the Address column.
- Type ”24” (no speech marks) in the Netmask column
- Type the gateway address from above in the Gateway column, and again in the ”DNS Servers” text box.
- Apply the changes
Now your server now has a static IP address.
Step 4: Downloading the package lists from the repository.
sudo apt-get update
Step 5: Installing Samba Packages
sudo apt-get install samba
Note: you will be prompted for YOUR password (because of Sudo) then twice for a new samba password for the sharer.
Step 6: Make a safe backup copy of the original smb.conf file
sudo cp /etc/fstab /etc/fstab.bak
Step 7: Edit smb.conf Configuration File
sudo nano /etc/samba/smb.conf
Step 8: Deleting the file content of the snmb.conf :
CTRL + K
Step 9: Settings up share path and restrictions inside smb.conf file
#===================== Global Settings ======================
[global]
workgroup = WORKGROUP
server string = Samba Server %v
netbios name = srvr1
security = user
map to guest = bad user
name resolve order = bcast host
dns proxy = no
#==================== Shared Folders =======================
[pi]
path = /mnt/ssd/pi
browsable =yes
writable = yes
guest ok = yes
read only = no
Step 10: Installing NTFS Support:
sudo apt-get install Ntfs-config
Step 11: Setting the hard drive to mount automatically on boot
to get a list of mounted devices, for example:
pi@bpi-iot-ros-ai:sudo lsblk -o NAME,FSTYPE,SIZE,MOUNTPOINT,LABEL

NAME FSTYPE SIZE MOUNTPOINT LABEL
sda 111.8G
+-sda1 ntfs 111.8G ssd
mmcblk1boot0 4M
mmcblk1boot1 4M
mmcblk0 14.5G
+-mmcblk0p1 vfat 256M /boot BPI-BOOT
+-mmcblk0p2 ext4 7G / BPI-ROOT
mmcblk1 7.3G
Step 12: adding your device name to fstab file: mounting path, file system
sudo nano /etc/fstab

proc /proc proc defaults 0 0
/dev/mmcblk0p2 / ext4 defaults,noatime 0 1
/dev/mmcblk0p1 /boot/ vfat defaults 0 2
/dev/sda1 /mnt/ssd ntfs defaults 0 1
Mounting all Devices:
sudo mount -all
Step 13: Creating a directory for Mounted Device
sudo mkdir -p /mnt/ssd/samba/pi
Step 14: Creating Samba User and setting Password
sudo smbpasswd -a pi
Step 15: Setting the correct user permissions
cd /mnt/ssd/pi

sudo chmod -R 0755 pi
sudo chown -R nobody:nogroup pi/
Step 16: Starting the Service demon
sudo service smbd restart
Step 17: Checking configuration
testparm
Step 18: Changing network settings in Windows
Now we should let Windows know that there’s a WINS server active in the network.
If you had to change “wins support” to “no” above skip this step!
– Click “START”
– Click “Control Panel”
– Click “Network Connections”
– Find your “LAN Connection”
– Right-click the icon and select “Properties”
– Select the “TCP/IP” Protocol and click the “Properties” button
– Click “Advanced”
– Select the third tab entitled “WINS”
– Click “Add”
– Type in the ip-address of your Linux box
– Click “Add”
– Select “Use NetBIOS over TCP/IP”
– Click “OK”
– Click “OK”
– Click “OK”
– Reboot Windows
Upon reboot, you may now map the network drive within Windows.
With WINS enabled:
– Click “START”
– Right-click “My Computer”
– Select “Map network drive”
– Choose the drive letter
– Type \\DAPPER\MyFiles
NOTE: Adjust this to the hostname and share the name you chose above!
– Click “Finish”
With WINS disabled:
– Click “START”
– Right-click “My Computer”
– Select “Map network drive”
– Choose the drive letter
– Type \\<ip-address>\MyFiles
NOTE: To find out the address of your Linux box, type “ifconfig” inside a terminal and find the ip for the correct interface (i.e. eth0). Don’t forget to adjust the share name to the name you chose above.
– Click “Finish”
Step 19: Mounting the Share from a Windows Client
- Right-click on My Computer and select “Map Network Drive“
- Enter the IP address and the name of the share:
\\IP-DES-REMOTE-SERVERS\Share-name
Final Words
Overall, the M3 provides good performance with and above decent software support. Applications ran very smoothly without lags. The A83T hardware platform is powerful enough to be used as a basic Mini PC, a media file sharing server, and also for other open-source projects that require above average CPU “juice power”. The BPI M3 is currently on sale for a retail price of $74. For further details, you are welcome to visit SINOVIP official AliExpress store here.
Pros
- 2 GB DDR3 RAM
- Onboard Gigabit Ethernet LAN and WiFi.
- High-Performance Hardware (Octa-Core Processor).
- Good Software Support.
Cons
- 32-bit Processor.
- It only has two USB ports.
- Native SATA II Interface with Low Read/Write Speeds).