
It’s time for the final check to make sure everything is working properly.
Slot: 0002:00:00.0
Class: PCI bridge
Vendor: MEDIATEK Corp.
Device: Device 7988
Rev: 01
ProgIf: 00
Slot: 0002:01:00.0
Class: SATA controller
Vendor: JMicron Technology Corp.
Device: JMB58x AHCI SATA controller
SVendor: JMicron Technology Corp.
SDevice: JMB58x AHCI SATA controller
ProgIf: 01
NAME MAJ:MIN RM SIZE RO TYPE MOUNTPOINTS
loop0 7:0 0 4K 1 loop /snap/bare/5
loop1 7:1 0 69.2M 1 loop /snap/core22/1438
loop2 7:2 0 33.7M 1 loop /snap/snapd/21761
sda 8:0 0 953.9G 0 disk
sdb 8:16 0 111.8G 0 disk
└─sdb1 8:17 0 111.8G 0 part
mtdblock0 31:0 0 128M 0 disk
mtdblock1 31:1 0 1M 1 disk
mtdblock2 31:2 0 512K 0 disk
mtdblock3 31:3 0 4M 0 disk
mtdblock4 31:4 0 2M 0 disk
mmcblk0 179:0 0 14.5G 0 disk
├─mmcblk0p1 179:1 0 4M 0 part
├─mmcblk0p2 179:2 0 512K 0 part
├─mmcblk0p3 179:3 0 2M 0 part
├─mmcblk0p4 179:4 0 4M 0 part
├─mmcblk0p5 179:5 0 256M 0 part /boot
└─mmcblk0p6 179:6 0 6.8G 0 part /
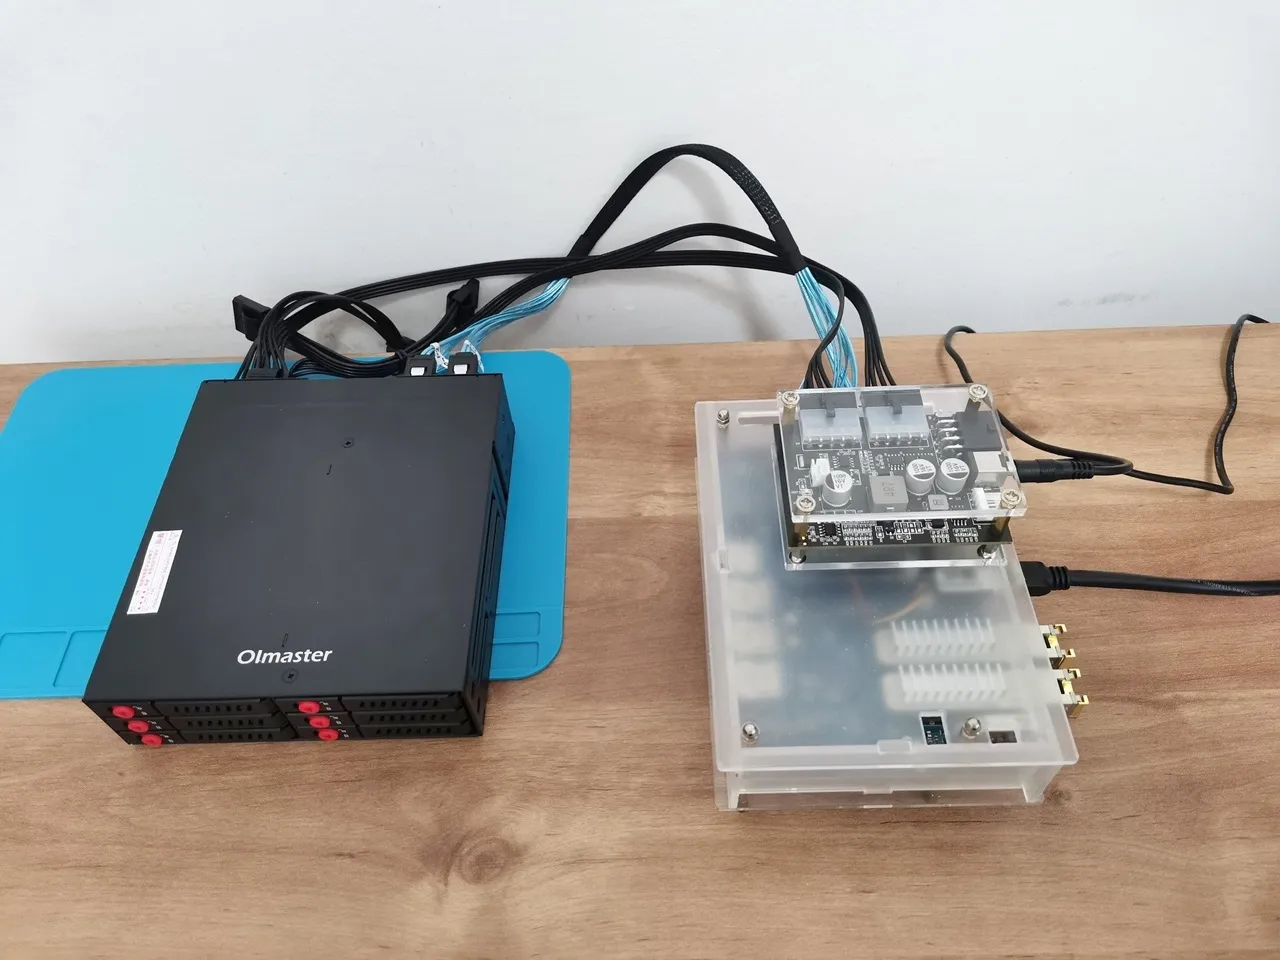
We have successfully identified two SSDs under Ubuntu 24.04 LTS, running Kernel 5.4.260. One drive boasts a size of 120 GB, and another with a larger capacity of 1 TB. While our M.2 SATA card accommodates a maximum of 5 SATA ports, our rack has the capacity for up to 6 SSDs. Unfortunately, this limits us to using only five drives. Nonetheless, this configuration is good, providing users with an incredibly cost-effective option to maximize their Banana Pi R4 storage capacity.
| Device name | Brand | Model | Capacity |
| sda | OEING | OEING 1TB | 1 TB |
| sdb1 | KingSpec | C3000-120 | 120 GB |
Disk /dev/loop0: 4 KiB, 4096 bytes, 8 sectors
Units: sectors of 1 * 512 = 512 bytes
Sector size (logical/physical): 512 bytes / 512 bytes
I/O size (minimum/optimal): 512 bytes / 512 bytes
Disk /dev/loop1: 69.21 MiB, 72572928 bytes, 141744 sectors
Units: sectors of 1 * 512 = 512 bytes
Sector size (logical/physical): 512 bytes / 512 bytes
I/O size (minimum/optimal): 512 bytes / 512 bytes
Disk /dev/loop2: 33.71 MiB, 35344384 bytes, 69032 sectors
Units: sectors of 1 * 512 = 512 bytes
Sector size (logical/physical): 512 bytes / 512 bytes
I/O size (minimum/optimal): 512 bytes / 512 bytes
Disk /dev/loop3: 69.24 MiB, 72605696 bytes, 141808 sectors
Units: sectors of 1 * 512 = 512 bytes
Sector size (logical/physical): 512 bytes / 512 bytes
I/O size (minimum/optimal): 512 bytes / 512 bytes
Disk /dev/mtdblock0: 128 MiB, 134217728 bytes, 262144 sectors
Units: sectors of 1 * 512 = 512 bytes
Sector size (logical/physical): 512 bytes / 512 bytes
I/O size (minimum/optimal): 512 bytes / 512 bytes
Disk /dev/sda: 953.87 GiB, 1024209543168 bytes, 2000409264 sectors
Disk model: OEING 1TB
Units: sectors of 1 * 512 = 512 bytes
Sector size (logical/physical): 512 bytes / 512 bytes
I/O size (minimum/optimal): 512 bytes / 512 bytes
Disk /dev/sdb: 111.79 GiB, 120034123776 bytes, 234441648 sectors
Disk model: C3000-120
Units: sectors of 1 * 512 = 512 bytes
Sector size (logical/physical): 512 bytes / 512 bytes
I/O size (minimum/optimal): 512 bytes / 512 bytes
Disklabel type: dos
Disk identifier: 0x4eef5367
Device Boot Start End Sectors Size Id Type
/dev/sdb1 * 2048 234440703 234438656 111.8G 7 HPFS/NTFS/exFAT
GPT PMBR size mismatch (14942207 != 30318591) will be corrected by write.
Disk /dev/mmcblk0: 14.46 GiB, 15523119104 bytes, 30318592 sectors
Units: sectors of 1 * 512 = 512 bytes
Sector size (logical/physical): 512 bytes / 512 bytes
I/O size (minimum/optimal): 512 bytes / 512 bytes
Disklabel type: gpt
Disk identifier: 5452574F-2211-4433-5566-778899AABB00
Device Start End Sectors Size Type
/dev/mmcblk0p1 34 8191 8158 4M Linux filesystem
/dev/mmcblk0p2 8192 9215 1024 512K Linux filesystem
/dev/mmcblk0p3 9216 13311 4096 2M Linux filesystem
/dev/mmcblk0p4 13312 21503 8192 4M EFI System
/dev/mmcblk0p5 204800 729087 524288 256M Microsoft basic data
/dev/mmcblk0p6 729088 14940159 14211072 6.8G Linux filesystem
Disk /dev/mtdblock1: 1 MiB, 1048576 bytes, 2048 sectors
Units: sectors of 1 * 512 = 512 bytes
Sector size (logical/physical): 512 bytes / 512 bytes
I/O size (minimum/optimal): 512 bytes / 512 bytes
Disk /dev/mtdblock2: 512 KiB, 524288 bytes, 1024 sectors
Units: sectors of 1 * 512 = 512 bytes
Sector size (logical/physical): 512 bytes / 512 bytes
I/O size (minimum/optimal): 512 bytes / 512 bytes
Disk /dev/mtdblock3: 4 MiB, 4194304 bytes, 8192 sectors
Units: sectors of 1 * 512 = 512 bytes
Sector size (logical/physical): 512 bytes / 512 bytes
I/O size (minimum/optimal): 512 bytes / 512 bytes
Disk /dev/mtdblock4: 2 MiB, 2097152 bytes, 4096 sectors
Units: sectors of 1 * 512 = 512 bytes
Sector size (logical/physical): 512 bytes / 512 bytes
I/O size (minimum/optimal): 512 bytes / 512 bytes
Checking if the SSDs are functioning correctly
SSD Model: OEING-1
root@BPI-R4:~# hdparm -t –direct /dev/sda
/dev/sda:
Timing O_DIRECT disk reads: 1372 MB in 3.00 seconds = 456.81 MB/sec
Write Speed (Creating a 1 GB test file named “test” and saving it to a storage device.).
root@BPI-R4:/media/OEING-1# sudo dd if=/dev/zero of=test bs=1G count=1 oflag=direct
1+0 records in
1+0 records out
1073741824 bytes (1.1 GB, 1.0 GiB) copied, 3.04559 s, 353 MB/s
SSD Model: C3000-120
root@BPI-R4:~# hdparm -t –direct /dev/sdb1
/dev/sdb:
Timing O_DIRECT disk reads: 1134 MB in 3.00 seconds = 377.55 MB/sec
Write Speed (Creating a 500Mb test file named “test” and saving it to a storage device.).
root@BPI-R4:/media/C3000-120# sudo dd if=/dev/zero of=test bs=500M count=1 oflag=direct
1+0 records in
1+0 records out
524288000 bytes (524 MB, 500 MiB) copied, 3.9872 s, 131 MB/s
Conclusions
The IOCrest M.2 5-port SATA adapter enables high-speed PCIe 3.0 connectivity with a dual-lane (x2) configuration. On the other hand, the Banana Pi R4 M.2 Key-M socket accommodates a single-lane (x1), and it also offers PCIe 3.0 performance with a theoretical maximum speed of approximately 970 MB/s. However, it is worth noting that actual speeds may fluctuate due to various factors, including controller quality, NAND type, and system overhead.
Even with a speed of 400 MB/s, the performance remains quite satisfactory. However, if you wish to achieve even faster read/write speeds, it would be worth considering powering the PSU board with a 12V-10A power adapter and upgrading the SATA cables.
Enhancing the design
For those passionate about 3D printing, we strongly advise creating an intricately designed case that encompasses the PSU board, HDD rack, and the Banana Pi R4 board. This remarkable case will not only exude a visually stunning appearance but also provide unparalleled protection for all these valuable components.
Banana Pi R4 NAS Configurtions | The Final Outcome
More Optional NAS Racks are available.
If you are in search of a reasonably priced NAS Rack that is also compatible with 3.5-inch drives, not just with 2.5-inch drives, this case is definitely worth exploring.
This site contains affiliate links to products. We may receive a commission for purchases made through these links.
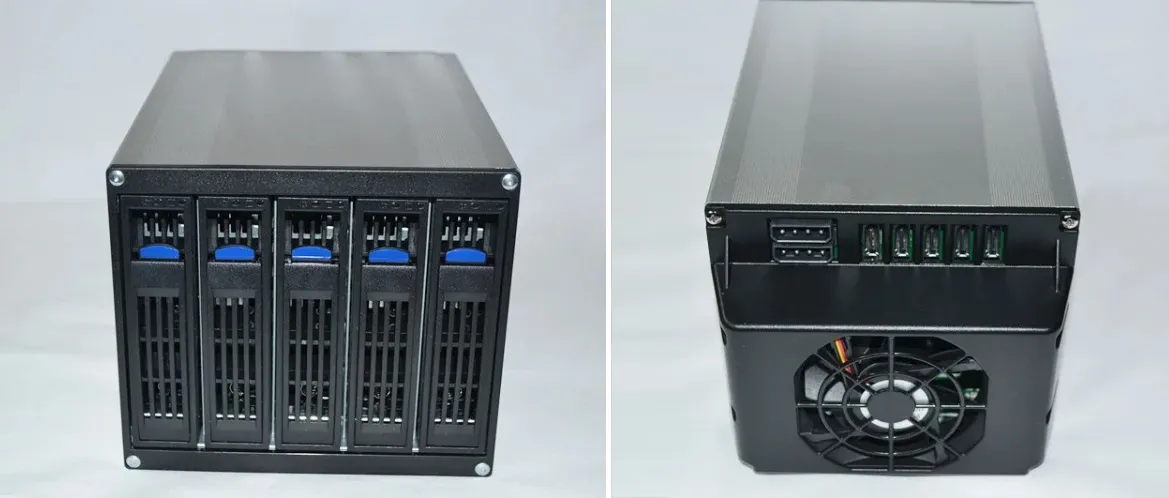
A 5 Storage Rack NAS is designed to accommodate 2.5 and 3.5-inch drives.
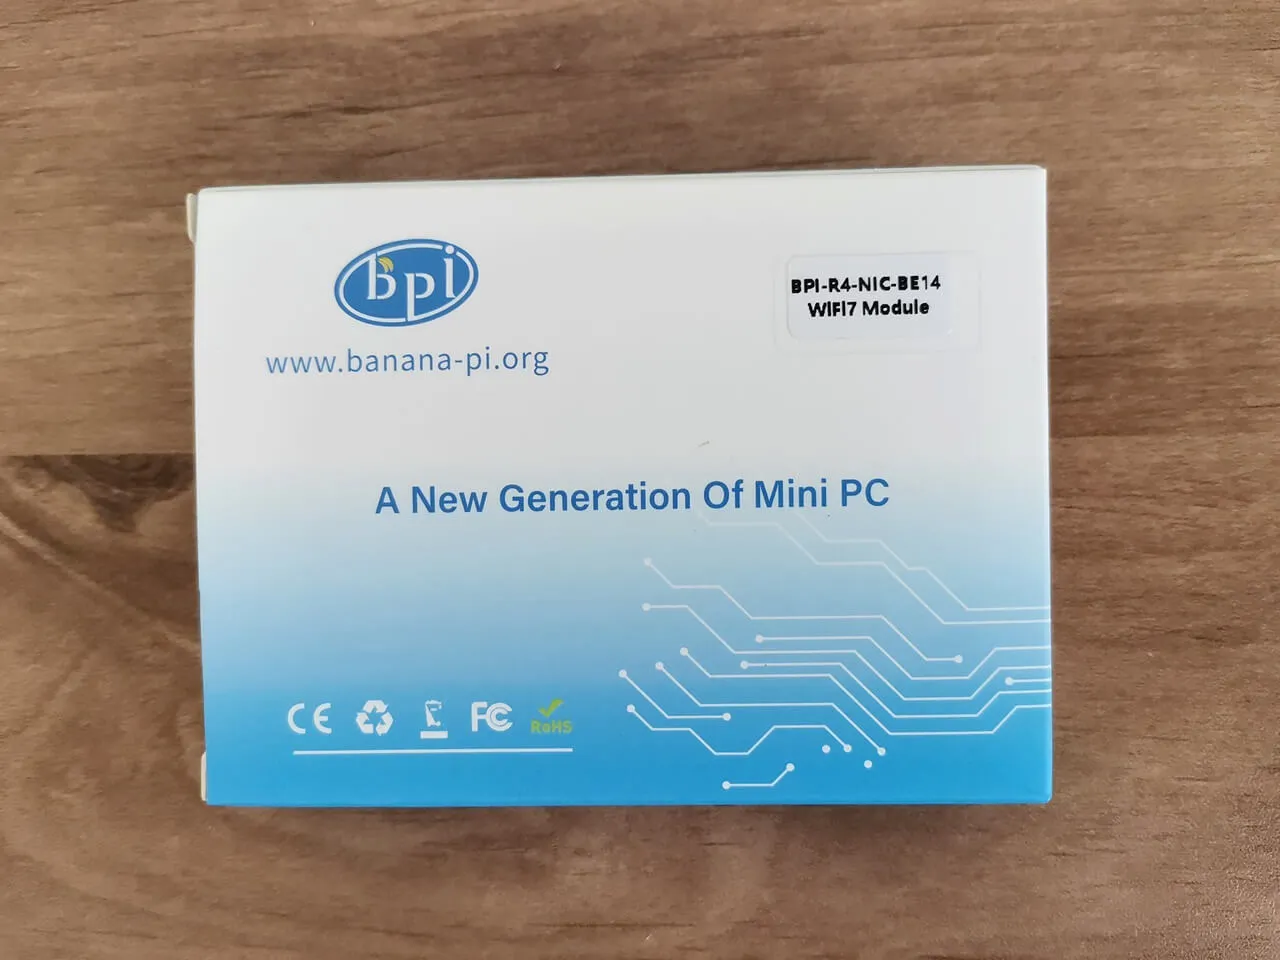
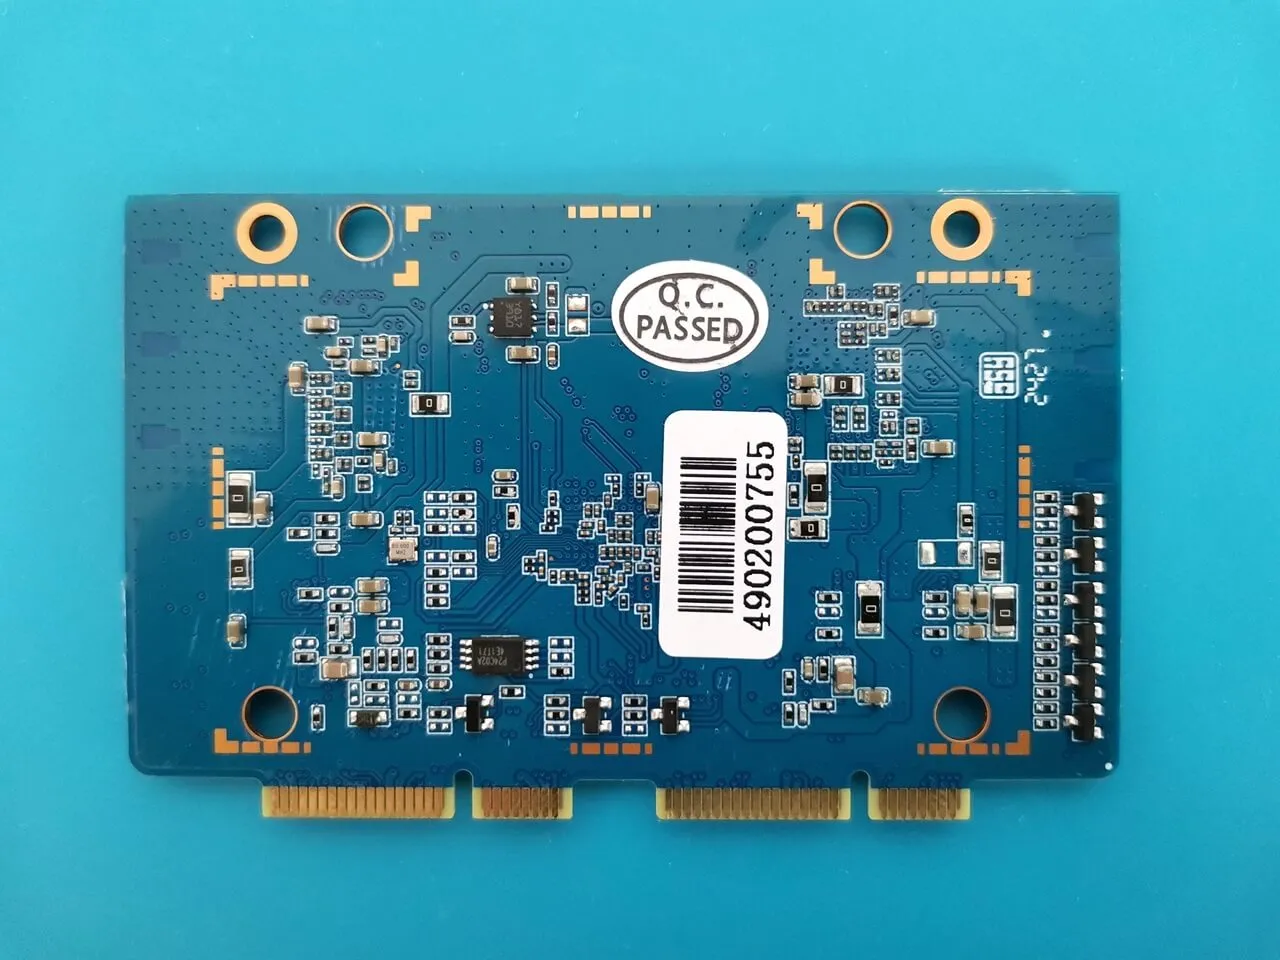
Setting Up the Banana Pi BE14000 Wireless NIC Expansion Card
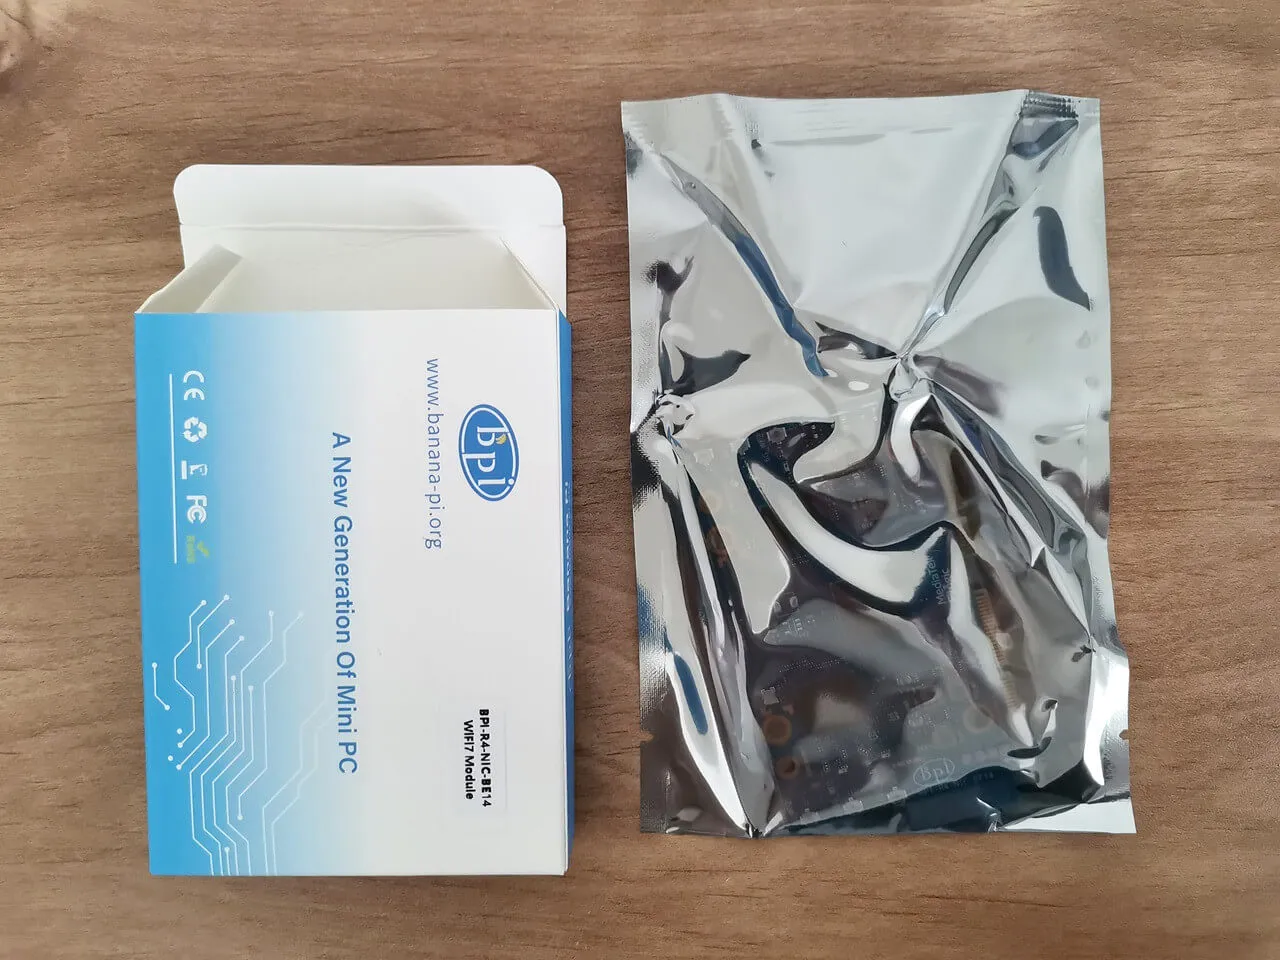
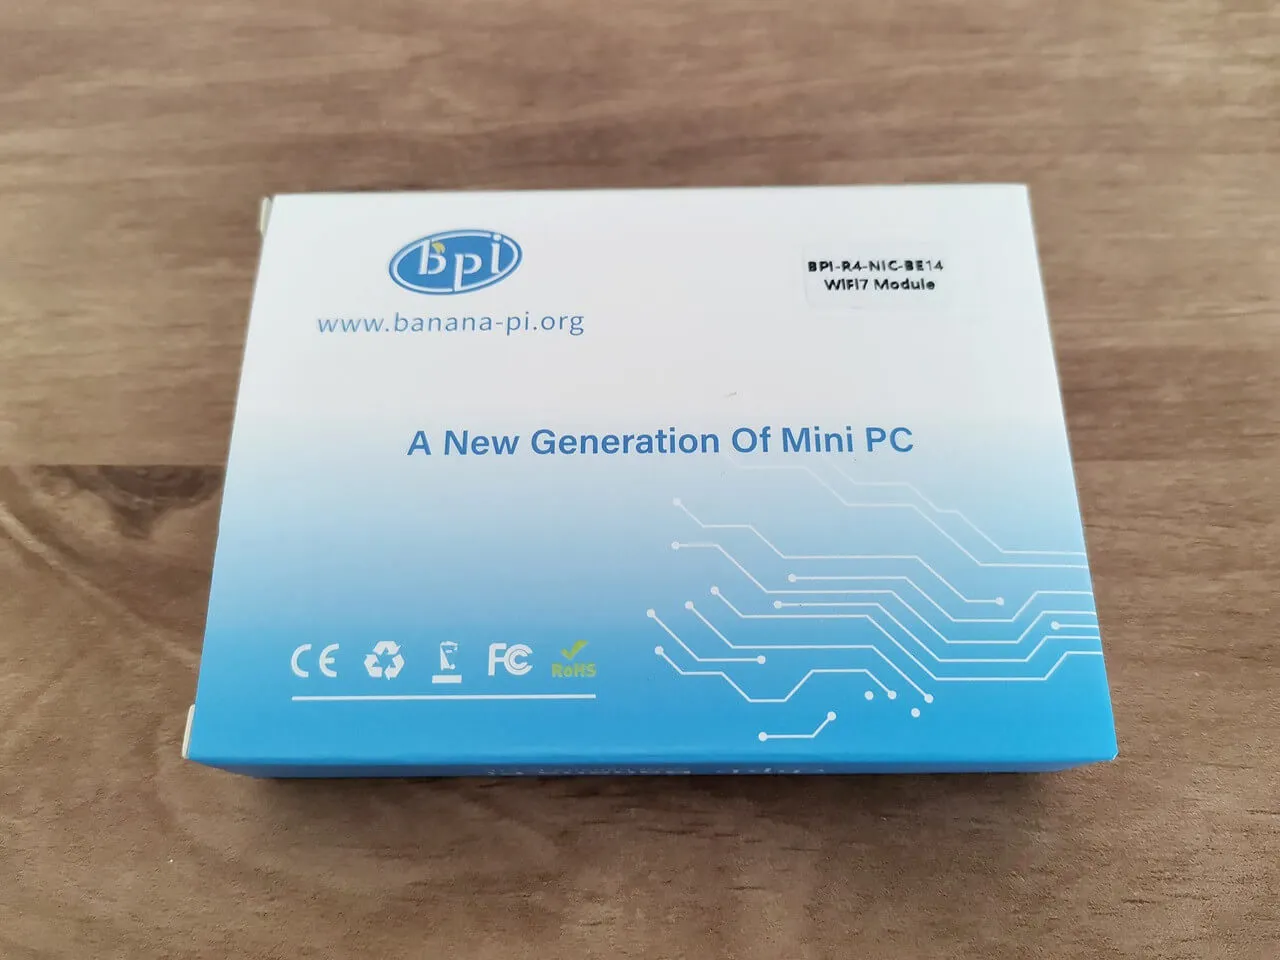
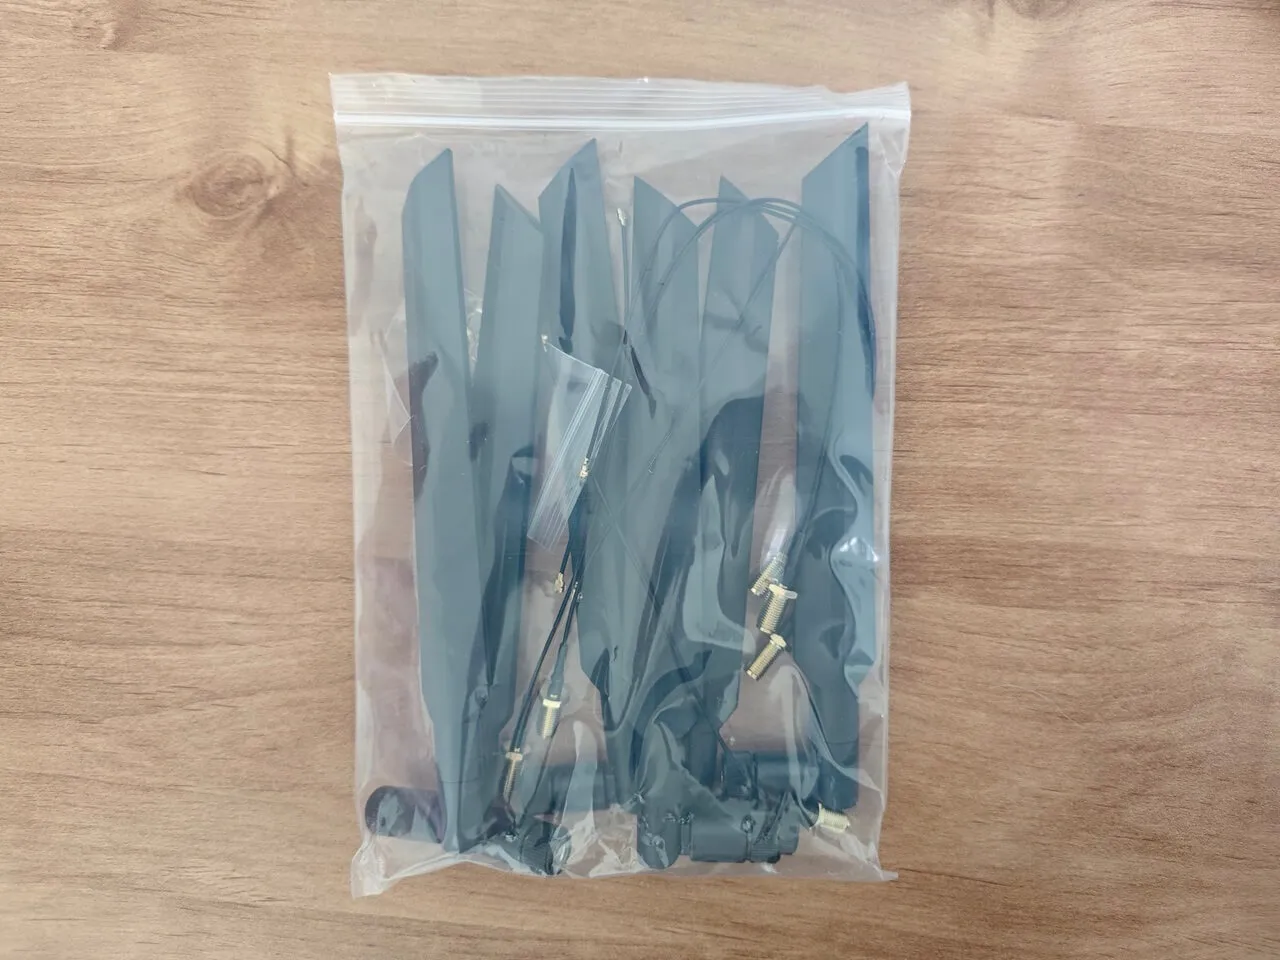
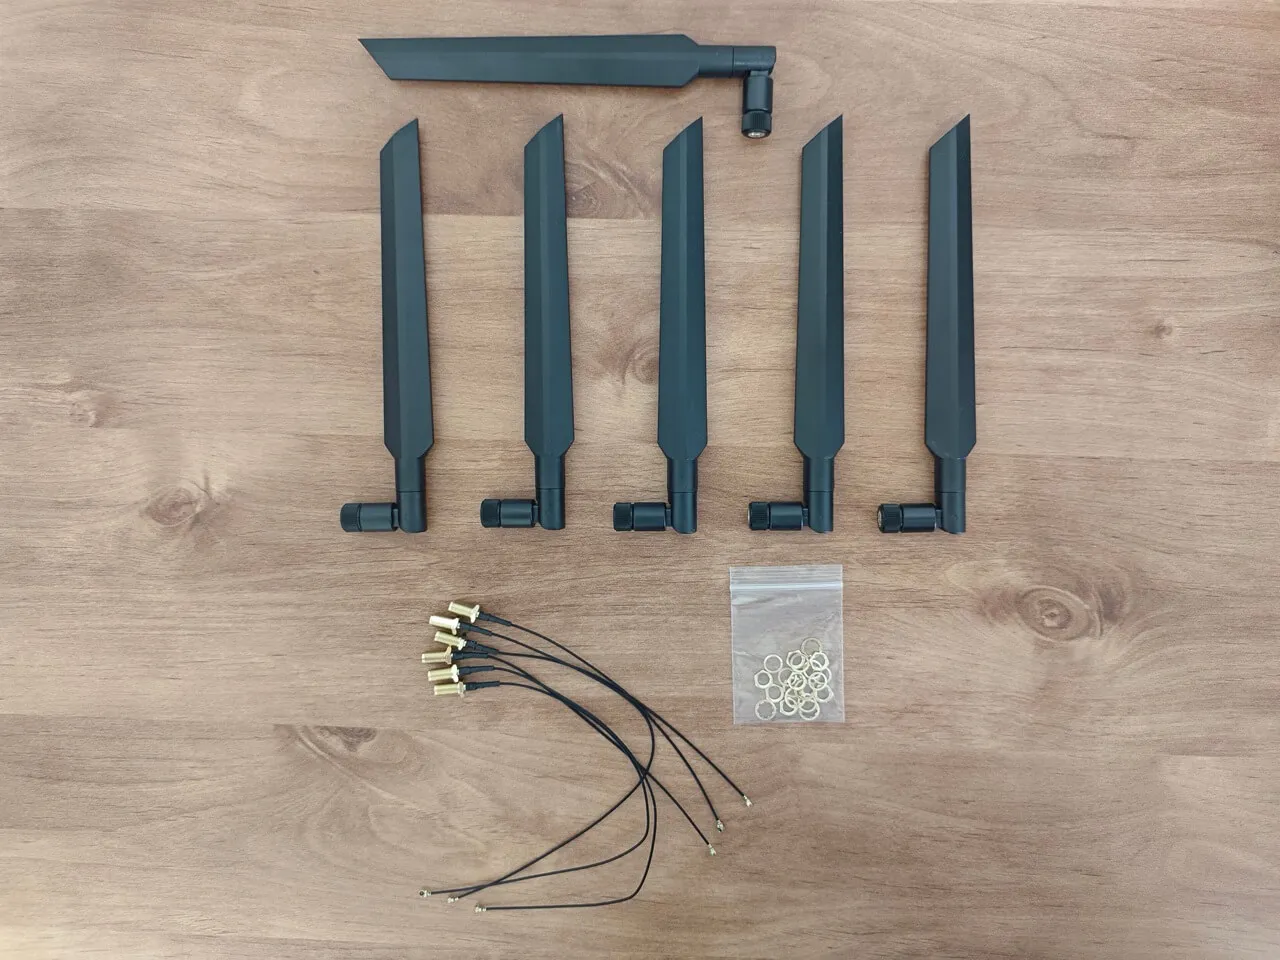
Unboxing the Item

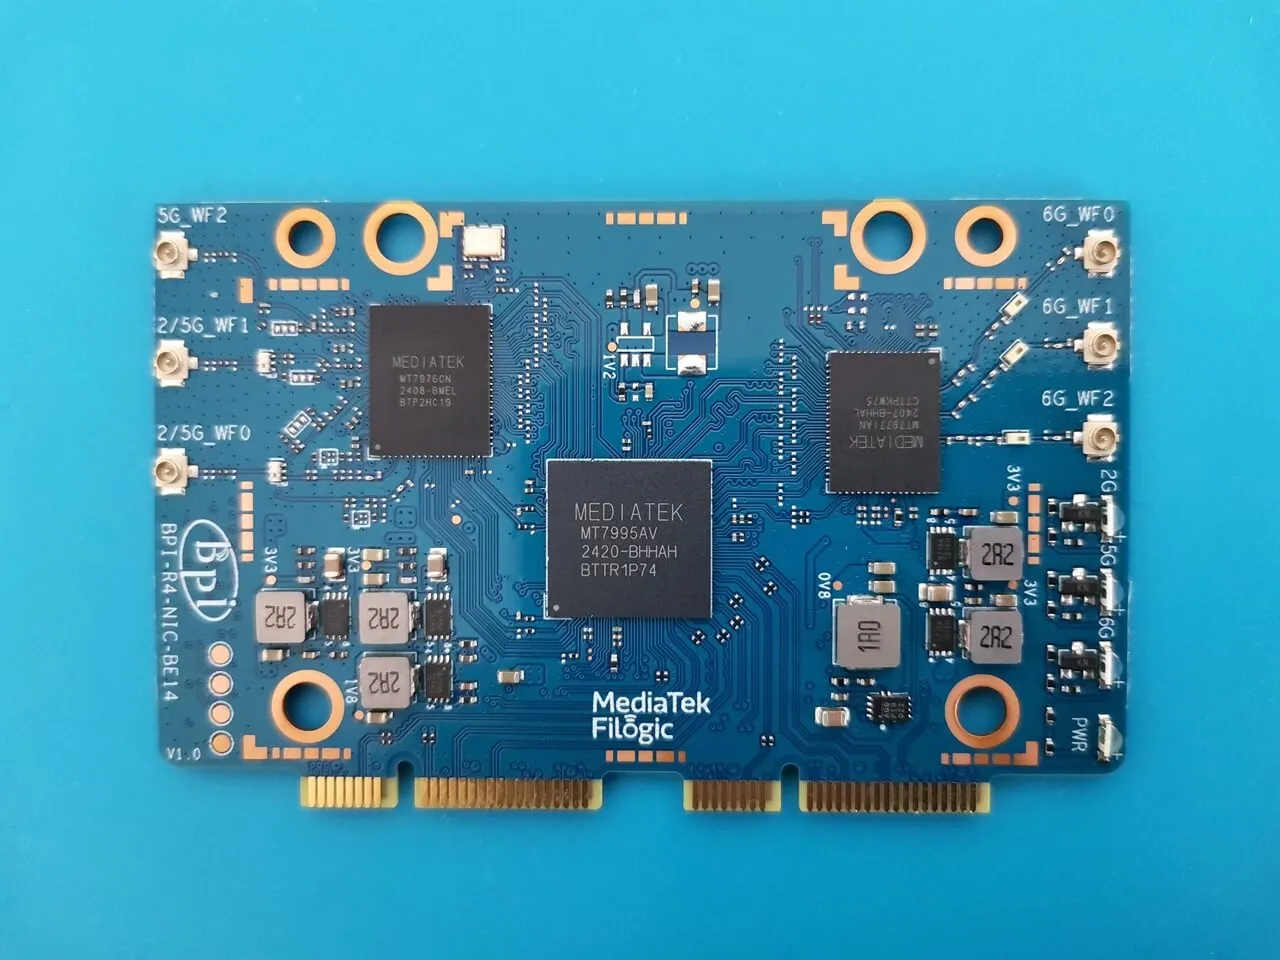
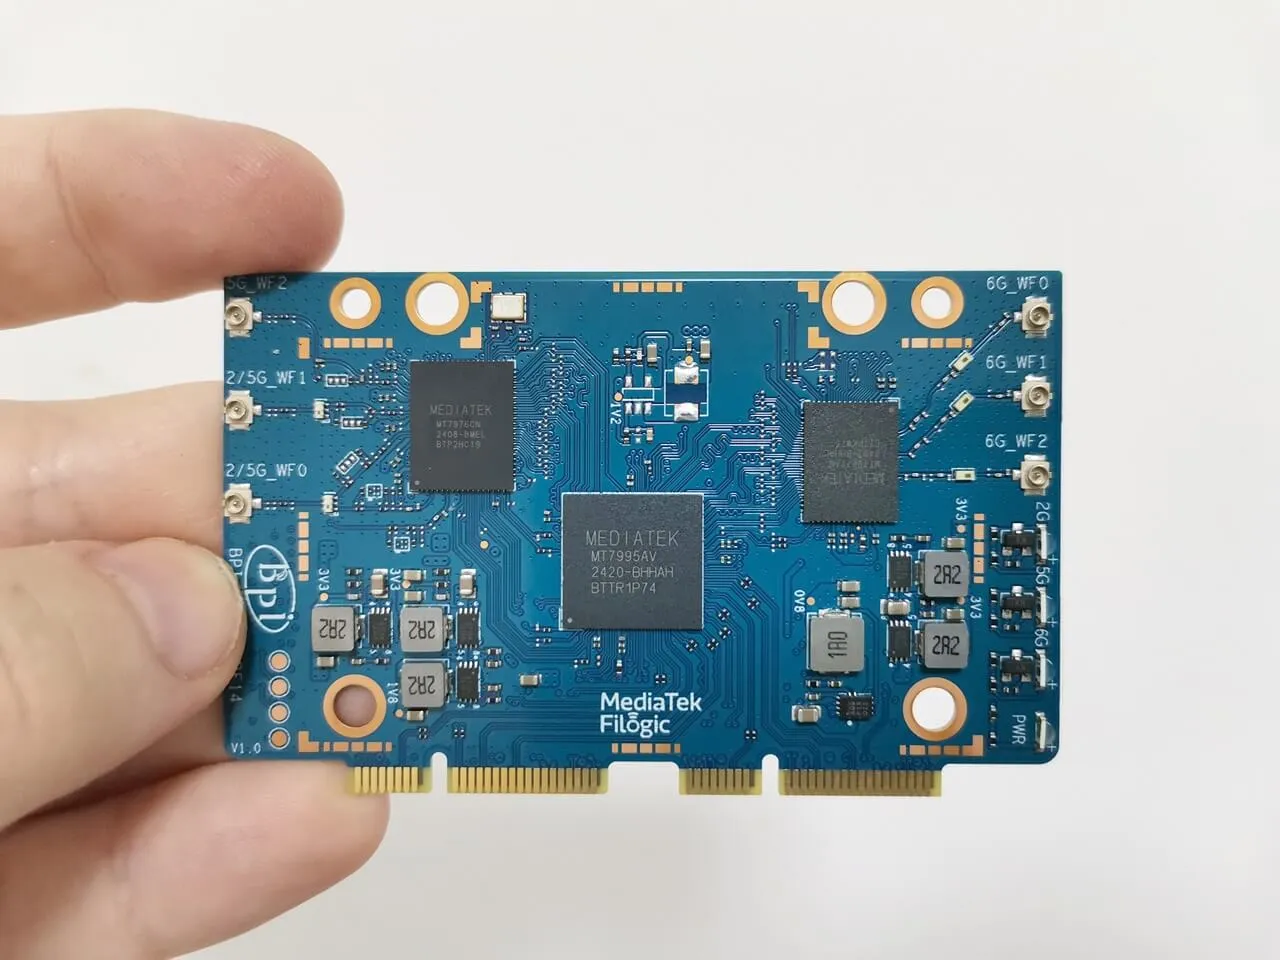
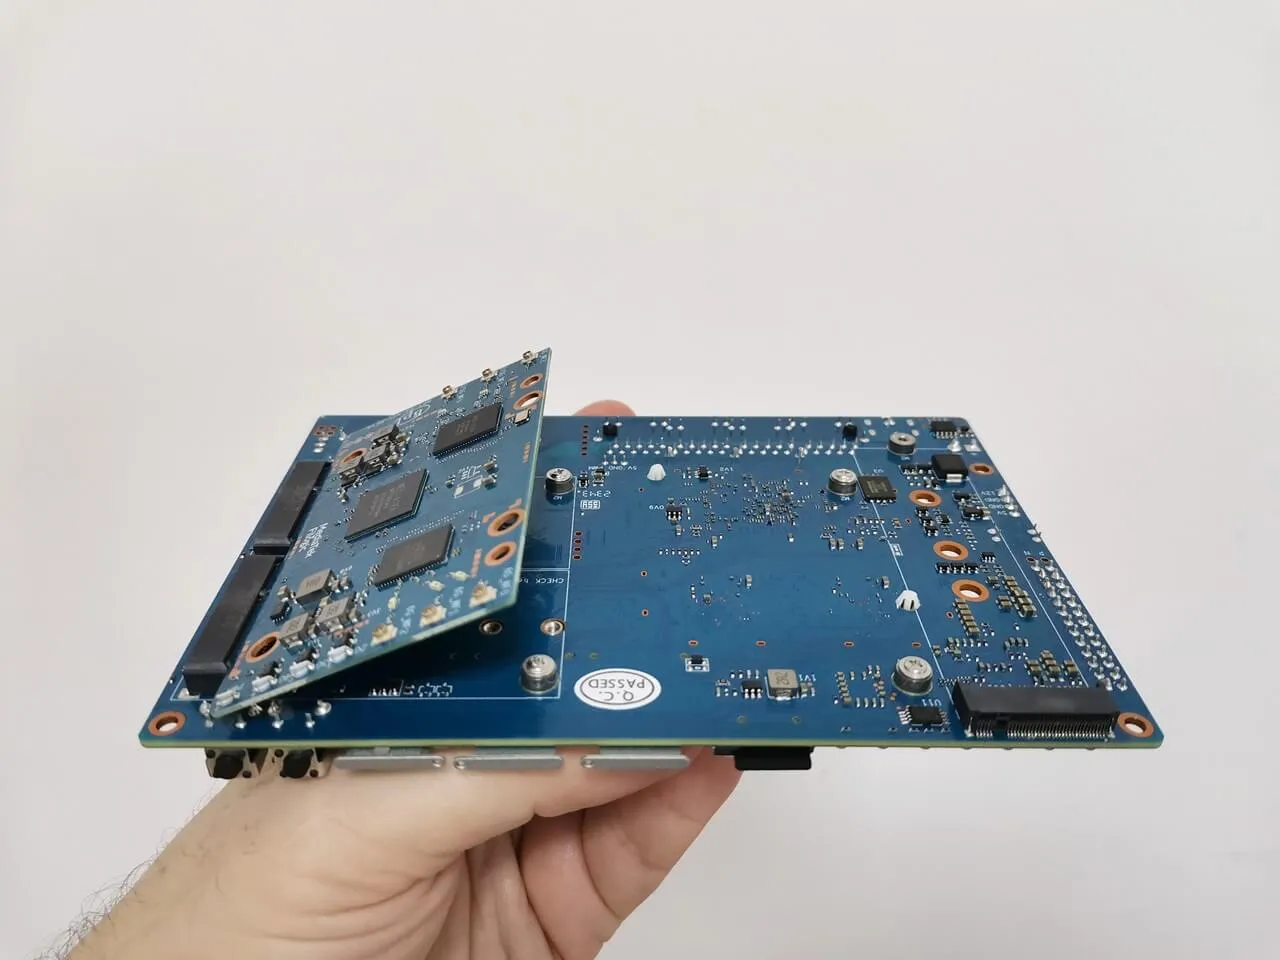
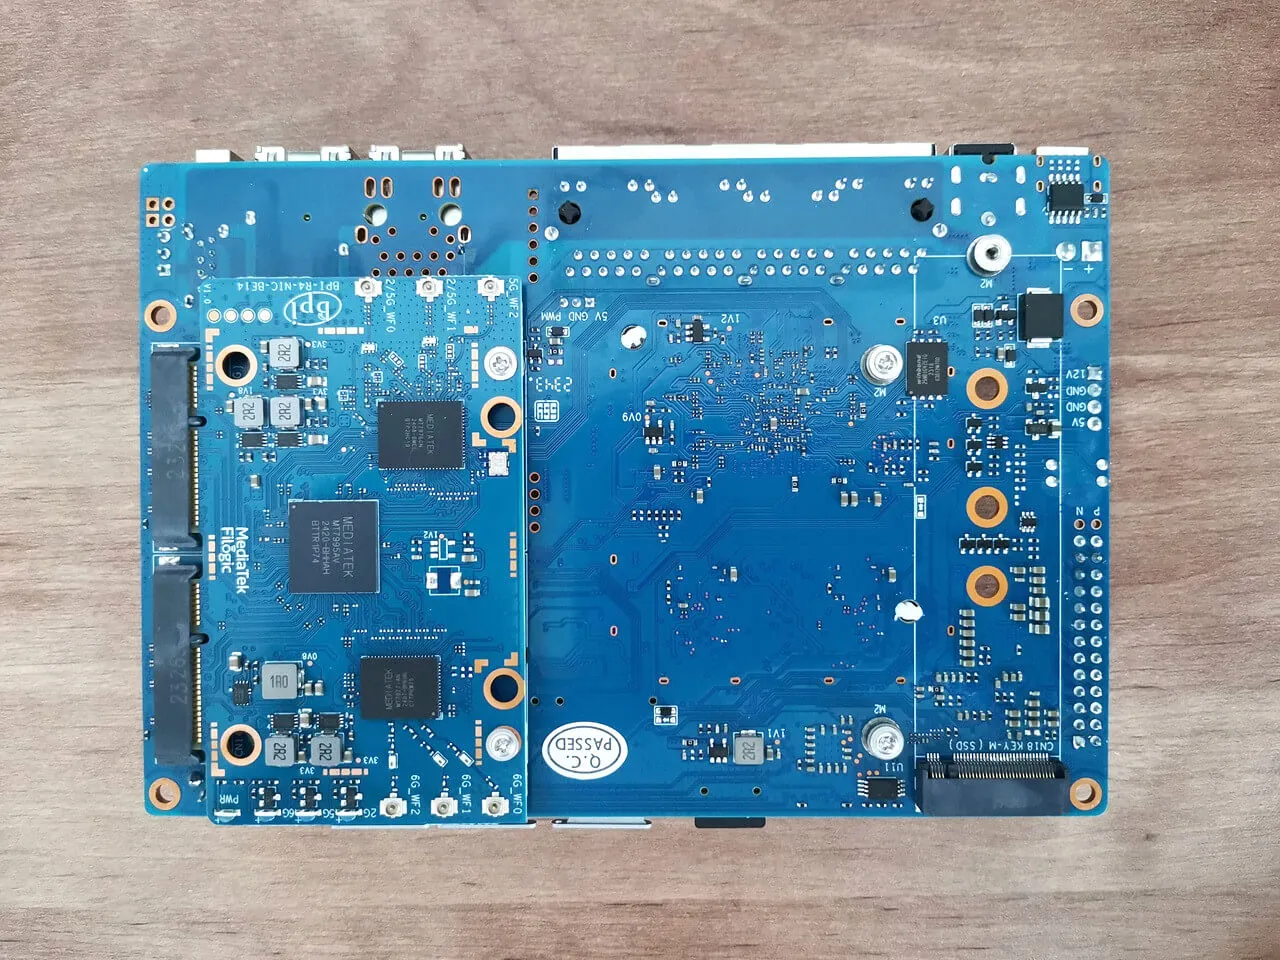
A closer look at the board
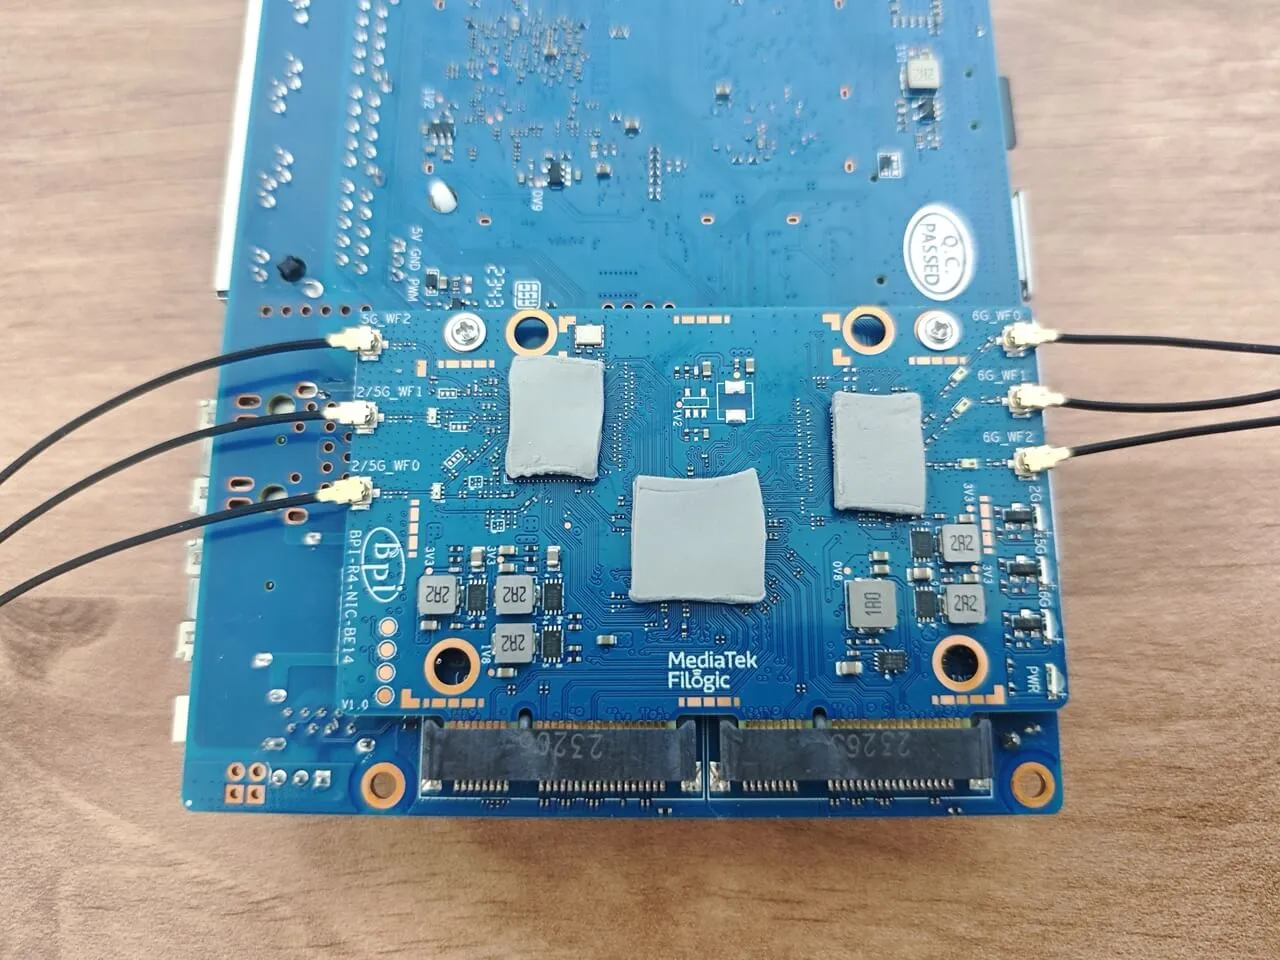
The Banana Pi R4 NIC Card is powered by a Mediatek chipset and is composed of three chips: MT7995AV, WT7976CN, and MT79771AN, which support the latest Wi-Fi 7 wireless technology. This remarkable card boasts IEEE802.11a/b/g/n/ac/ax/be compliance, with 2.4GHz 2×2, 5GHz 3×3 3ss, and 6GHz 3×3 capabilities. Additionally, it comes equipped with three ipex sockets for easy attachment of external WIFI antennas. This expansion board is priced at around $80. It may not be an essential item, but it is definitely worth the investment if you are looking for a superfast, high bandwidth connection.
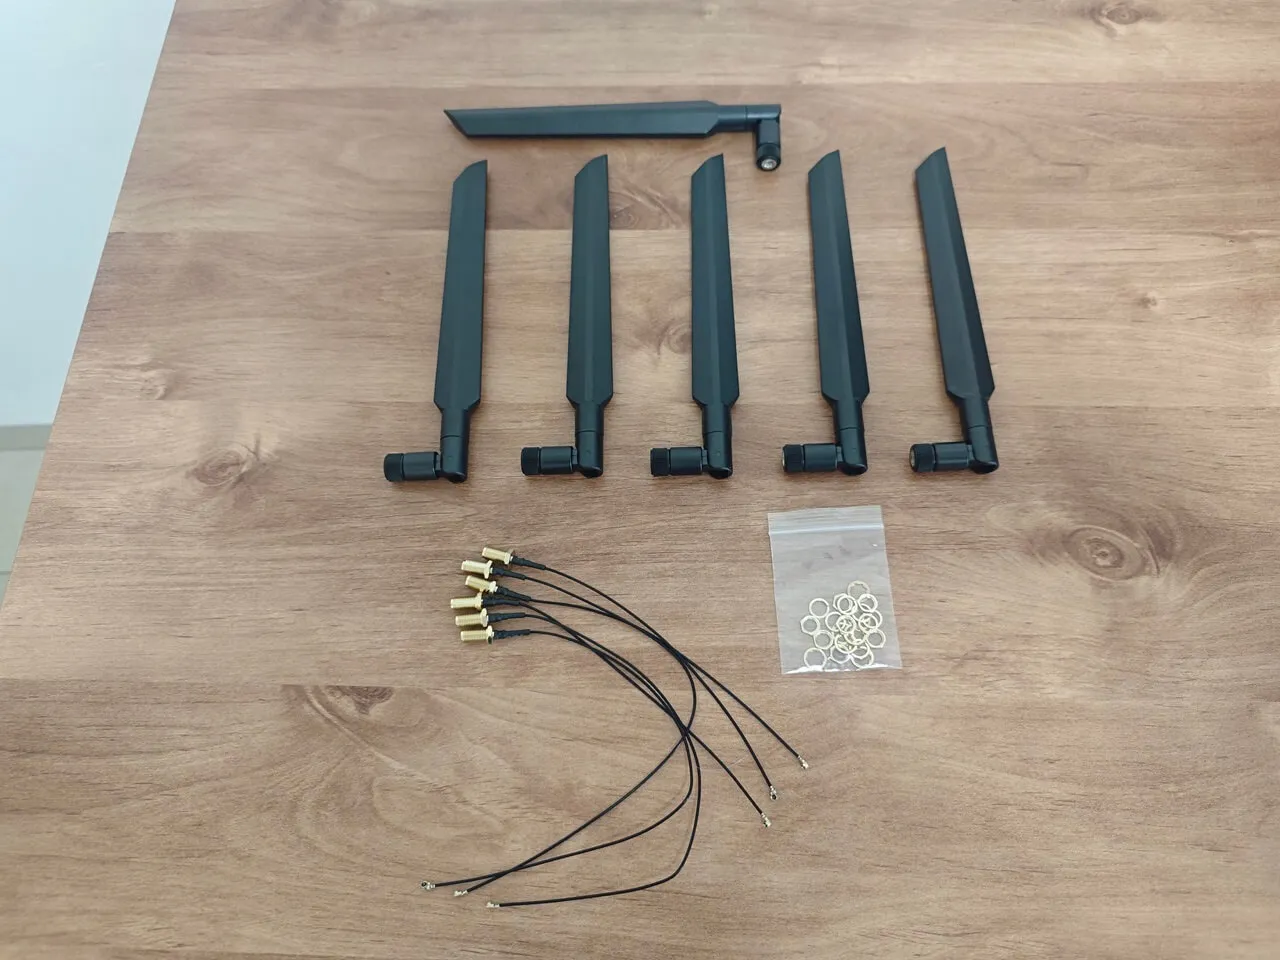
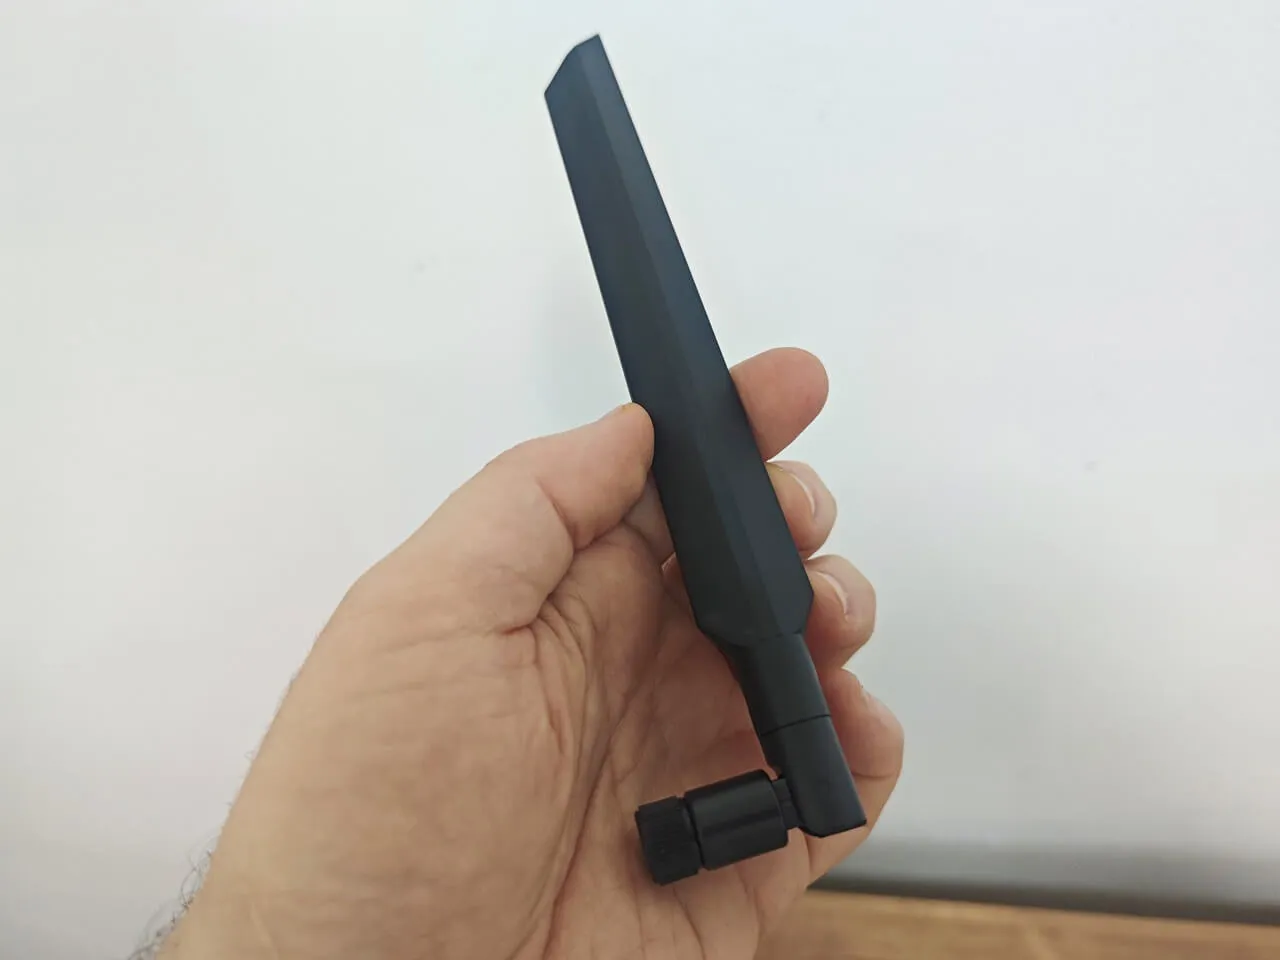
WIFI antennas
The NIC card is normally included when you purchase the full Banana Pi R4 kit. If you already have six antennas at home, you can save a few dollars by just buying the NIC card. Here’s a closer look at the antennas.
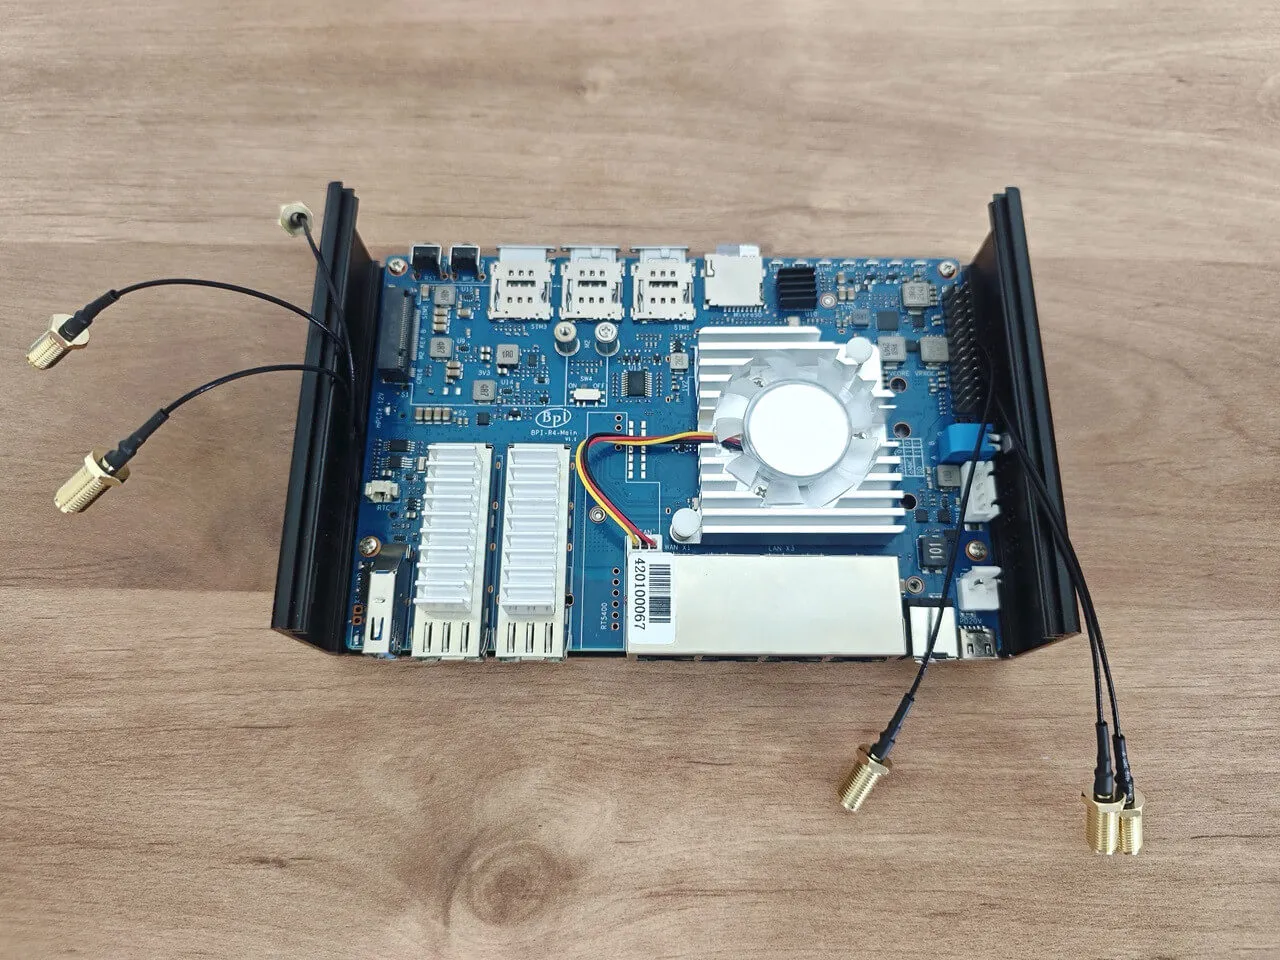
Installation
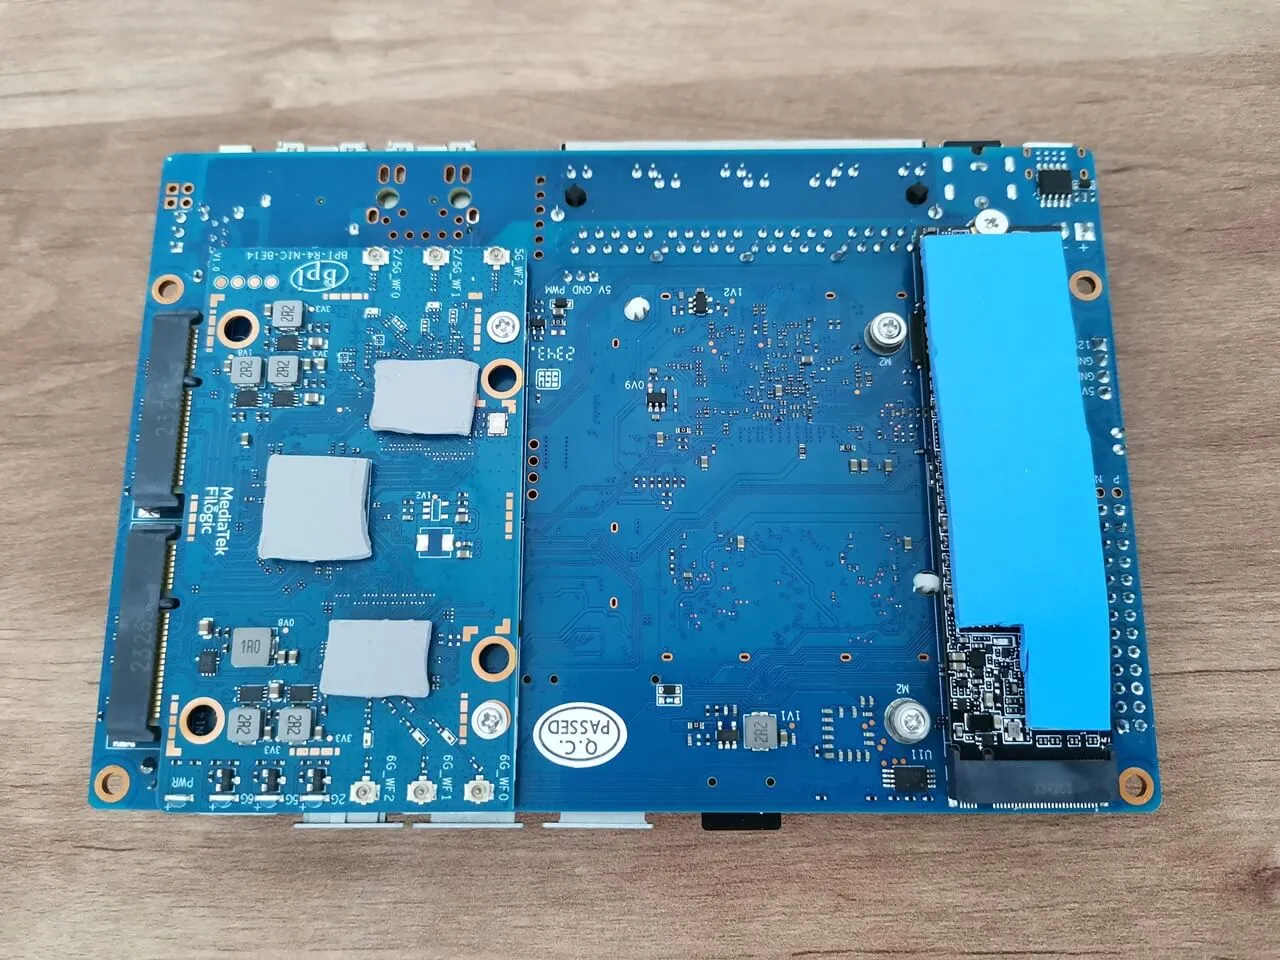
The installation process was very straightforward and hassle-free. You will need to Insert the NIC card into the PCIe 3.0 Socket, located on the back of the R4 board. The Banana Pi team has thoughtfully pre-inserted a pair of screws, ensuring that mounting the board is simple and it was.
Additionally, three thermal pads are included as part of the board accessories, aligning perfectly with the design concept, which involves utilizing the case body for efficient heat discharge.
If you want to install an NVMe card, it’s recommended to use a thermal pad that covers the chips on the card. A thermal pad with a thickness of 3 mm will provide good contact with the case.
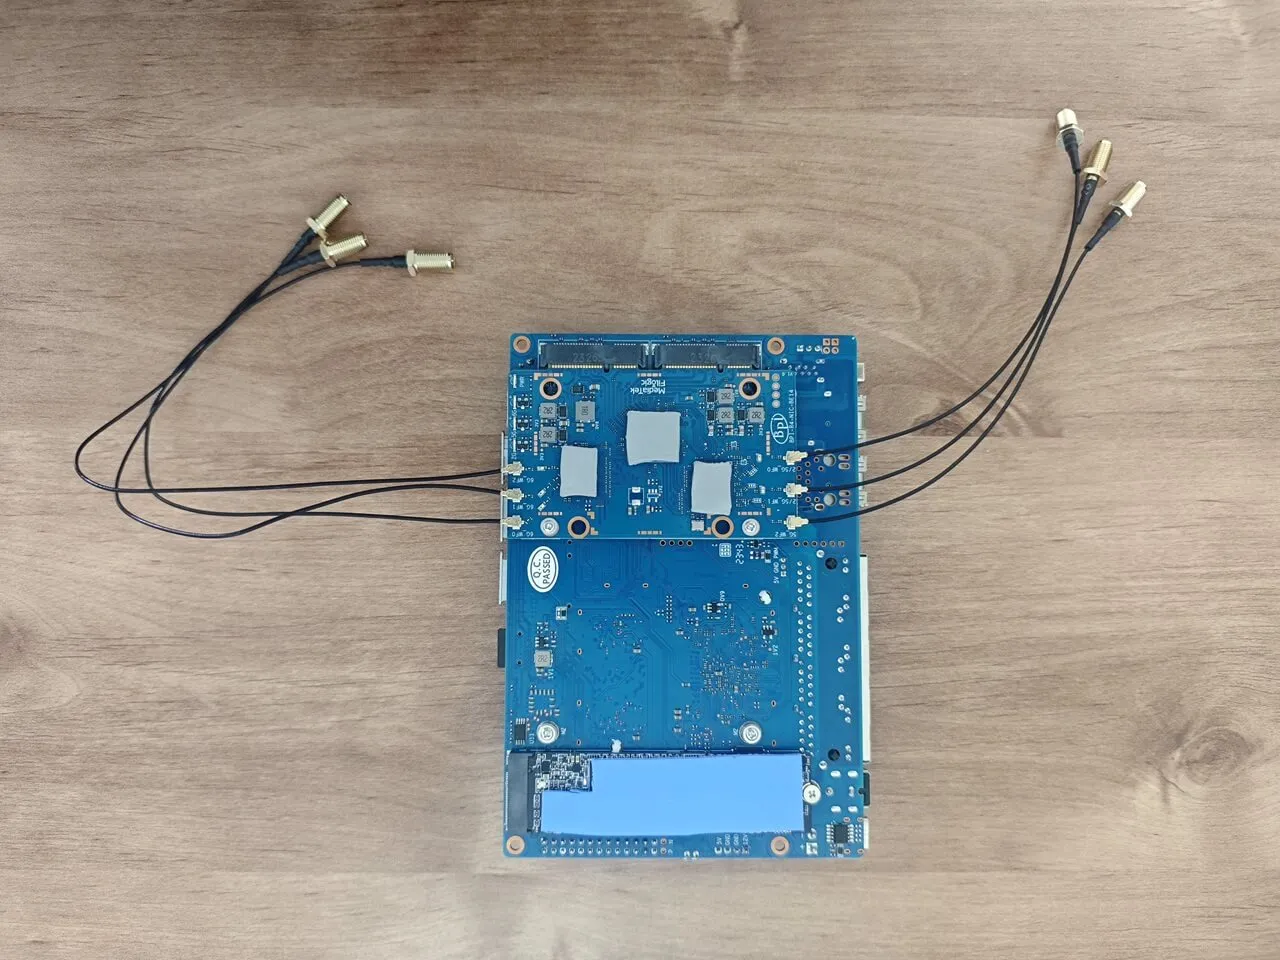
Mounting the Banana BPI-R4-NIC-BE14 and arranging the antenna wires

The wireless connectivity capabilities of the Banana BPI-R4-NIC-BE14.
What should you expect?
Wi-Fi 7, also known as IEEE 802.11be, is the next-generation Wi-Fi standard that’s here to turbocharge our wireless experiences. So, let’s talk frequencies! Wi-Fi 7 is like a musical trio—it harmoniously utilizes three frequency bands:
- 6 GHz: This high-frequency spectrum dances between 5.925 and 7.125 GHz.
- 2.4 GHz: This band ranges from 2.400 to 2.495 GHz, providing valuable coverage, particularly over extended distances.
- 5 GHz: A dynamic band that seamlessly operates within the frequency range of 5.170 to 5.835 GHz.
Utilizing the 6GHz band
Our tri-band WiFi card module has been tested and works reliably in Israel’s 5.9GHz spectrum. It includes a built-in DFS antenna integrated on the R4 board and collaborates with the device OS Kernel to monitor radar signals. This enables it to switch to unused frequency channels, allowing Wi-Fi networks to function safely without interfering with important radar operations.
Additionally, it is crucial to acknowledge that performance can differ across various regions, and the module may automatically engage higher frequency ranges exceeding 5.925 GHz.
An updated list of countries has fully endorsed the 5925-7125 GHz frequency band as of 2024.
| Country | Frequency Range (MHz) | Status |
|---|---|---|
| United States | 5925-7125 | Fully implemented |
| Canada | 5925-7125 | Fully implemented |
| Brazil | 5925-7125 | Fully implemented |
| South Korea | 5925-7125 | Fully implemented |
| Taiwan / China | 5925-7125 | Fully implemented |
| United Arab Emirates | 5925-7125 | Fully implemented |
| Saudi Arabia | 5925-7125 | Fully implemented |
| Costa Rica | 5925-7125 | Fully implemented |
| Peru | 5925-7125 | Fully implemented |
| Honduras | 5925-7125 | Fully implemented |
| Guatemala | 5925-7125 | Fully implemented |
What are the benefits of WiFi 7?
- 320 MHz channels: The 6 GHz band offers significantly higher throughput with Wi-Fi 7’s 320 MHz channels, compared to 160 MHz in Wi-Fi 6, effectively doubling the speed.
- 4K QAM improves signal density by 20%, boosting data rates from 2.4 Gbps with 1K QAM to 5.8 Gbps. This upgrade enables flawless 4K/8K streaming, lag-free gaming, and high-quality video conferencing.
- Multi-Link Operation (MLO): Qualcomm describes MLO technology as essential for combining channels across frequency bands for better data transmission. The MLO dramatically decreases latency, reducing it from one second to an impressive 10–20 milliseconds by utilizing less congested channels.
Checking wireless network interfaces, access point names, and frequency bands.
phy#2
Interface apclix0
ifindex 21
wdev 0x200000002
addr 06:0c:43:26:60:e8
type managed
channel 37 (6135 MHz), width: 320 MHz, center1: 6105 MHz
4addr: on
Interface rax0
ifindex 16
wdev 0x200000001
addr 00:0c:43:26:60:e8
ssid AP_MTK_MT7990_6G
type AP
channel 37 (6135 MHz), width: 320 MHz, center1: 6105 MHz
phy#1
Interface apclii0
ifindex 20
wdev 0x100000002
addr 06:0c:43:26:60:90
type managed
channel 36 (5180 MHz), width: 160 MHz, center1: 5250 MHz
4addr: on
Interface rai0
ifindex 15
wdev 0x100000001
addr 00:0c:43:26:60:90
ssid AP_MTK_MT7990_5G
type AP
channel 36 (5180 MHz), width: 160 MHz, center1: 5250 MHz
phy#0
Interface apcli0
ifindex 17
wdev 0x2
addr 06:0c:43:26:60:28
type managed
channel 6 (2437 MHz), width: 20 MHz, center1: 2437 MHz
4addr: on
Interface ra0
ifindex 14
wdev 0x1
addr 00:0c:43:26:60:28
ssid AP_MTK_MT7990_2G
type AP
channel 6 (2437 MHz), width: 20 MHz, center1: 2437 MHz
root@OpenWrt:~# clear
root@OpenWrt:~# iw dev
phy#2
Interface apclix0
ifindex 21
wdev 0x200000002
addr 06:0c:43:26:60:e8
type managed
channel 37 (6135 MHz), width: 320 MHz, center1: 6105 MHz
4addr: on
Interface rax0
ifindex 16
wdev 0x200000001
addr 00:0c:43:26:60:e8
ssid AP_MTK_MT7990_6G
type AP
channel 37 (6135 MHz), width: 320 MHz, center1: 6105 MHz
phy#1
Interface apclii0
ifindex 20
wdev 0x100000002
addr 06:0c:43:26:60:90
type managed
channel 36 (5180 MHz), width: 160 MHz, center1: 5250 MHz
4addr: on
Interface rai0
ifindex 15
wdev 0x100000001
addr 00:0c:43:26:60:90
ssid AP_MTK_MT7990_5G
type AP
channel 36 (5180 MHz), width: 160 MHz, center1: 5250 MHz
phy#0
Interface apcli0
ifindex 17
wdev 0x2
addr 06:0c:43:26:60:28
type managed
channel 6 (2437 MHz), width: 20 MHz, center1: 2437 MHz
4addr: on
Interface ra0
ifindex 14
wdev 0x1
addr 00:0c:43:26:60:28
ssid AP_MTK_MT7990_2G
type AP
channel 6 (2437 MHz), width: 20 MHz, center1: 2437 MHz
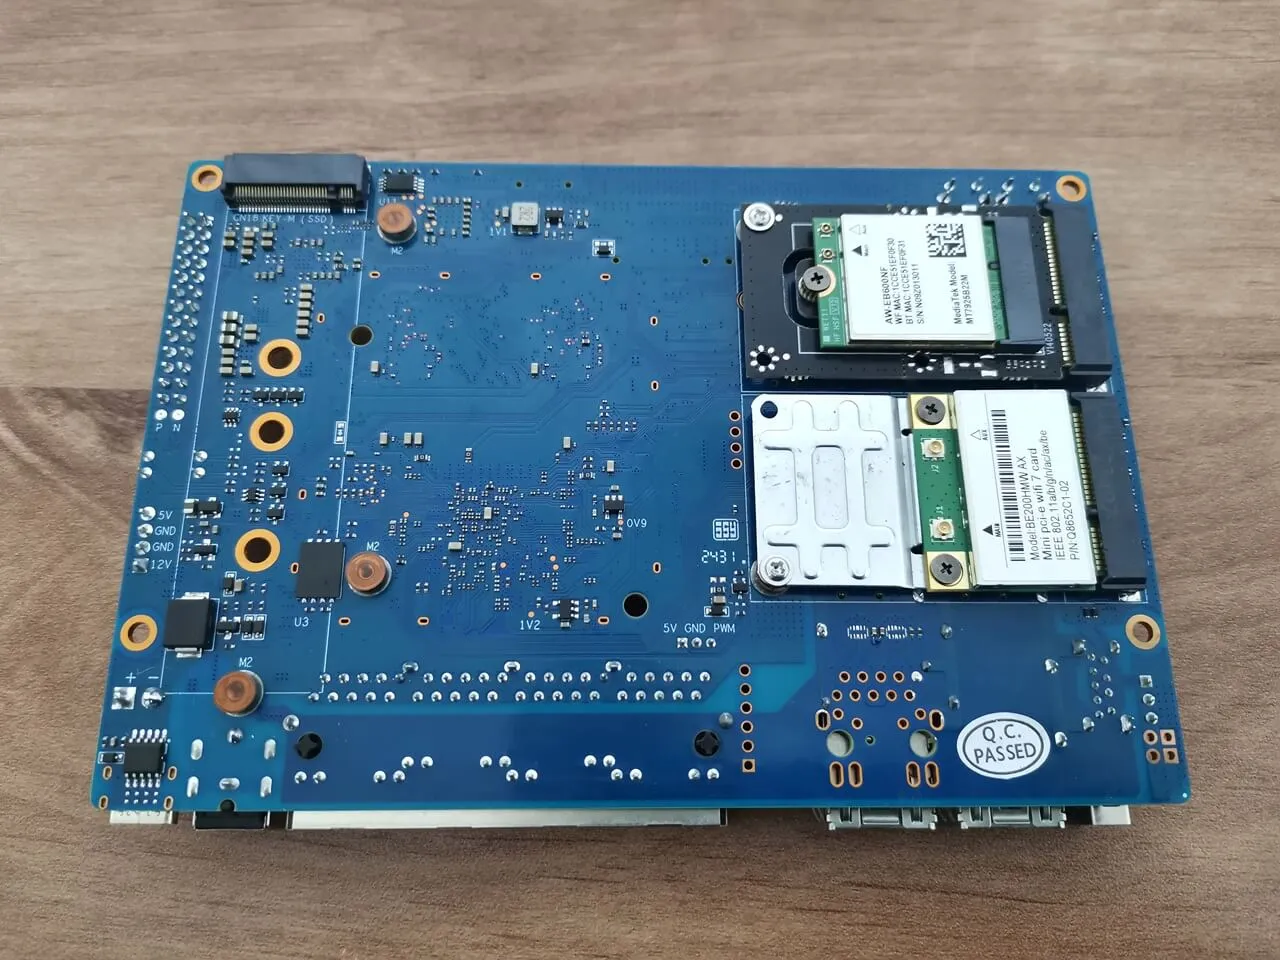
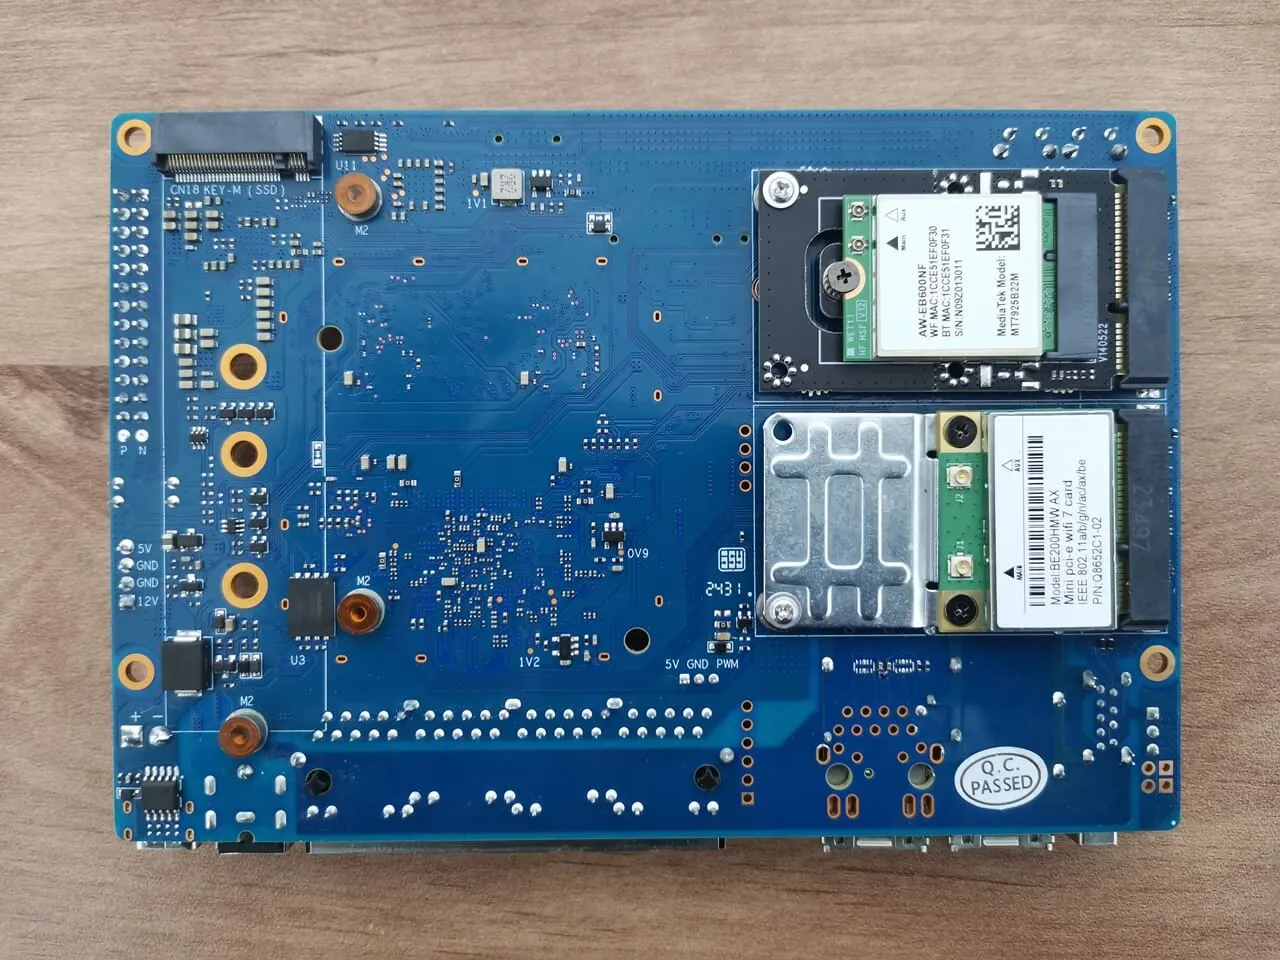
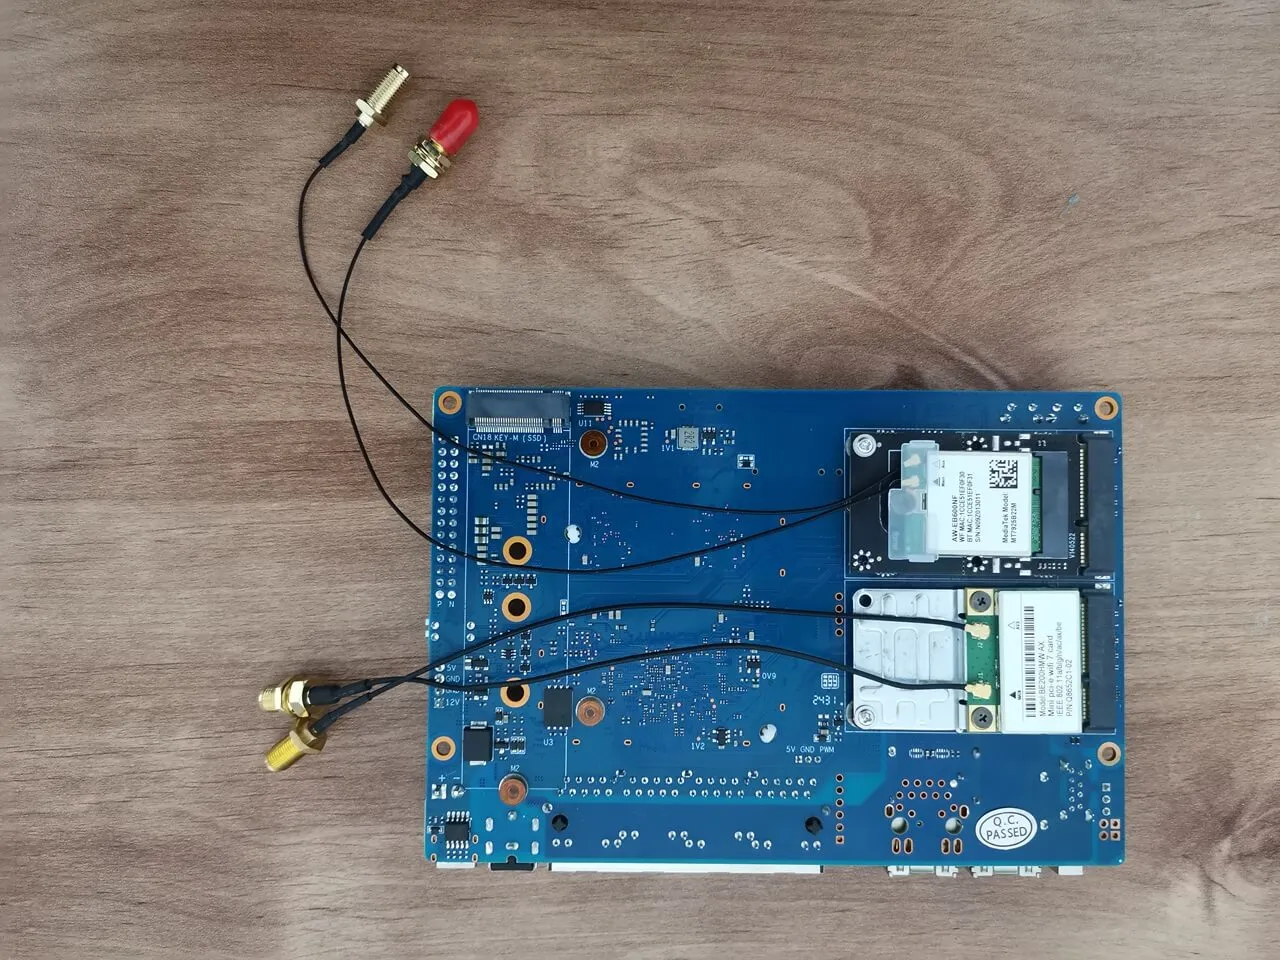
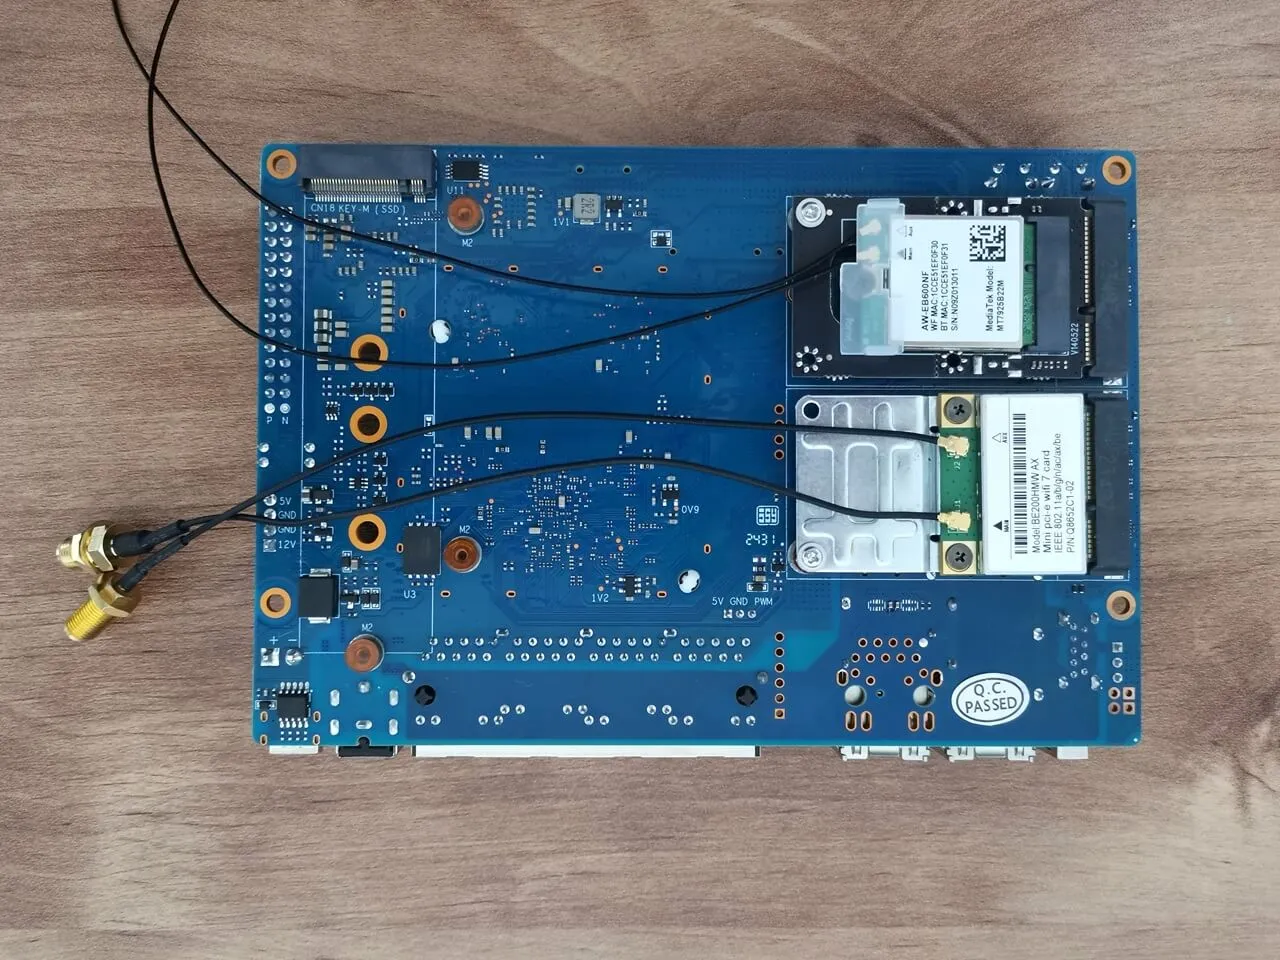
An alternative Wi-Fi configuration
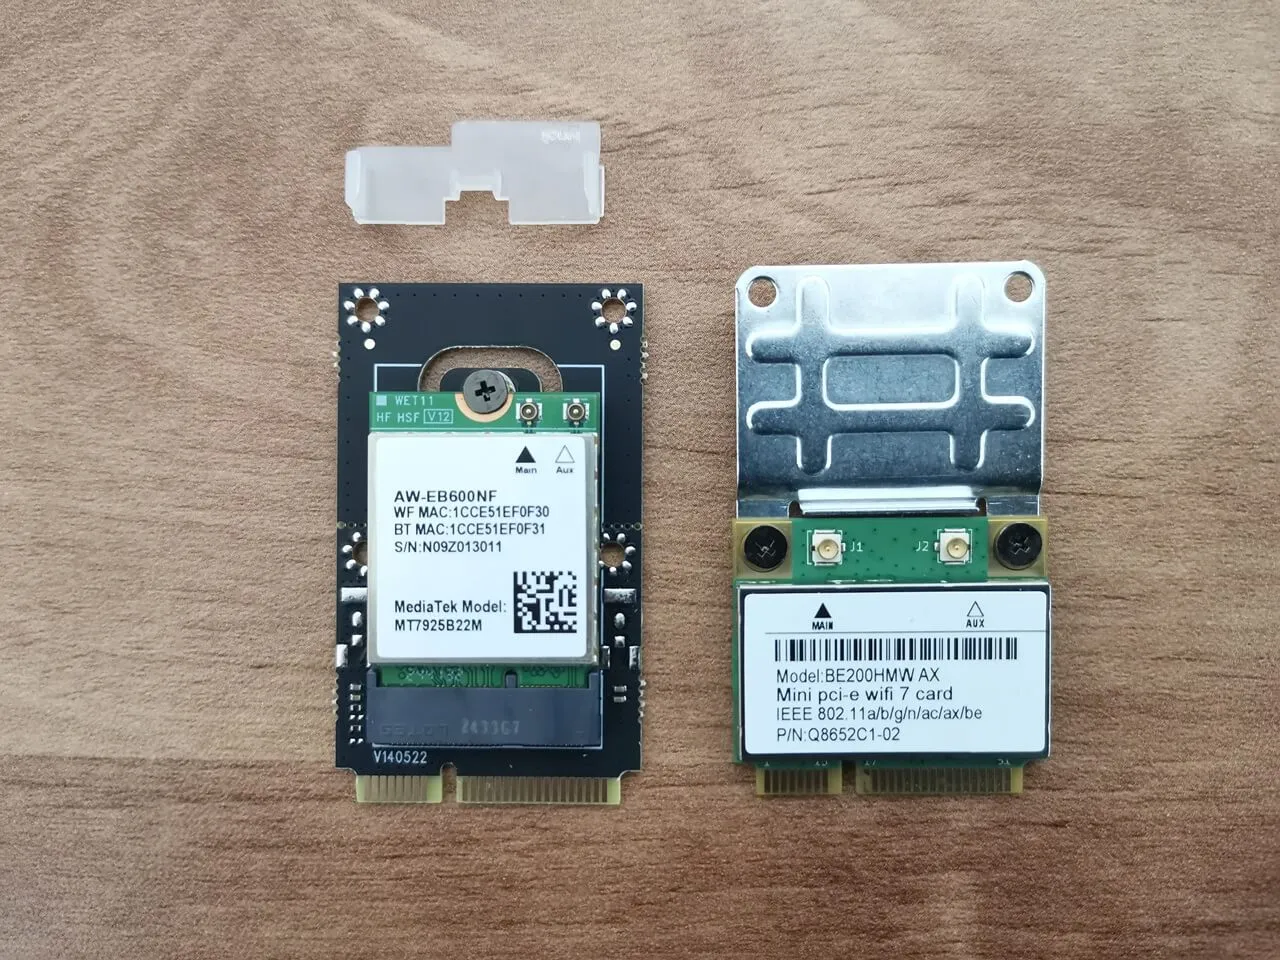
In this setup, we installed two distinct Wi-Fi 7 cards into the R4 board’s mini-PCIe slots. This is an alternative configuration that offers a cheaper solution than buying the BPI-R4-NIC-BE14 module expansion card, which costs around $78 (excluding antennas). To make this option work, you will need to install a single or two Wi-Fi cards that is preferably based on MediaTek chipsets. In our configuration, we used a mini-PCIe card based on the MT7925B22M chip, but most likely other models based on MTK should also work. You can find the full compatibility list of cards on OpenWrt website compatible hardware list.
Furthermore, Intel-based cards frequently encounter compatibility issues, resulting in incomplete functionality or certain features being disabled. Therefore, we strongly recommend testing with MTK-based chipsets for optimal performance.
Installing two Wi-Fi 7 Cards: Intel BE200HMW & MT7925B22M
Installing the necessary drivers
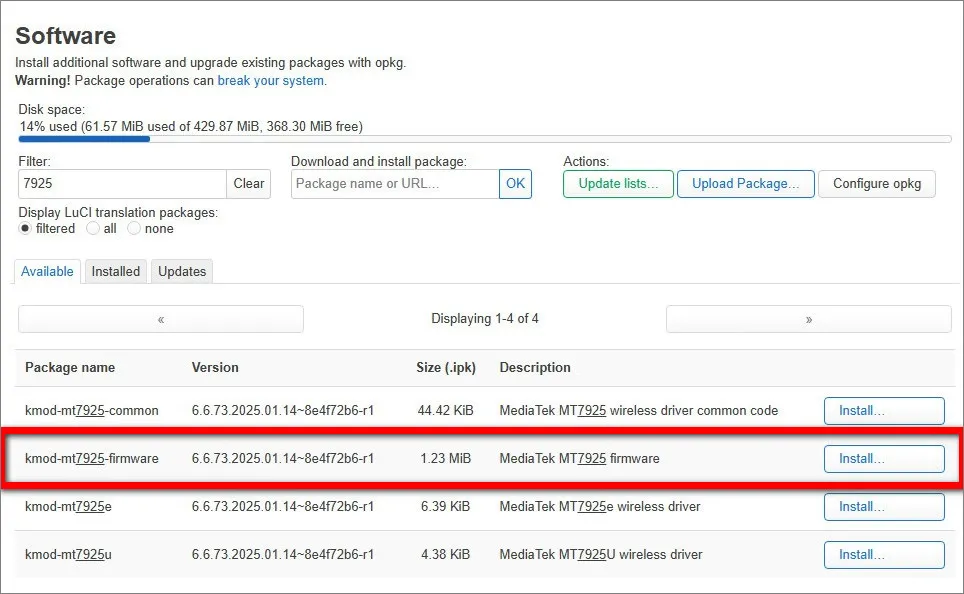
The table below includes a list of packages required for both cards to function effectively. Additionally, it’s essential to explore the latest OpenWrt snapshots and releases that utilize kernel version 6.6 or higher for optimal results. If you find the command line less user-friendly, you can also install the needed packages through the LuCI web interface.
| BE200HMW | MT7925B22M |
| opkg update opkg install kmod-iwlwifi opkg install iwlwifi-firmware-be200 | opkg update opkg install kmod-mt7925e opkg install kmod-mt7925u opkg install mt76 |
Installing the Installing the MT7925 driver via LuCI Web interface.


Good Job
Thanks
That’s the most in-depth review I’ve seen of the BPI-R4. However, the benchmark and Wi-Fi testing sections are noticeably missing. Any reason why?
Thanks. Probably at that time I didn’t have the extra patience to wait until they fixed the bugs/problems. Hopefully a few months have passed and it should be fine now.