
Wired cable Data Transfer Rate
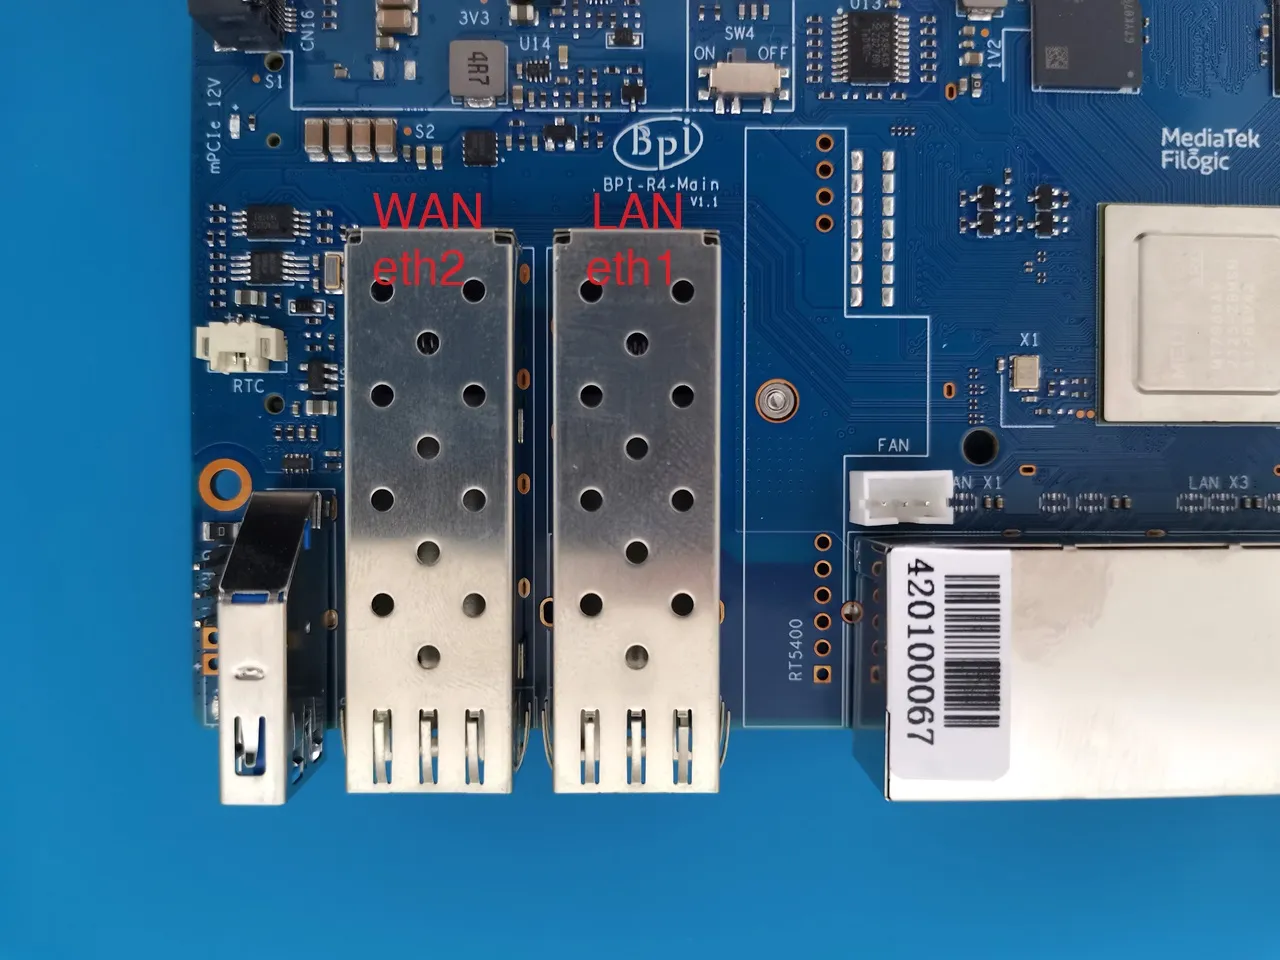
Divining into the design of the R4 Ethernet ports. Next to a pair of SFP+ 10G ports (cages), there are four RJ45 LAN ports that offer a max throughput of up to 1.0G (each) controlled by the R4 Ethernet controller chip.
What makes these ports unique is that each one is capable of reaching 1G PHY, standing out from the usual way of dividing bandwidth to achieve full 10Gbps throughput. By logic, there should have been a second 2.5 PHY interface for all the RJ45 ports, but it’s probably not implemented due to cost reduction considerations.
How many Ethernet 2.5G PHYs are needed to achieve a real throughput of 10Gbps?
The question of how many 2.5G PHYs you need to match the capabilities of 10Gbps depends on the context and the specific technology being used. If you’re looking to achieve a similar total data transfer rate, you would typically need four 2.5G PHYs, as 2.5 Gbps x 4 = 10 Gbps.
Here’s the breakdown:
- If each Ethernet port operates at 2.5 Gbps, so for 4 ports, that’s a total of 10 Gbps.
- Each 2.5G PHY operates at 2.5 Gbps.
To match the total data transfer rate of the dual 10G SFP+ ports with 2.5G PHYs, you would need four 2.5G PHYs (2.5 Gbps x 4 = 10 Gbps).
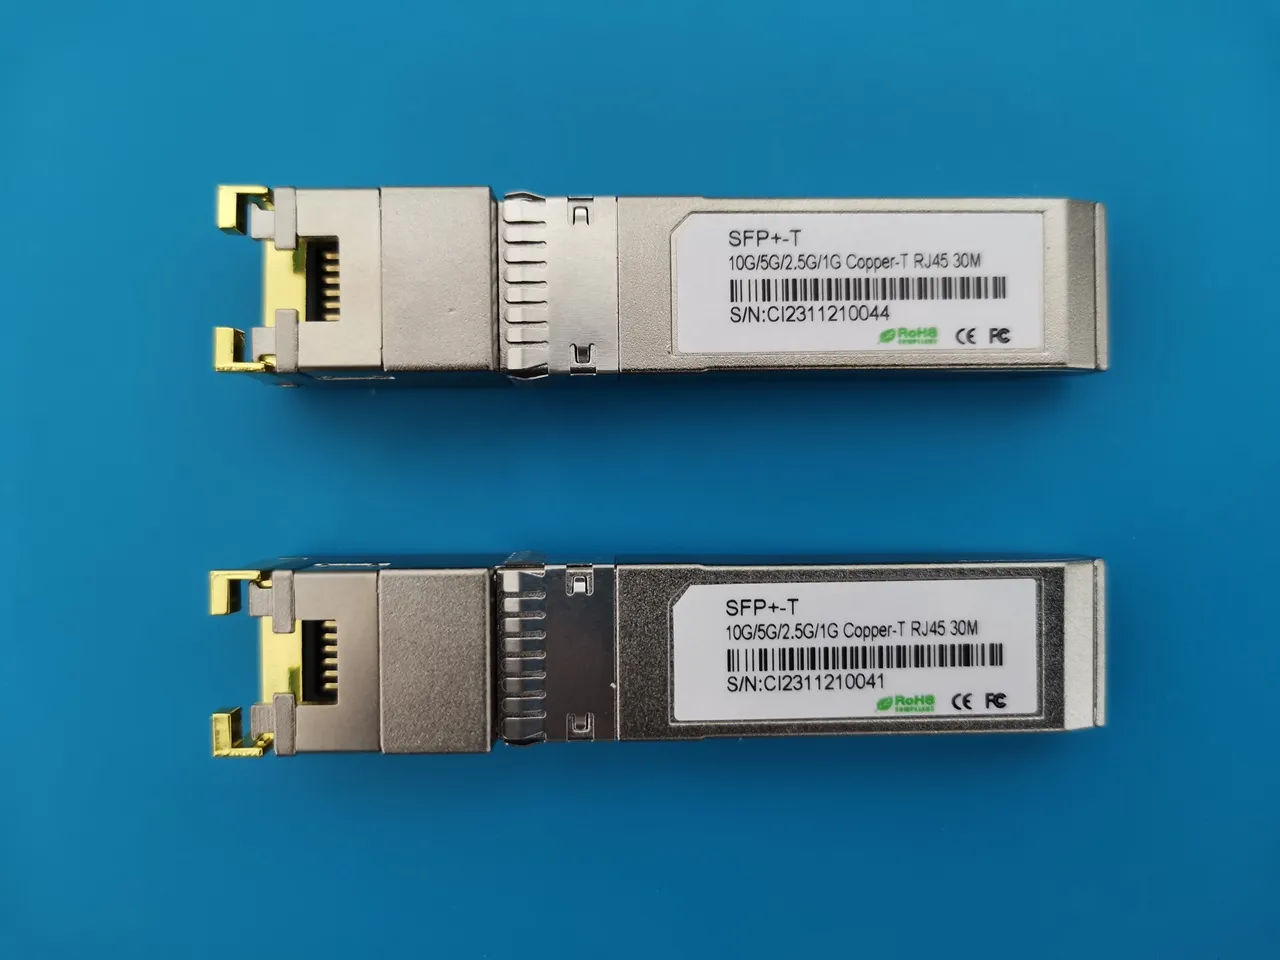
Performing iPerf throughput test with 10GBASE-T SFP+ Copper RJ-45 transceivers.
Consider mounting a heatsink on each SFP+ cage to help dissipate any excess heat. This additional cooling method can be particularly beneficial, especially if you plan to utilize both SFP+ cages simultaneously, maximizing their potential for high-speed data transfer and network connectivity. The heatsinks will help maintain optimal performance and prevent any potential overheating issues, ensuring a stable and reliable connection between the RJ45 transceivers and your network devices.
The recommended maximum width for the heat sink is 14mm, but if you have a 12mm heat sink, it should work just fine. Additionally, it would be wise to consider using a low-height heat sink if you plan to assemble the R4 inside a closed case.
Checking Network Interface Properties:
Interface eth1 information (LAN):
root@OpenWrt:~# ethtool eth1
Settings for eth1:
Supported ports: [ ]
Supported link modes:   100baseT/Full
1000baseT/Full
10000baseT/Full
1000baseKX/Full
10000baseKR/Full
2500baseT/Full
5000baseT/Full
Supported pause frame use: Symmetric Receive-only
Supports auto-negotiation: Yes
Supported FEC modes: Not reported
Advertised link modes:  100baseT/Full
1000baseT/Full
10000baseT/Full
1000baseKX/Full
10000baseKR/Full
2500baseT/Full
5000baseT/Full
Advertised pause frame use: Symmetric Receive-only
Advertised auto-negotiation: Yes
Advertised FEC modes: Not reported
Link partner advertised link modes:  10baseT/Half 10baseT/Full
100baseT/Half 100baseT/Full
1000baseT/Half 1000baseT/Full
10000baseT/Full
2500baseT/Full
5000baseT/Full
Link partner advertised pause frame use: No
Link partner advertised auto-negotiation: Yes
Link partner advertised FEC modes: Not reported
Speed: 10000Mb/s
Duplex: Full
Port: MII
PHYAD: 17
Transceiver: external
Auto-negotiation: on
Current message level: 0x000000ff (255)
drv probe link timer ifdown ifup rx_err tx_err
Link detected: yes
Interface eth2 information (WAN)
root@OpenWrt:~# ethtool eth2
Settings for eth2:
Supported ports: [ ]
Supported link modes:   100baseT/Full
1000baseT/Full
10000baseT/Full
1000baseKX/Full
10000baseKR/Full
2500baseT/Full
5000baseT/Full
Supported pause frame use: Symmetric Receive-only
Supports auto-negotiation: Yes
Supported FEC modes: Not reported
Advertised link modes:  100baseT/Full
1000baseT/Full
10000baseT/Full
1000baseKX/Full
10000baseKR/Full
2500baseT/Full
5000baseT/Full
Advertised pause frame use: Symmetric Receive-only
Advertised auto-negotiation: Yes
Advertised FEC modes: Not reported
Link partner advertised link modes:  10baseT/Half 10baseT/Full
100baseT/Half 100baseT/Full
1000baseT/Full
Link partner advertised pause frame use: Symmetric
Link partner advertised auto-negotiation: Yes
Link partner advertised FEC modes: Not reported
Speed: 1000Mb/s
Duplex: Full
Port: MII
PHYAD: 17
Transceiver: external
Auto-negotiation: on
Current message level: 0x000000ff (255)
drv probe link timer ifdown ifup rx_err tx_err
Link detected: yes
SFP+ RJ45 Transceivers
You can take full advantage of the two SFP+ cages by choosing to install two RJ45 Transceivers. Alternatively, you can use one cage with your ISP GPON OLT optical module, depending on your specific needs. Through our extensive testing, we have confirmed that it is feasible to create a connection between two RJ45 Transceivers using a set of premium copper CAT7 cables.
Home EN Forum CN Forum Github Downloads BPI Doc Wikipedia Official Aliexpress Store
BPI-R4 SFP+ RJ45 Module compatibility list
What SFP+ modules are compatible with the R4 board? The R4 board works with different SFP+ modules, depending on your needs and network setup. Additionally, it is always recommended to consult the manufacturer’s documentation for the most accurate and up-to-date information on compatible modules. For a reliable option, refer to the following list.
Compatible RJ45 10G Transceivers with Banana Pi R4 | |||||
Item Photo | Brand | Description | Tested | QTY | Buy Link |
Banana Pi (Generic) | 10G RJ45 SFP-T Transceiver | 2 | |||
Xicom | 10G RJ45 SFP+- Transceiver | 2 | |||
JT-COM (JT-C1TE-R01) | 10G RJ45 SFP+ Transceiver | 2 | |||
This site contains affiliate links to products. We may receive a commission for purchases made through these links. | |||||
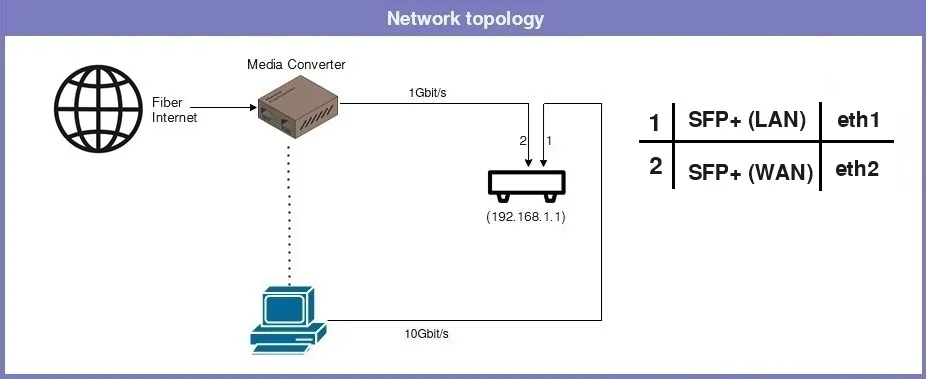
Our network topology
Network Components
| Item No. | Description | QTY | Notes |
| 1 | Banana Pi R4 Board | 1 | |
| 2 | Media Converter | 1 | |
| 3 | Cat 7/8 Ethernet cables | 2 | |
| 4 | 10G RJ45 Copper SFP+ Transceiver | 2 | |
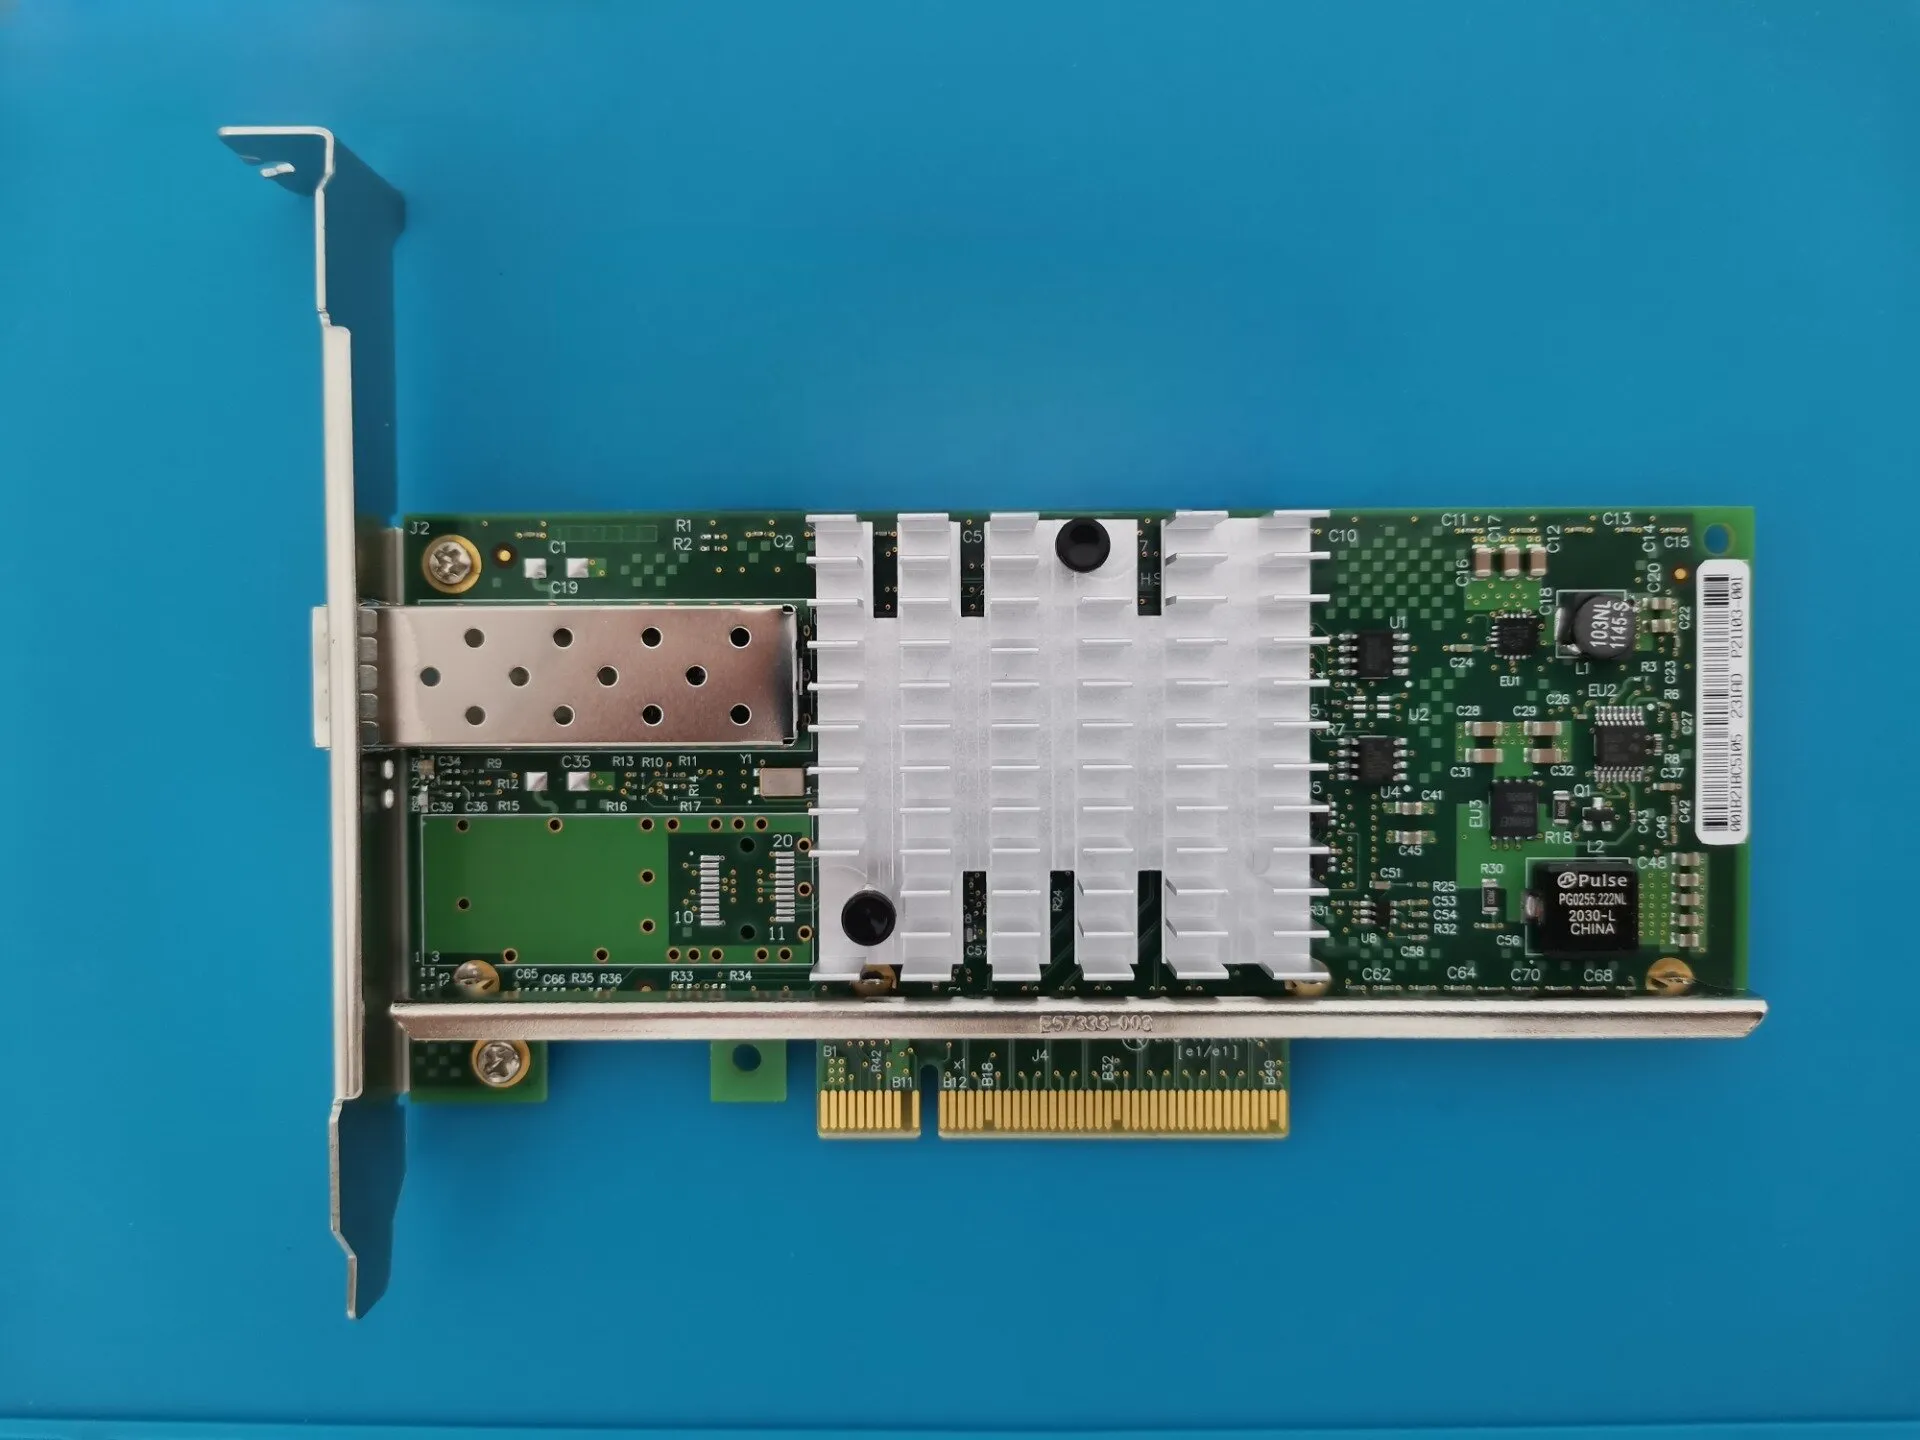
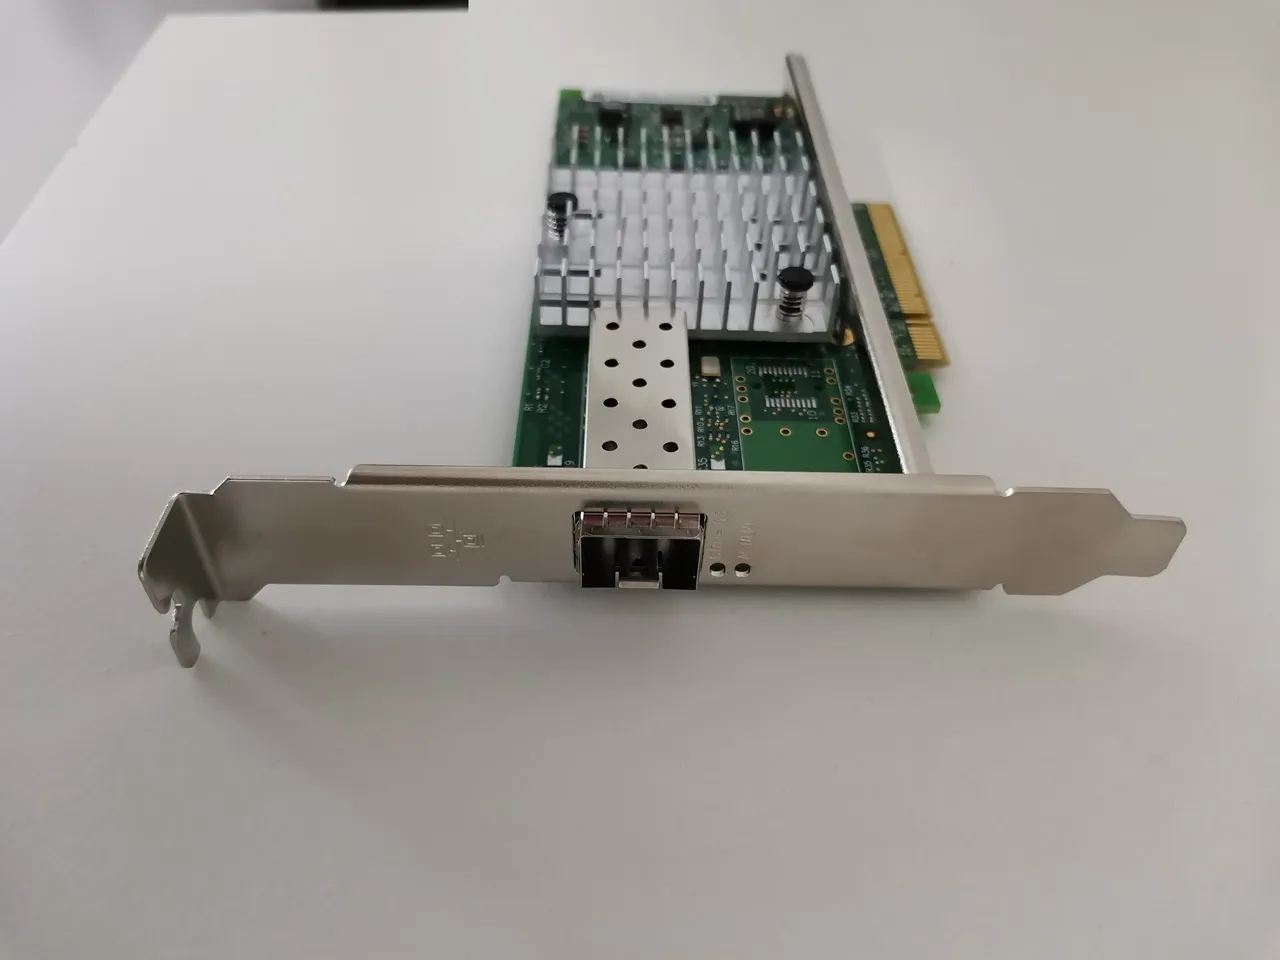
| 5 | X520-DA1 Network Card | 1 | |
| 5 | Desktop PC | 1 | CPU: Intel Core i5 4690 @ 3.50GHz OS: Win 11 Education 64-bit Motherboard: B85-PRO GAMER Graphics: NVIDIA GeForce GTX 750 Ti RAM: 32 GB DDR3 |
Desktop PC network interface card (NIC) + x2 RJ45 SFP+ Transceivers
Testing the Network Bandwidth and Throughput.
| Test No. | No. of Parallel streams | Test result |
| 1 | 10 | [ ID] Interval Transfer Bandwidth [ 3] 0.0000-30.0511 sec 6.48 GBytes 1.85 Gbits/sec [ 6] 0.0000-30.0513 sec 1.45 GBytes 415 Mbits/sec [ 8] 0.0000-30.0515 sec 1.33 GBytes 382 Mbits/sec [ 1] 0.0000-30.0511 sec 4.50 GBytes 1.29 Gbits/sec [ 9] 0.0000-30.0511 sec 1.20 GBytes 344 Mbits/sec [ 4] 0.0000-30.0513 sec 2.85 GBytes 813 Mbits/sec [ 5] 0.0000-30.0510 sec 2.57 GBytes 735 Mbits/sec [ 2] 0.0000-30.0515 sec 4.93 GBytes 1.41 Gbits/sec [ 10] 0.0000-30.0712 sec 1.05 GBytes 300 Mbits/sec [ 7] 0.0000-30.0513 sec 2.42 GBytes 692 Mbits/sec [SUM] 0.0000-30.0134 sec 28.8 GBytes 8.24 Gbits/sec |
| 2 | 20 | [ ID] Interval Transfer Bandwidth [ 3] 0.0000-30.0358 sec 4.94 GBytes 1.41 Gbits/sec [ 1] 0.0000-30.0573 sec 5.61 GBytes 1.60 Gbits/sec [ 12] 0.0000-30.0570 sec 1.14 GBytes 326 Mbits/sec [ 5] 0.0000-30.0568 sec 4.78 GBytes 1.36 Gbits/sec [ 18] 0.0000-30.0556 sec 1.11 GBytes 318 Mbits/sec [ 2] 0.0000-30.0567 sec 2.25 GBytes 644 Mbits/sec [ 16] 0.0000-30.0791 sec 816 MBytes 227 Mbits/sec [ 15] 0.0000-30.0773 sec 1015 MBytes 283 Mbits/sec [ 9] 0.0000-30.0785 sec 904 MBytes 252 Mbits/sec [ 19] 0.0000-30.0880 sec 321 MBytes 89.4 Mbits/sec [ 8] 0.0000-30.0914 sec 270 MBytes 75.3 Mbits/sec [ 6] 0.0000-30.0882 sec 960 MBytes 268 Mbits/sec [ 11] 0.0000-30.1024 sec 179 MBytes 49.8 Mbits/sec [ 10] 0.0000-30.1009 sec 424 MBytes 118 Mbits/sec [ 14] 0.0000-30.1015 sec 465 MBytes 129 Mbits/sec [ 13] 0.0000-30.1029 sec 457 MBytes 127 Mbits/sec [ 20] 0.0000-30.1027 sec 706 MBytes 197 Mbits/sec [ 17] 0.0000-30.1013 sec 355 MBytes 99.0 Mbits/sec [ 7] 0.0000-30.1230 sec 383 MBytes 107 Mbits/sec [ 4] 0.0000-30.1019 sec 439 MBytes 122 Mbits/sec [SUM] 0.0000-30.0559 sec 27.3 GBytes 7.82 Gbits/sec |
| 3 | 30 | [ ID] Interval Transfer Bandwidth [ 3] 0.0000-30.0358 sec 4.94 GBytes 1.41 Gbits/sec [ 1] 0.0000-30.0573 sec 5.61 GBytes 1.60 Gbits/sec [ 12] 0.0000-30.0570 sec 1.14 GBytes 326 Mbits/sec [ 5] 0.0000-30.0568 sec 4.78 GBytes 1.36 Gbits/sec [ 18] 0.0000-30.0556 sec 1.11 GBytes 318 Mbits/sec [ 2] 0.0000-30.0567 sec 2.25 GBytes 644 Mbits/sec [ 16] 0.0000-30.0791 sec 816 MBytes 227 Mbits/sec [ 15] 0.0000-30.0773 sec 1015 MBytes 283 Mbits/sec [ 9] 0.0000-30.0785 sec 904 MBytes 252 Mbits/sec [ 19] 0.0000-30.0880 sec 321 MBytes 89.4 Mbits/sec [ 8] 0.0000-30.0914 sec 270 MBytes 75.3 Mbits/sec [ 6] 0.0000-30.0882 sec 960 MBytes 268 Mbits/sec [ 11] 0.0000-30.1024 sec 179 MBytes 49.8 Mbits/sec [ 10] 0.0000-30.1009 sec 424 MBytes 118 Mbits/sec [ 14] 0.0000-30.1015 sec 465 MBytes 129 Mbits/sec [ 13] 0.0000-30.1029 sec 457 MBytes 127 Mbits/sec [ 20] 0.0000-30.1027 sec 706 MBytes 197 Mbits/sec [ 17] 0.0000-30.1013 sec 355 MBytes 99.0 Mbits/sec [ 7] 0.0000-30.1230 sec 383 MBytes 107 Mbits/sec [ 4] 0.0000-30.1019 sec 439 MBytes 122 Mbits/sec [SUM] 0.0000-30.0559 sec 27.3 GBytes 7.82 Gbits/sec |
- Each test has a duration of 30 seconds.
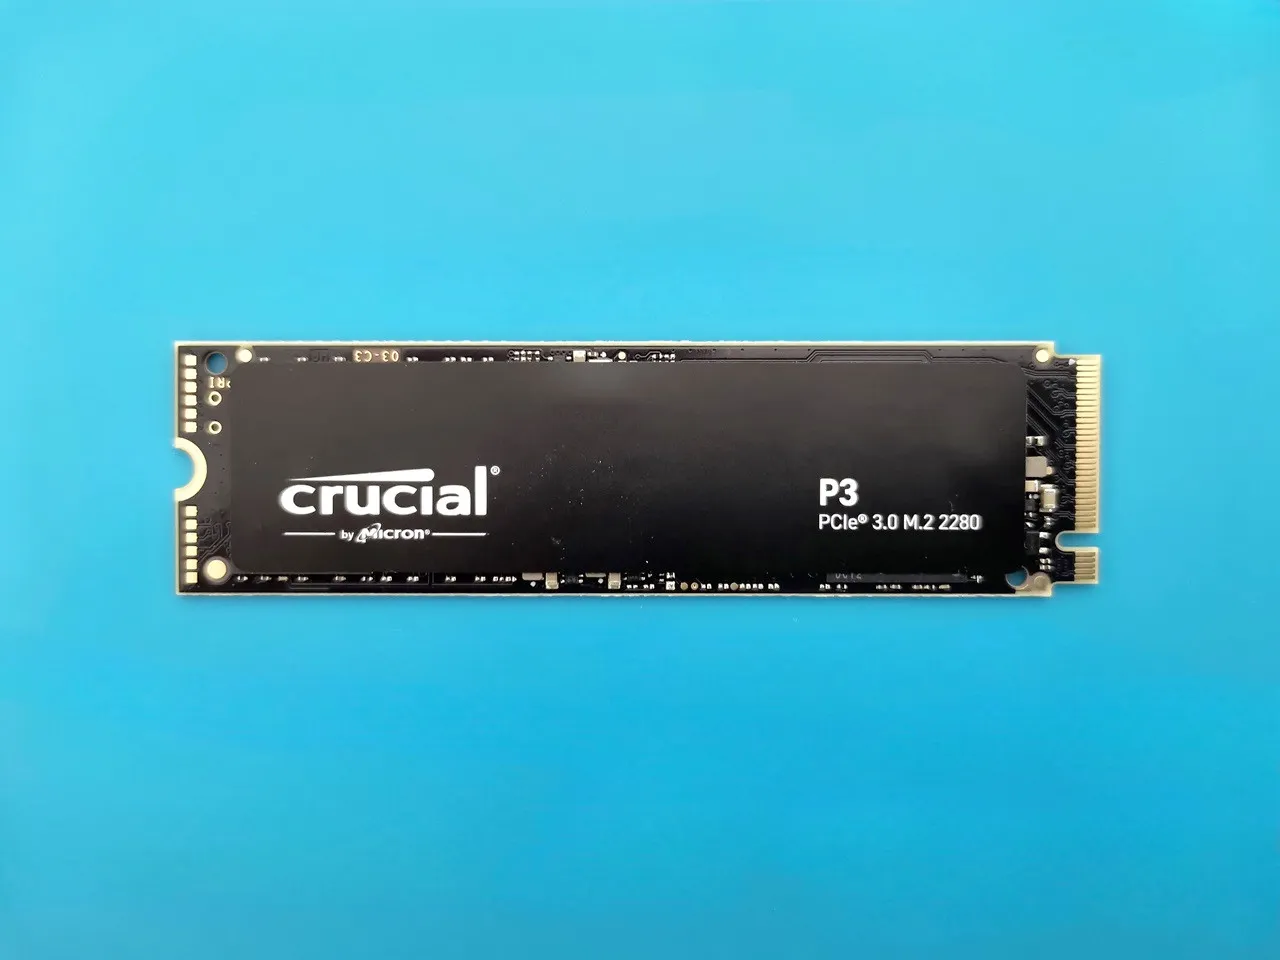
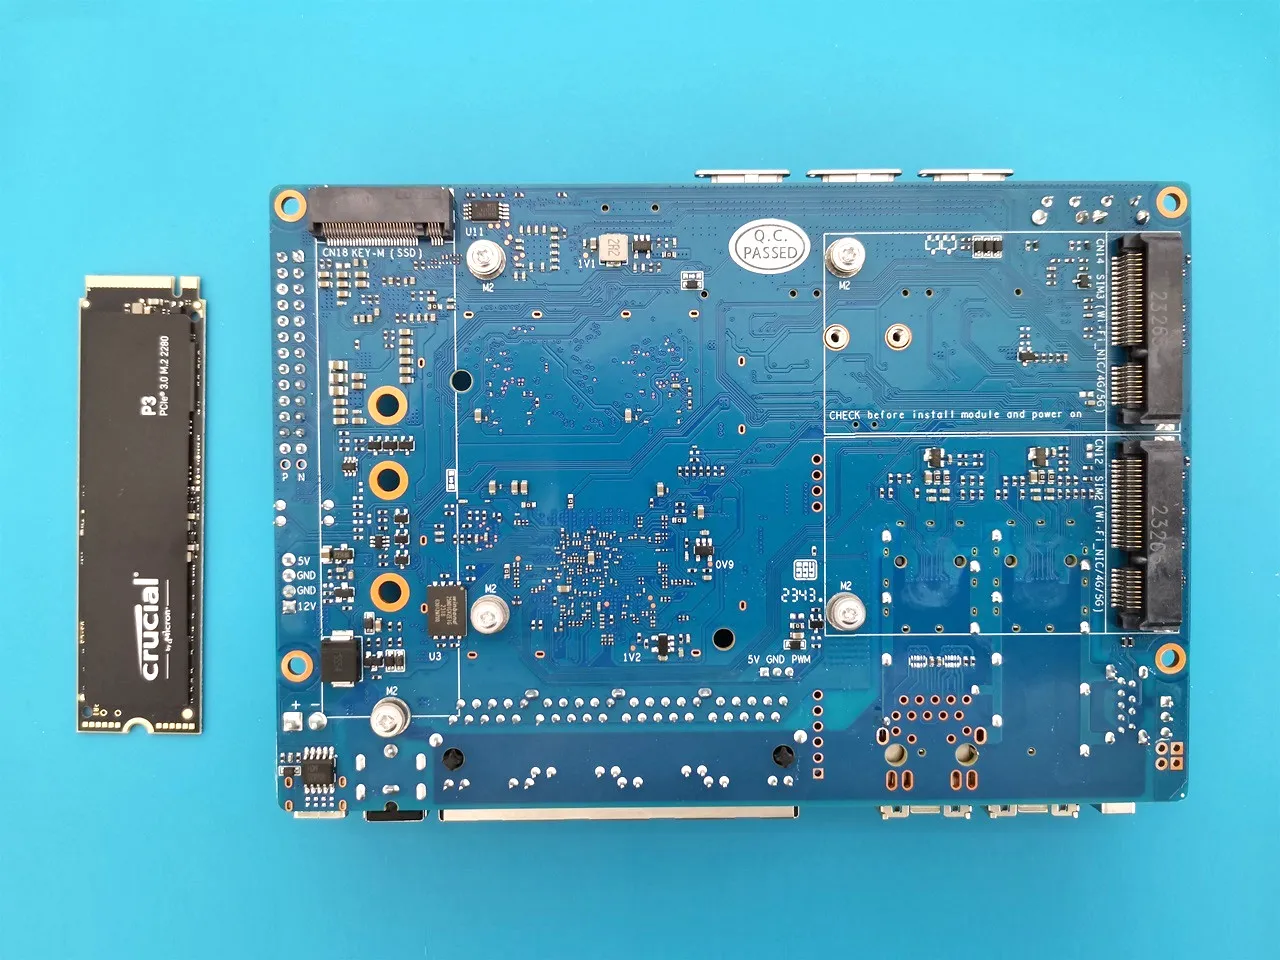
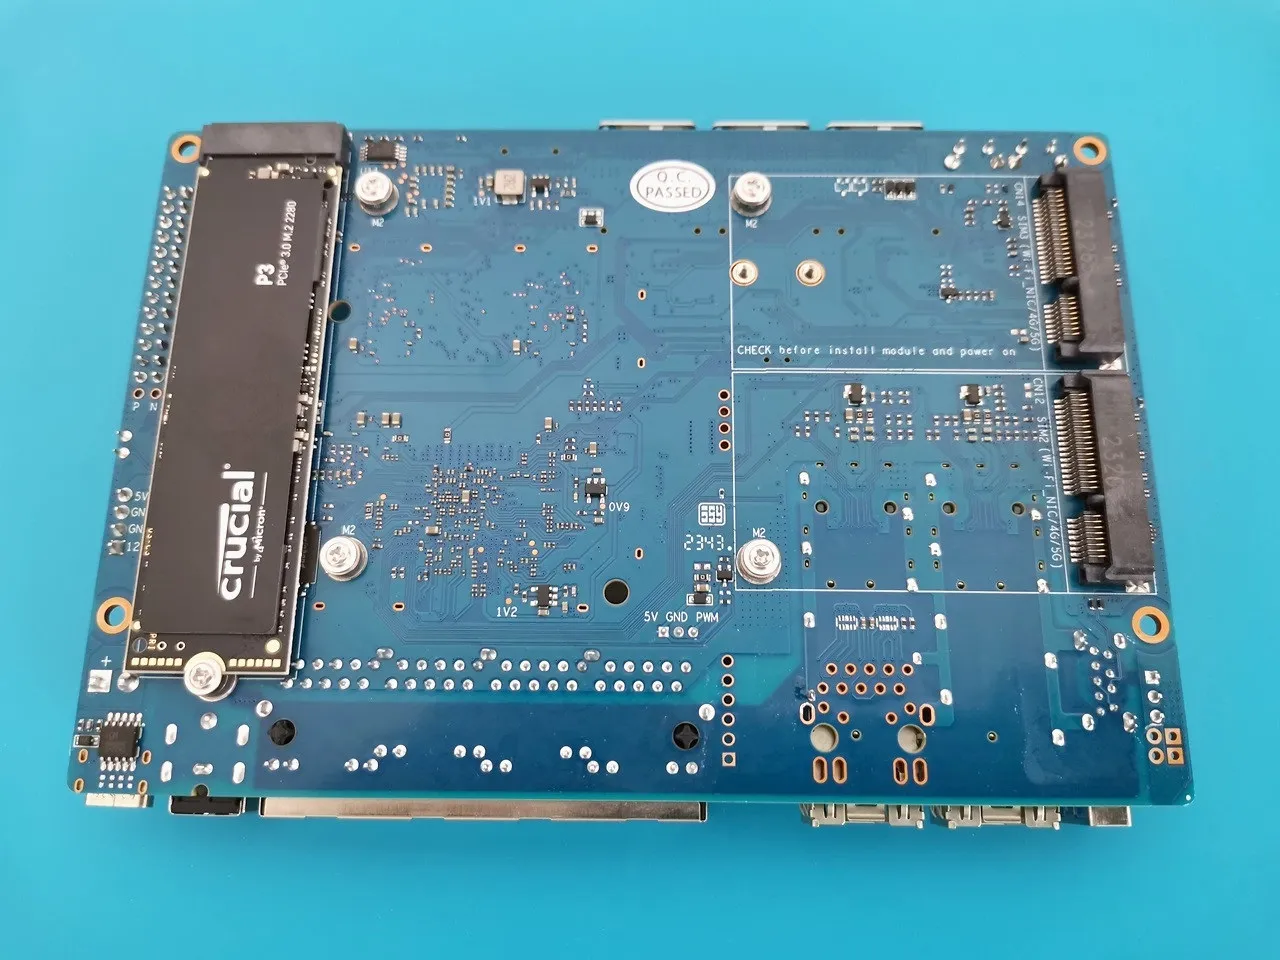
Installing an M.2 NVMe SSD
The R4 board is equipped with an M.2 Key-M 2280 socket that supports PCIe 3.0 with a single lane. Theoretically, each lane on PCIe 3.0 has a maximum theoretical data transfer rate of 8 giga transfers per second (GT/s), but due to the 8b/10b encoding scheme used by PCIe, the maximum practical throughput per lane is approximately 985 megabytes per second (MB/s).
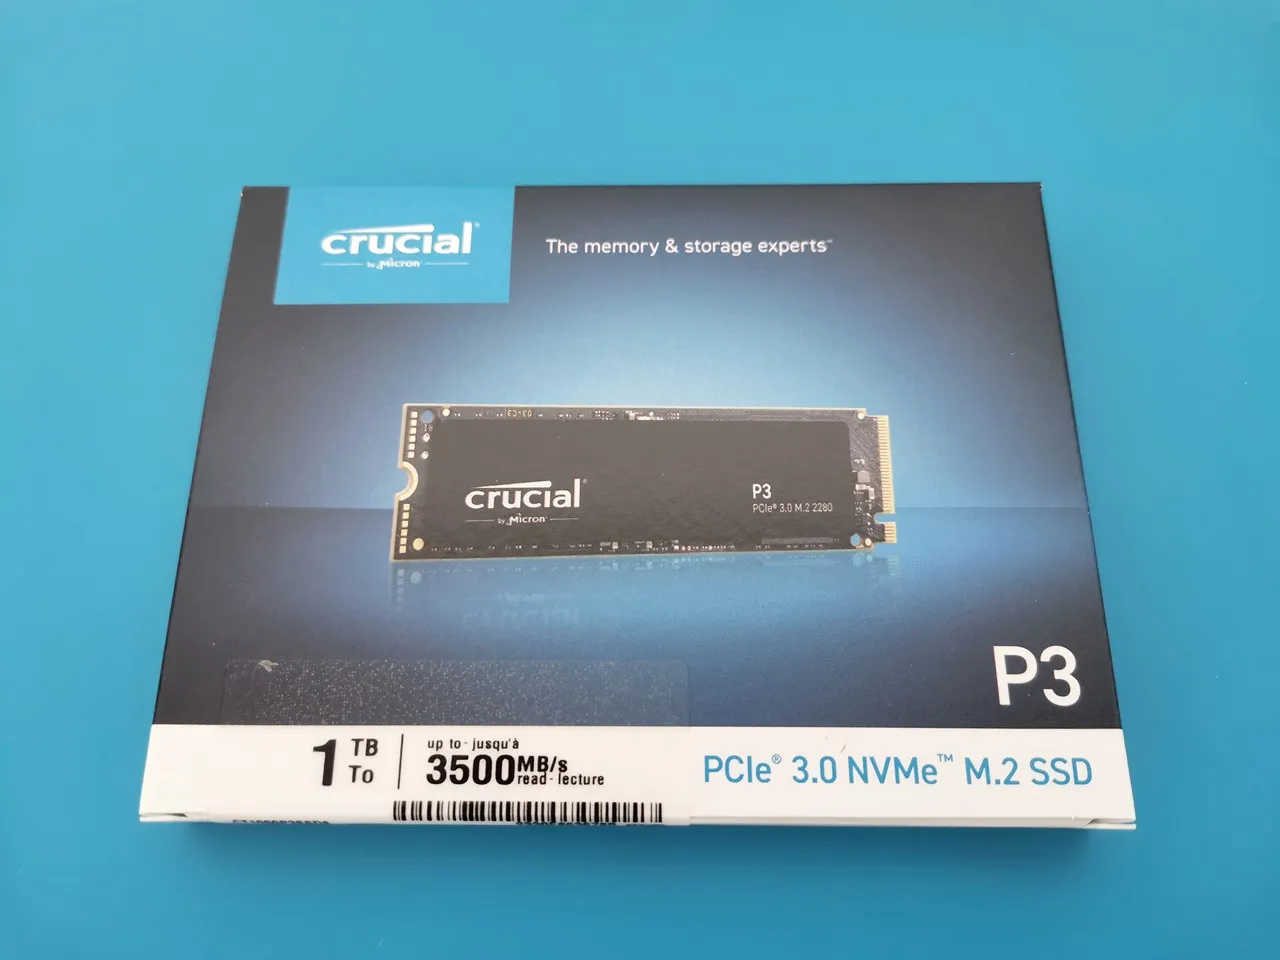
If you intend to install an NVMe SSD card, any PCIe 3.0 supported card should function perfectly. During our testing, we used a crucial brand NVMe based on micron chip technology, that boasts a peak throughput transfer speed of up to 3500 MB/s.

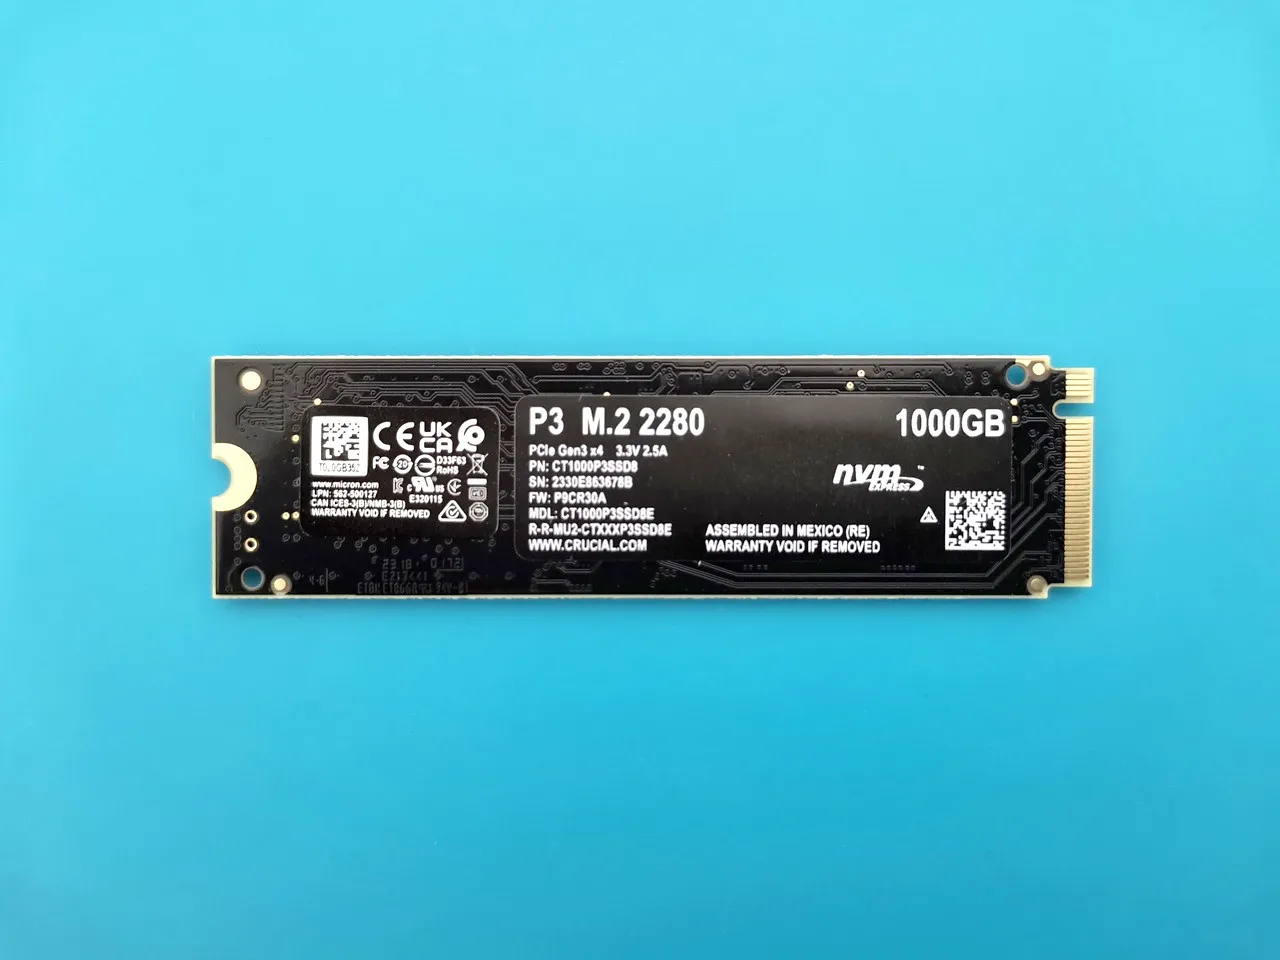

Disk /dev/nvme0n1: 931.51 GiB, 1000204886016 bytes, 1953525168 sectors
Disk model: CT1000P3SSD8
Units: sectors of 1 * 512 = 512 bytes
Sector size (logical/physical): 512 bytes / 512 bytes
I/O size (minimum/optimal): 512 bytes / 512 bytes
Preforming a hdparm speed test
In a PCIe 3.0 slot with a single lane (x1), you can experience a remarkable maximum theoretical throughput of approximately 985 MB/s. According to our test results, the transfer rate is 741 MB/s. Nonetheless, it’s crucial to factor in that the actual throughput achieved could be slightly lower due to protocol overhead and other considerations.
root@OpenWrt:/# hdparm -t --direct /dev/nvme0n1
/dev/nvme0n1:
Timing O_DIRECT disk reads: 2226 MB in  3.00 seconds = 741.53 MB/sec
Software support and Installation
The Banana Pi R4 board initially came preinstalled with SNAPSHOT V21.02, which presented challenges when updating packages using the opkg update command due to the absence of libraries in the depository branch. The use of snapshot images can lead to difficulties in downloading and installing updated packages, as repository source directories may have been intentionally removed by the developer.
Upgrading OpenWrt to a final stable release is the recommended solution for addressing this issue. In the meantime, make the most of Sinovoip’s Serial connection upgrade feature while waiting for the official release.
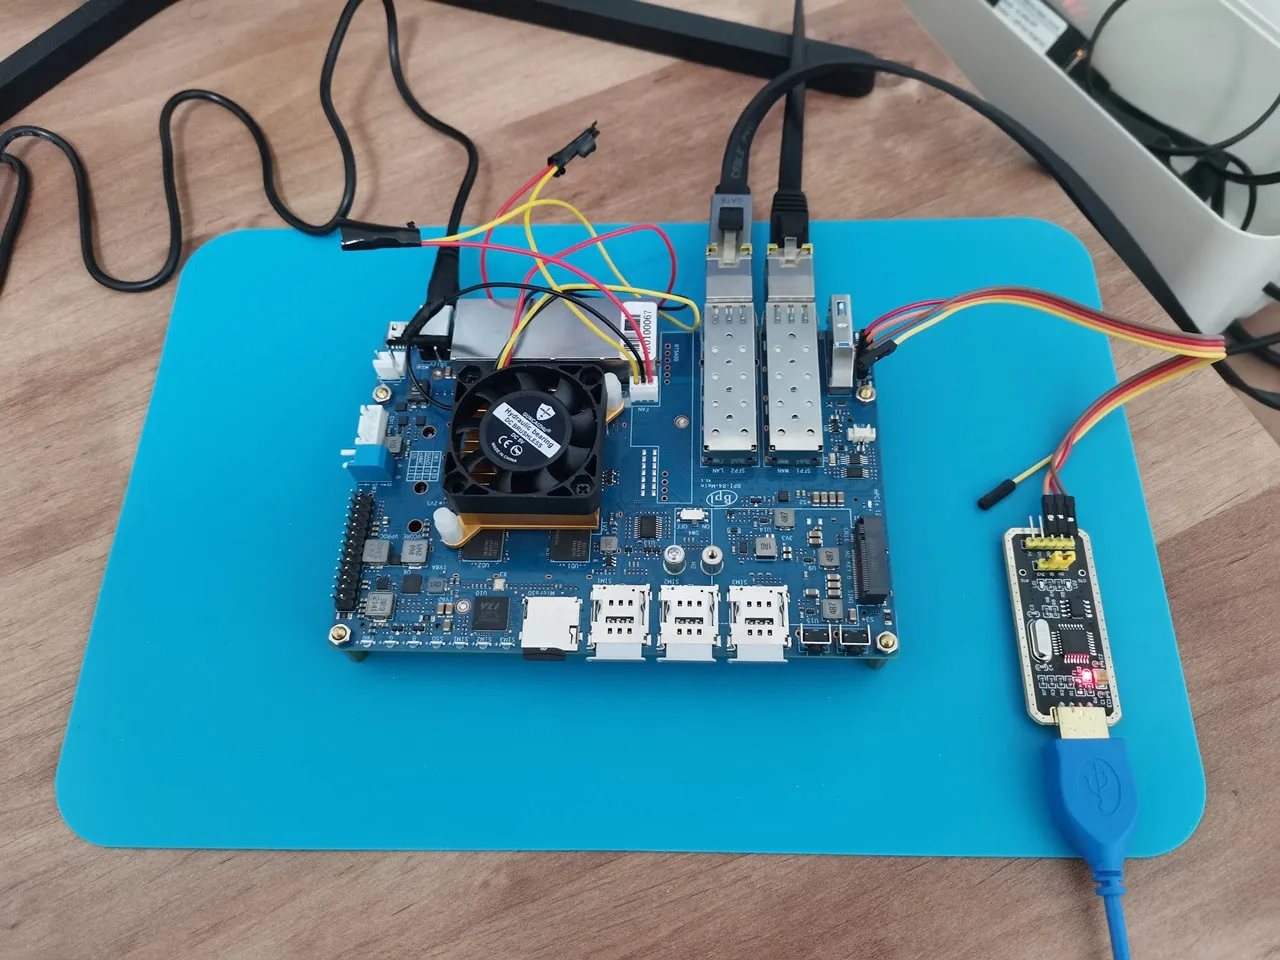
Switch jumper
As with the Banana Pi R3 board, Sinovip has incorporated a switch jumper that empowers users to select from three different storage options: Micro SD Card, NAND, and eMMC flash. By using a USB to RS232 ports adapter, you can gain access to your device, enabling you to easily perform recovery and update the device’s software.
The updating process
Since the SD card and eMMC device use the same interface, you should start by flashing the image to a Micro SD card. Then, follow these steps:
1) Boot from SD Card
2) Flash image into Nand
3) Change jumper to boot from Nand
4) Flash Image into eMMC
5) Change jumper settings to boot from eMMC
Banana Pi BPI-R4 Switch Boot Modes | ||
Status No. | Description | Picture |
1 | SD Card Mode. B-> 1 (High) |  |
2 | eMMC Mode. A->1 (High) B->0 (Low) | 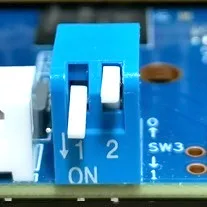 |
3 | NAND Mode. A->0 (Low) B->1 (High) | 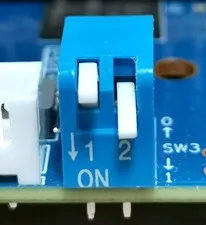 |
Updating the R4 board software by flashing it with a newer OpenWrt Image.

Although this option might not be the most user-friendly, it ensures that the updates for your R4 device to the latest OpenWrt Snapshot will be successful. Now, let’s delve into a detailed, step-by-step guide to ensure a smooth execution of this procedure.
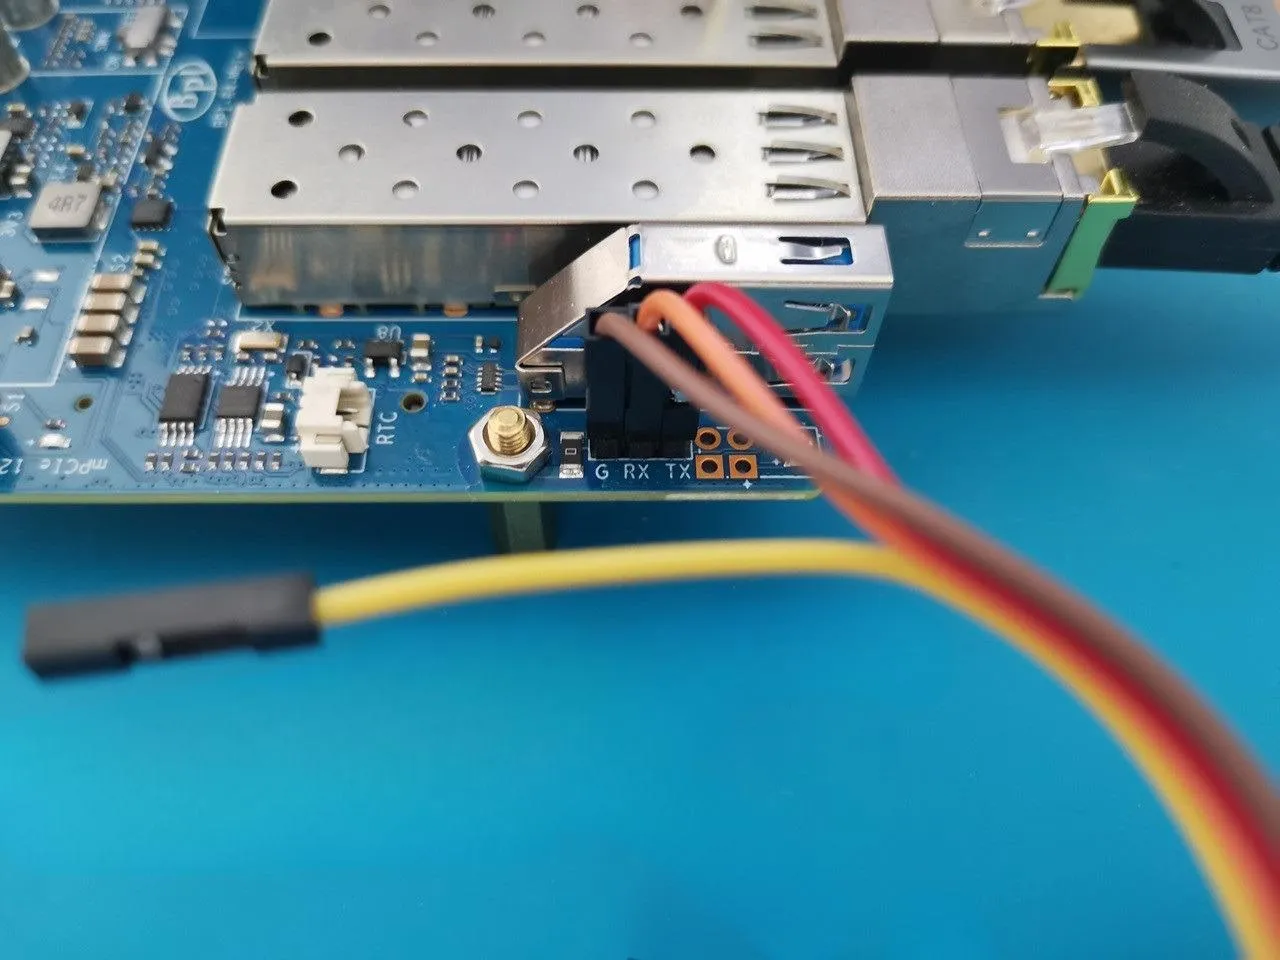
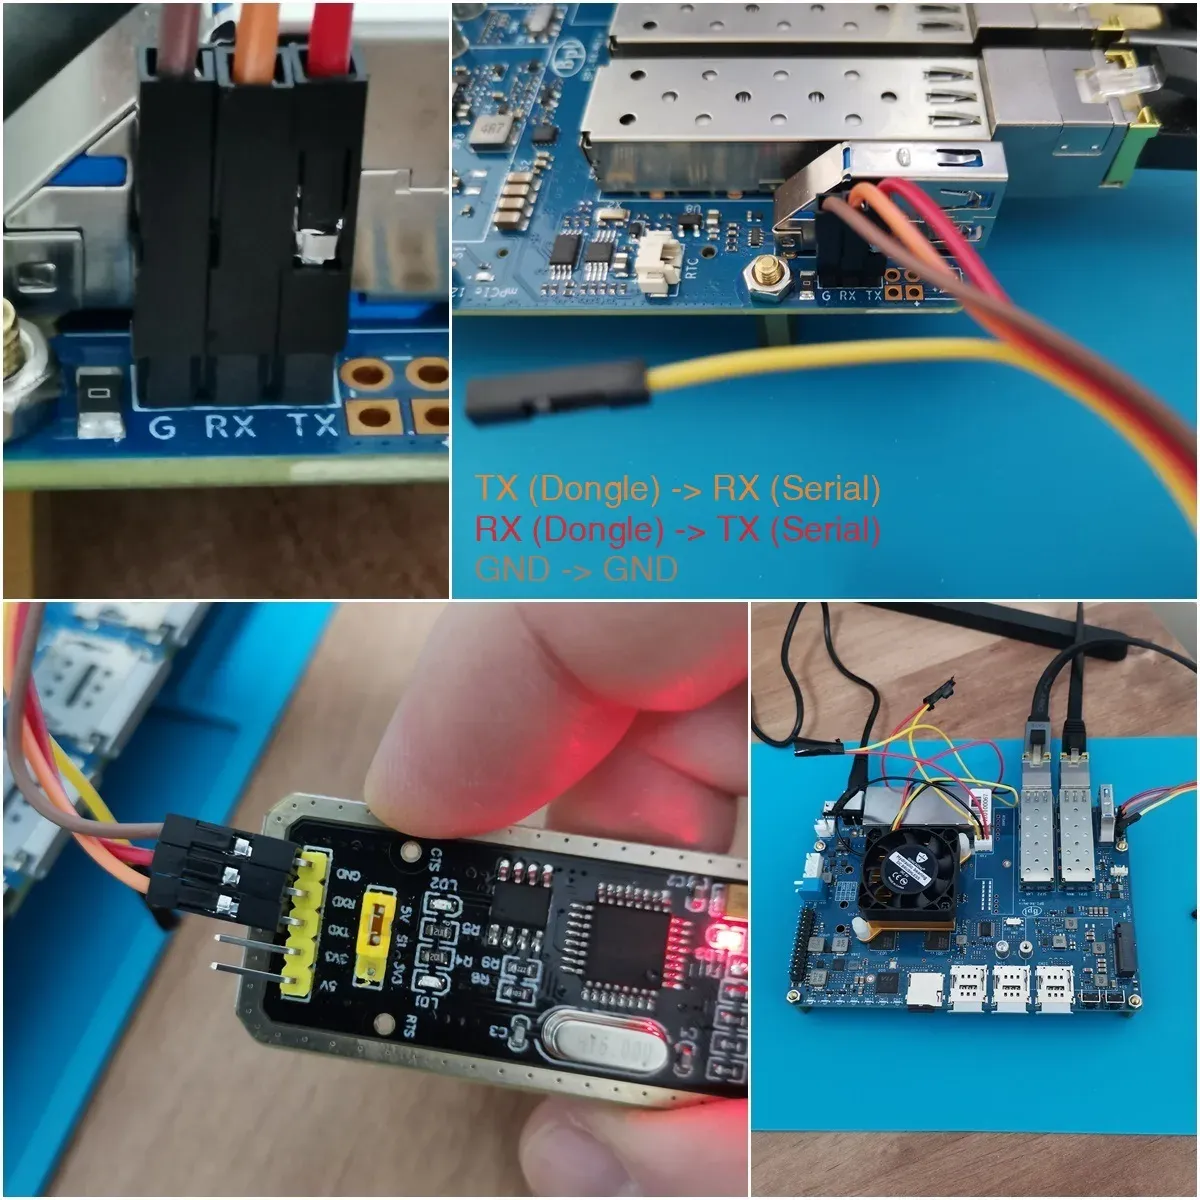
- Step No. 1: Connect the wires of the USB to RS232 ports adapter to the R4 Serial interfaces following the specified wiring arrangement, then insert it into a standard USB port.
Product Photo | Product description | Purchasing link |
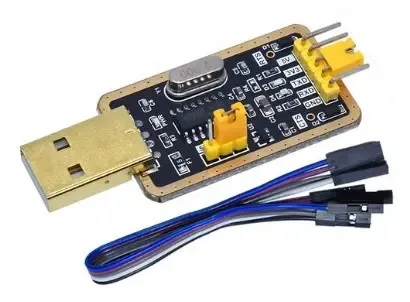 Model: CH340 | USB to UART Converter Module | |
This site contains affiliate links to products. We may receive a commission for purchases made through these links. | ||
| USB to RS232 Dongle | The Banana Pi R4 Board |
| RX | TX |
| TX | RX |
| Ground | Ground |
Flashing the OpenWrt Snapshot Image to Nand and eMMC
Step No. 1
Disconnect the power supply to the R4 board.
Step No. 2
Install PuTTY -SSH and telnet client for Windows/Linux on your PC.
Download source: PuTTY.org
Step No. 3
Prepare a formatted USB flash drive and copy the following images. The files should be named with a structure like this (y-year, d-date):
mtk-bpi-r4-NAND-yyyydddd.img
mtk-bpi-r4-EMMC-yyyydddd.img
- If the image is compressed, please uncompress it before copying to USB disk.
- You can find the image files on the Banana Pi R4 doc page.
Step No. 4
Prepare a formatted Micro SD Card and flash the OpenWrt Image using Windows Disk Imageror Balena Etcher software.The file should be named with a structure like this (y-year, d-date): mtk-bpi-r4-SD-yyyydddd.img
- If the image is compressed, please uncompress it before copying to USB disk.
- You can find the image file on the Banana Pi R4 doc page.
Step No. 5
Insert the prepped Micro SD card into the R4 board socket.
Step No. 6
Set the jumper settings to SD Card Mode: Jumper 1-> Down , Jumper 2 -> Down
Step No. 7
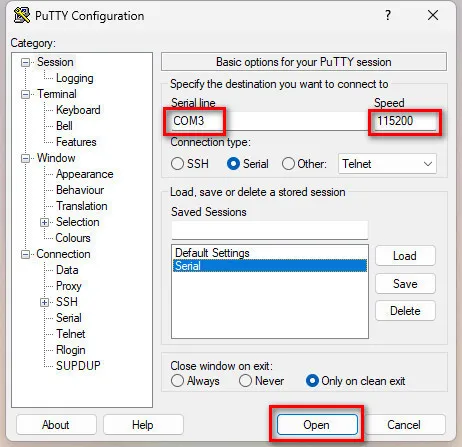
Launch PuTTY and choose the “Serial” option. Then, select the appropriate COM port and set the speed to 115200. Finally, click on “Open” to proceed.
Step No. 8
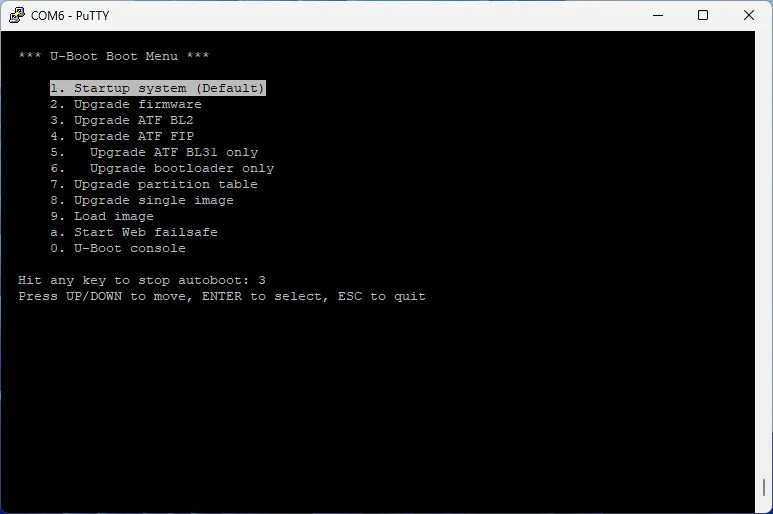
While Putty is running in the background, plug the power supply back into the board to power it up. As soon as you see a terminal screen, press the Enter button without any delay.
Step No. 9
When the U-Boot Boot Menu appears, choose option 1 labelled: “Startup system“.
Step No. 10
Connect the USB flash drive and mount it using the following commands:
mount -t vfat /dev/sda1 /mnt
cd /mnt
Step No. 11
To erase the whole Nand flash and copy image to nand device run the following commands:
mtd erase /dev/mtd0
dd if=mtk-bpi-r4-NAND-20231030.img of=/dev/mtdblock0
Step No. 12
Power off BPI-R4 board, unplug u-disk driver, change bootstrap switch to boot from Nand.
Set the jumper settings to Nand Mode: Jumper 1-> Up , Jumper 2 -> Down
Step No. 13
Repeat the same step again by plugging the power supply back into the board to power it up while putty app is running in the background.
Step No. 14
When the U-Boot Boot Menu appears, choose option 1 labelled: “Startup system“.
Step No. 15
Mount the USB flash drive by running the command:
mount -t vfat /dev/sda1 /mnt
Step No. 16
Run the following commands to flash the image into the eMMC:
echo 0 > /sys/block/mmcblk0boot0/force_ro
dd if=bl2_emmc-r4.img of=/dev/mmcblk0boot0 dd if=mtk-bpi-r4-EMMC-20231030.img of=/dev/mmcblk0
mmc bootpart enable 1 1 /dev/mmcblk0
Step No. 17
Power off the R4 board and change bootstrap switch to boot from eMMC:
Set the jumper settings to eMMC Mode: Jumper 1-> Down, Jumper 2 -> Up
The easiest way to install OpenWrt
If you feel that the method above is too complex, you can simply burn the OpenWrt image directly to your Micro SD card. Just remember to ensure that the jumper settings are configured to sd boot (Jumper 1-> Down, Jumper 2 -> Down).


Good Job
Thanks
That’s the most in-depth review I’ve seen of the BPI-R4. However, the benchmark and Wi-Fi testing sections are noticeably missing. Any reason why?
Thanks. Probably at that time I didn’t have the extra patience to wait until they fixed the bugs/problems. Hopefully a few months have passed and it should be fine now.