
Part 4: Installing a Fan-Cooled Heat Sink
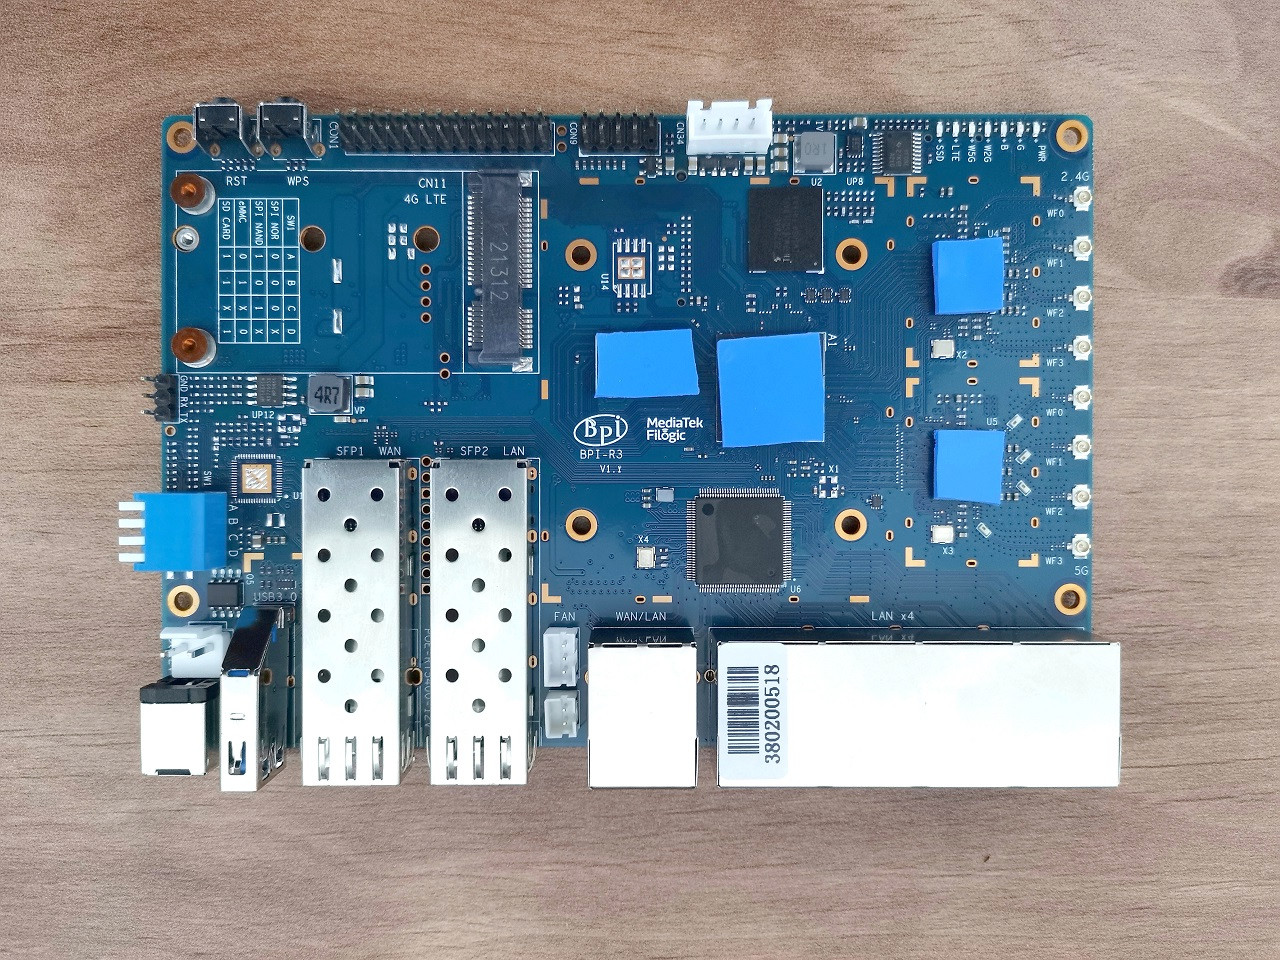
The Banana Pi R3 comes with three onboard connectors, as shown in the photo below. You got two FAN PH2.0 (2PINS + 4PINS) connectors. an Input 12V power DC input source (VH3.96 2PINS) and third XH2.54 4PIN SATA power connector that can be used to power a 12V FAN.

FAN Wiring Configurations (Options)

Configuration Option No. 1 (Passive Cooling)
If you don’t need the cooling fan option, you can order the following Heatsink from AliExpress and cut 20 mm from the 100 mm length. If 60 mm is too long, you will need to cut 3 mm of material using a circular saw. A Heatsink with dimensions of 80x57x10 should fit well and cover most of the R3 board components (Chips).
Passive Cooled Heat Sink Setup (Items list) | |||
Item No’ | Description | QTY | Buy Links |
1 | 100x60x10mm Aluminium Heat sink | 1 | |
2 | Thermal Silicone Adhesive Cooling Paste | 1 | |
3 | Circular Saw | 1 | – |
AndroidPIMP.COM will not be liable or responsible for any loss or damage caused by improper wiring/assembly of the above components. | |||
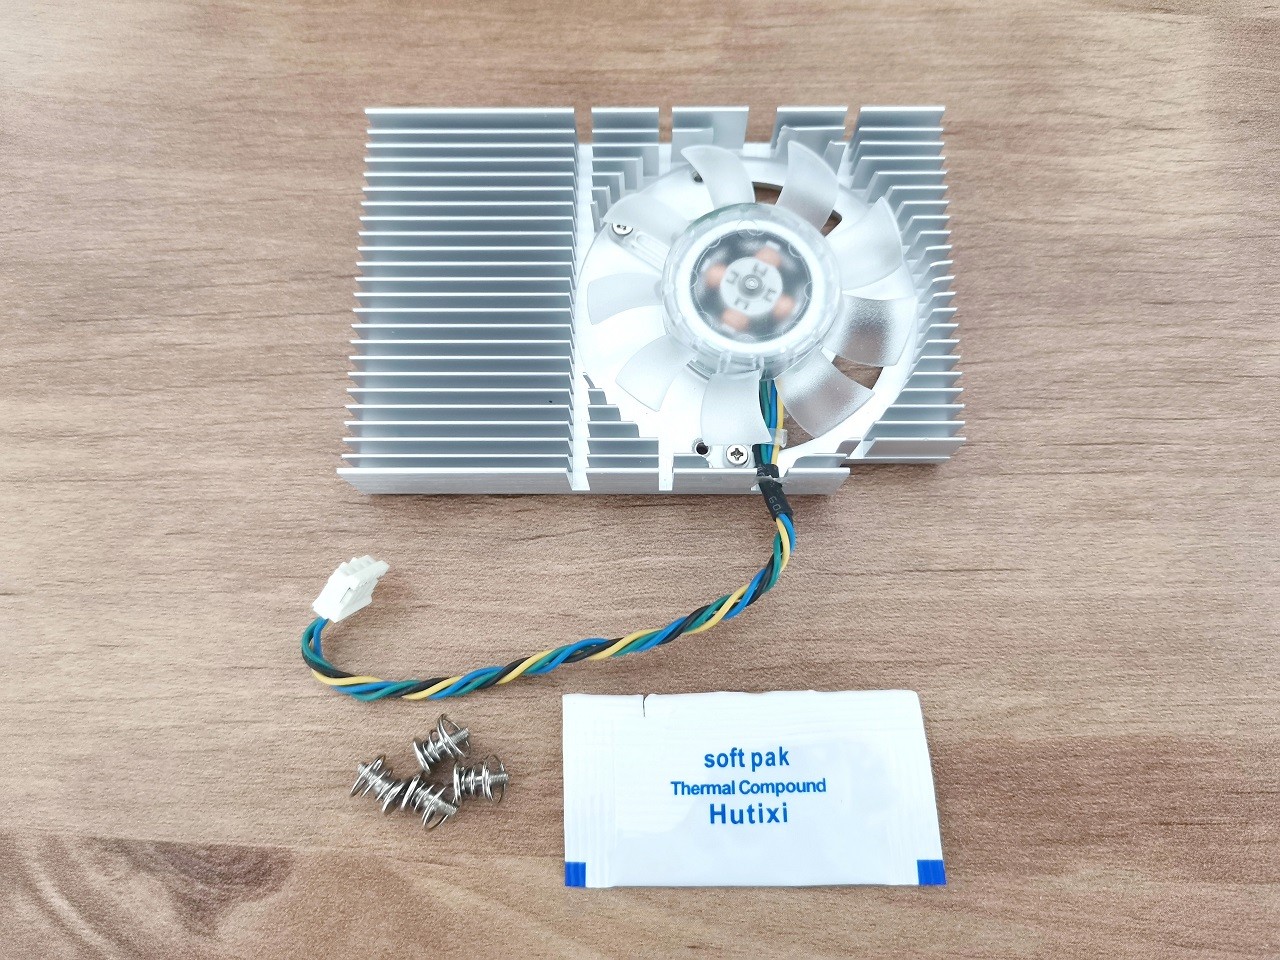
Cooled FAN Heatsink
This part might be a bit tricky. Because there is currently no official Heatsink with a built-in FAN that is fully compatible with the R3 board, and this Heatsink Cooling Fan is designed to fit into a video card, you will have to buy a suitable four or two pin type and replace the wire connector of the FAN with an XH2.54-4P / VH3.96 connector. This can be done by crimping, or the fastest method, in our opinion, is buying a pre-made cable with a connector included and soldering the wires together.
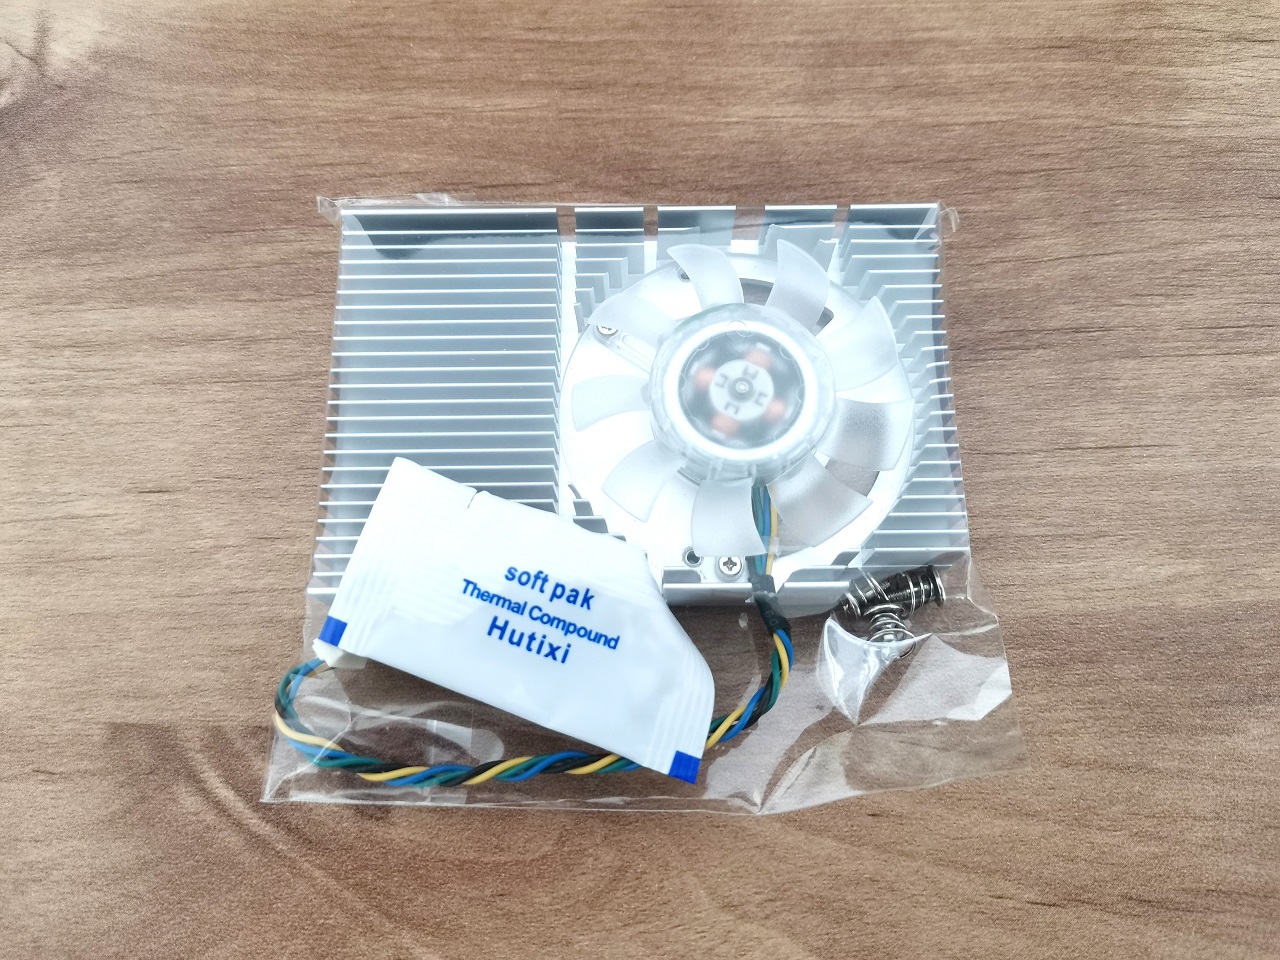

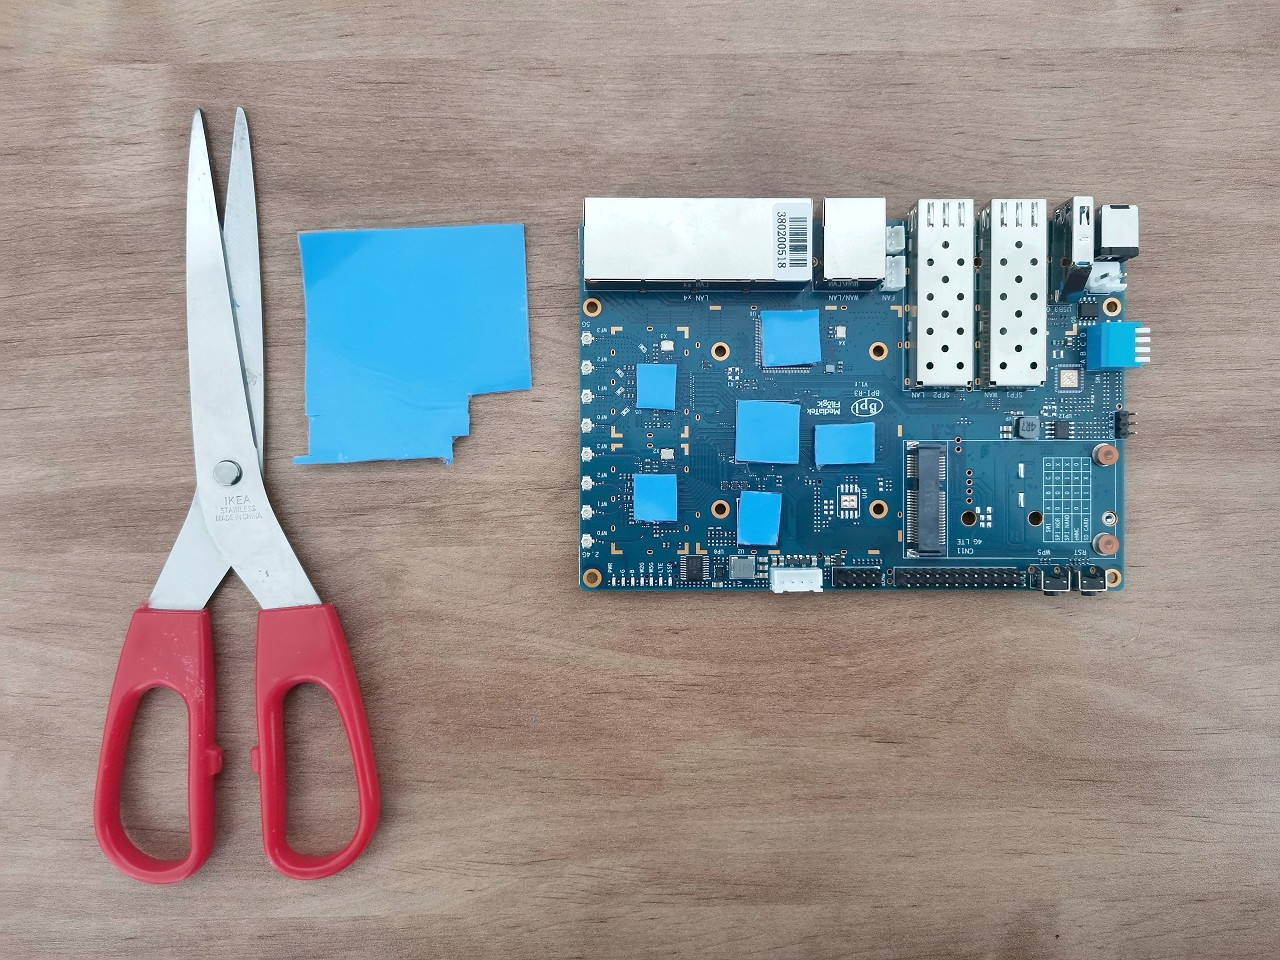
Preparing Conductive Silicone Thermal Pad
Based on the size of the chips, you can use scissors and cut the necessary width and height for the pads. Remember that the Heatsink’s 55 mm length is slightly smaller, so it will not fully cover most chips on the R3 board. It will comprehensively cover the 2GB DDR4 and the MediaTek MT7986A SoC Chip.
Cutting Conductive Silicone Thermal Pad
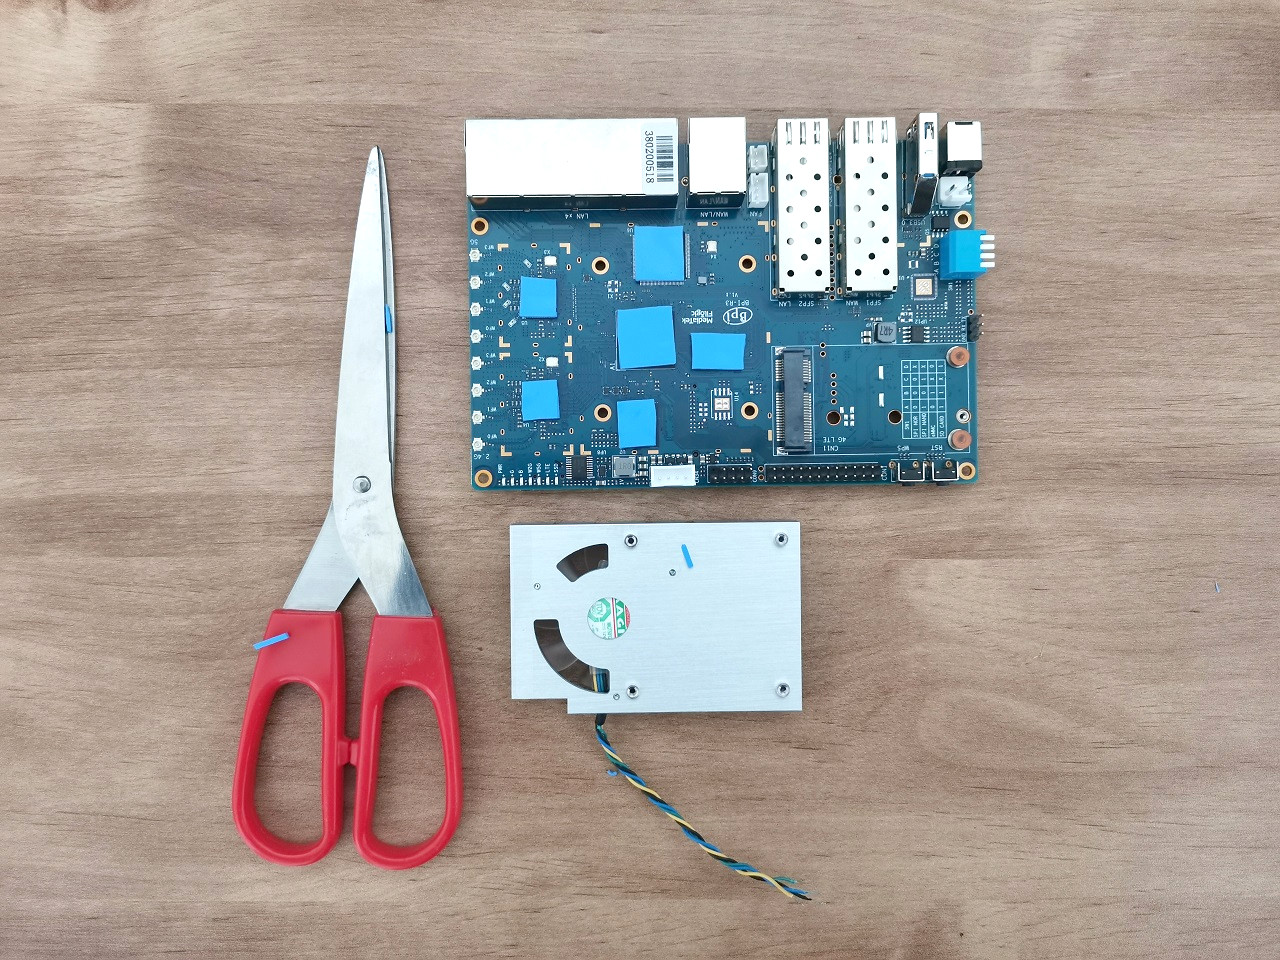
There are better solutions than this option, but it’s better than nothing. Plus, it’s fast, and you also have four mounting screws, which provide reasonable clamping force against the chips, helping to improve heat convection more effectively.
Configuration Option No. 2
Using the CN34 (XH2.54-4PIN) Connector as the fan 5V/12V power source.
 | ||||
Setting Up Fan Cooled Heat Sink (Items list) | ||||
Item No’ | Item Photo | Description | QTY | Buy Link |
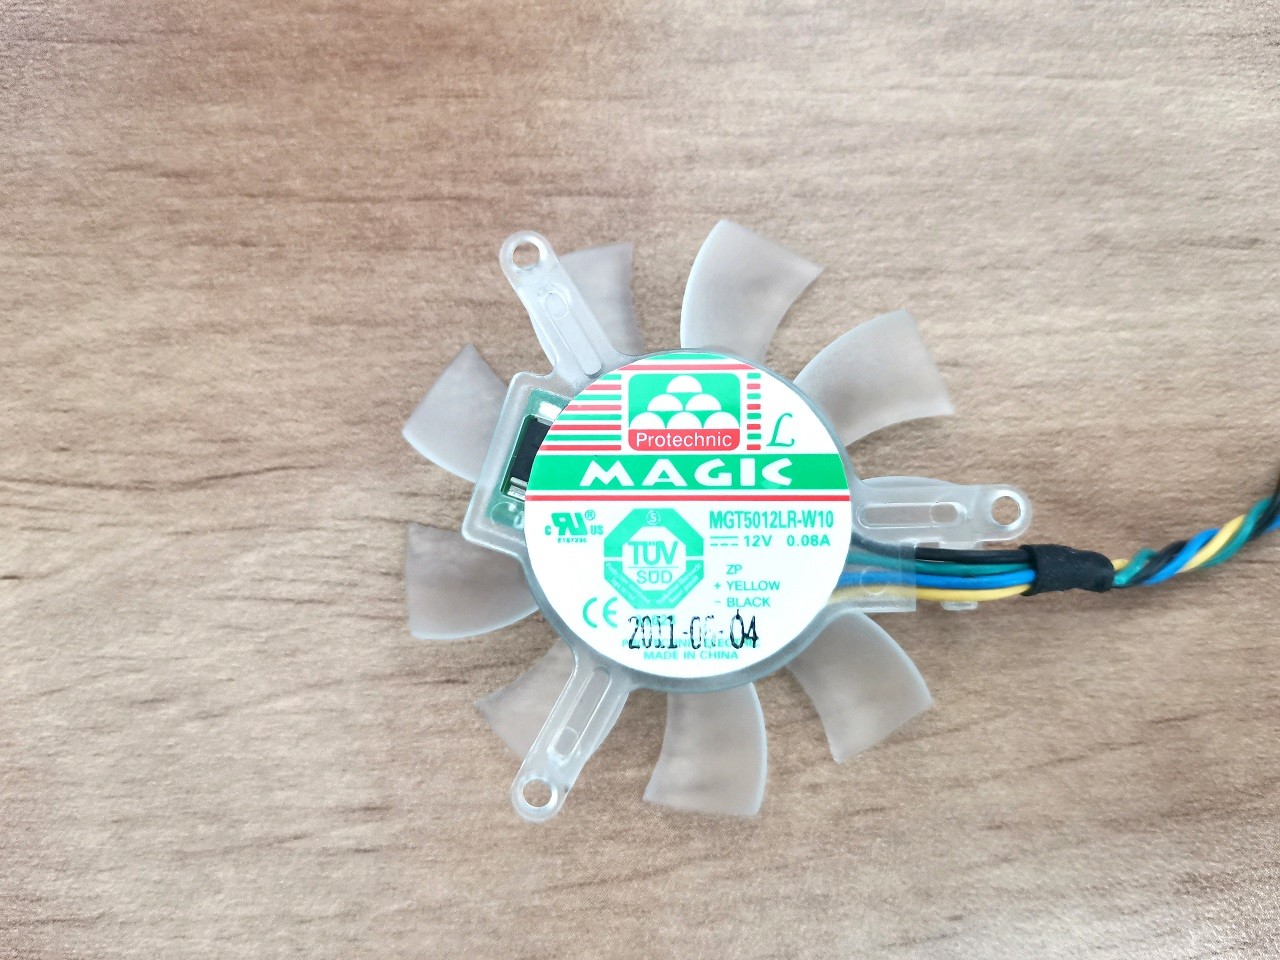
1 |  | Zotac 9400GT GT210 GT520 graphics card with 2 or 4Pin Connector. | 1 | |
2 |  | XH2.54 4PIN Terminal wire | 1 | |
3 |  | Conductive Silicone Thermal Pad | 1 | |
4 |  | Heat Shrink Sleeving Tubing Kit | 1 | |
Tools | ||||
Soldering iron | – | For Soldering the wires | 1 | – |
AndroidPIMP.COM will not be liable or responsible for any loss or damage caused by improper wiring/assembly of the above components. | ||||
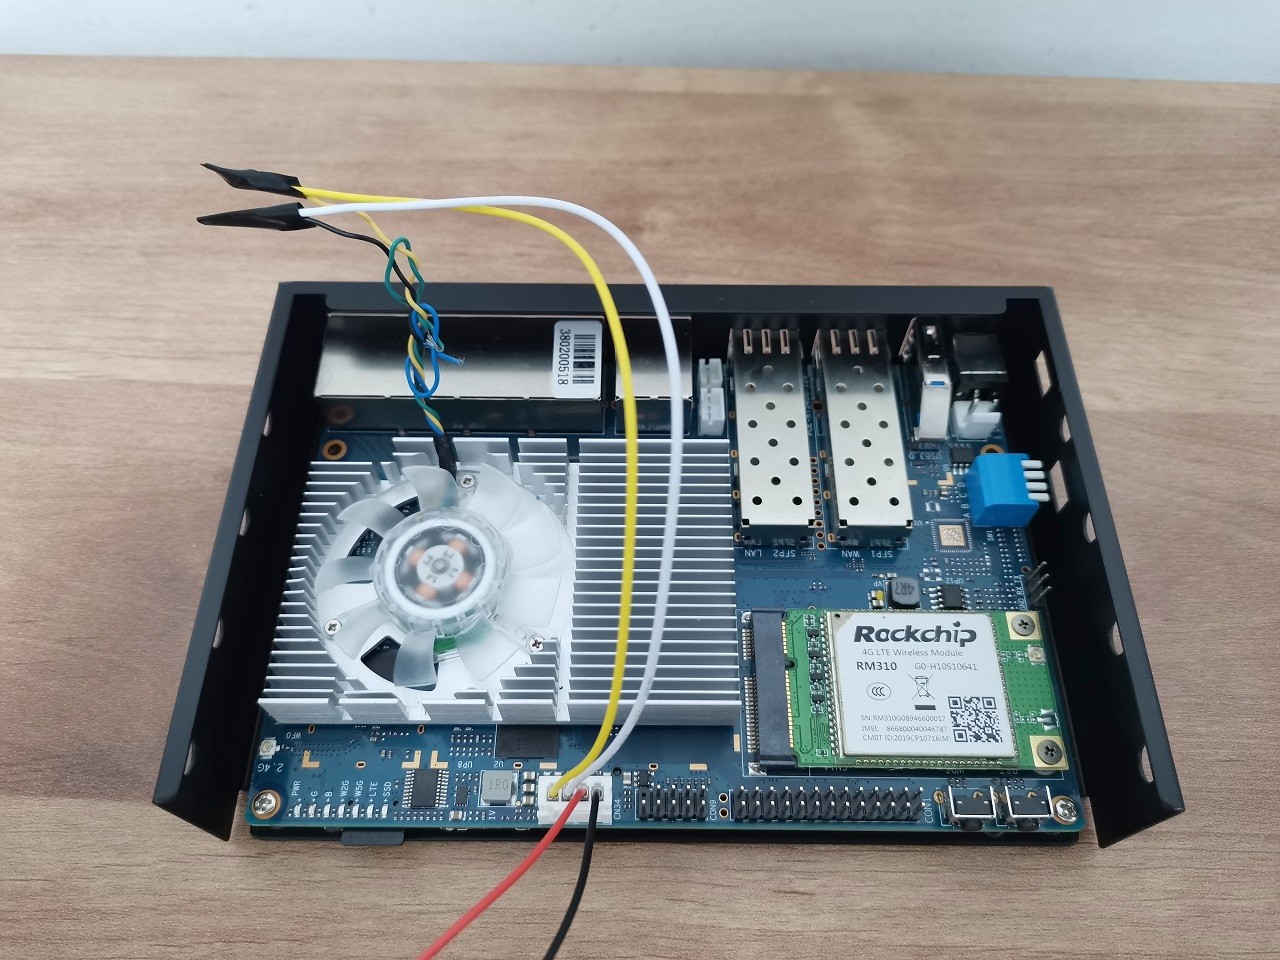
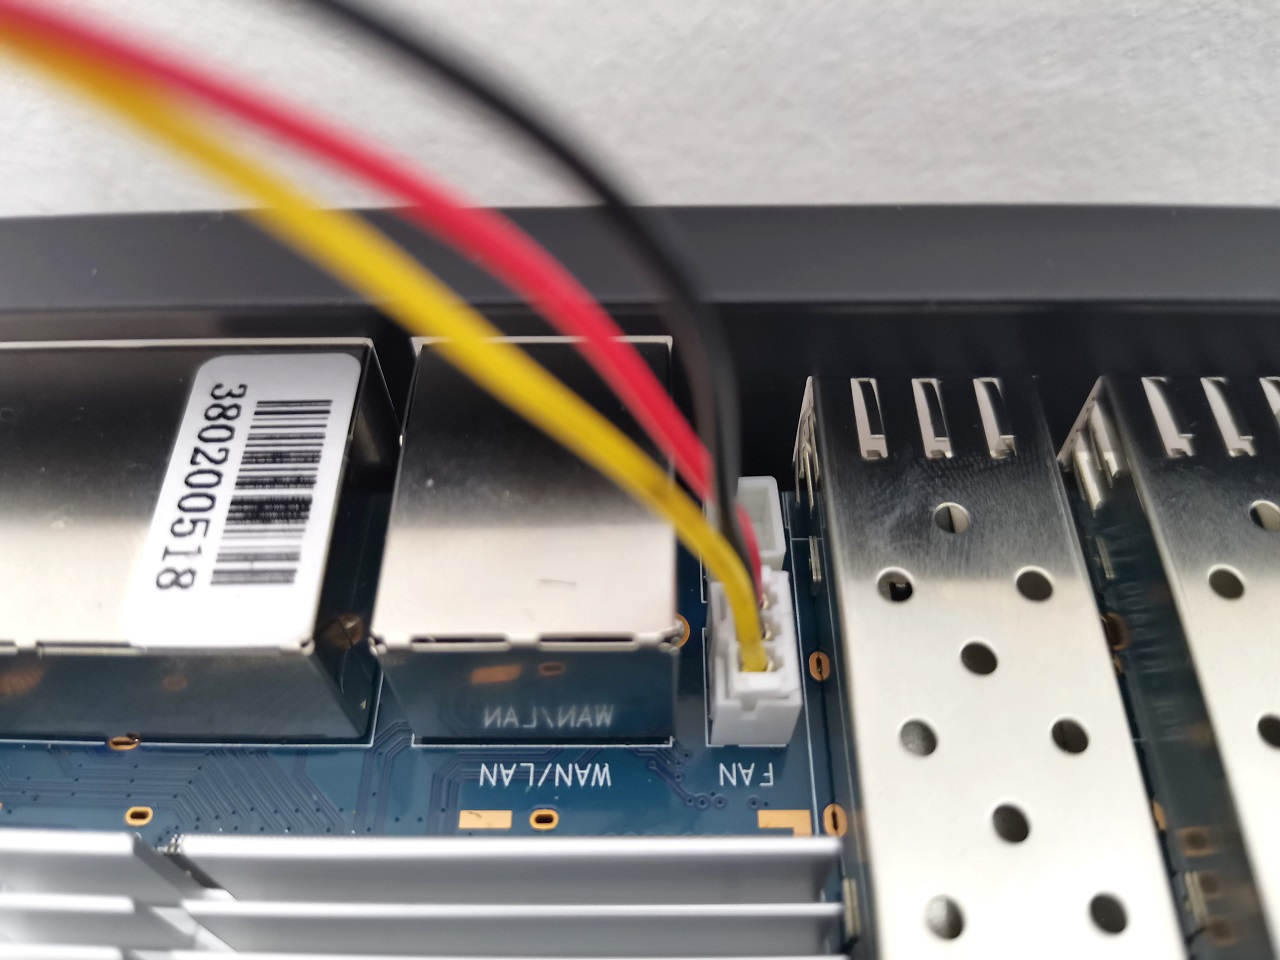
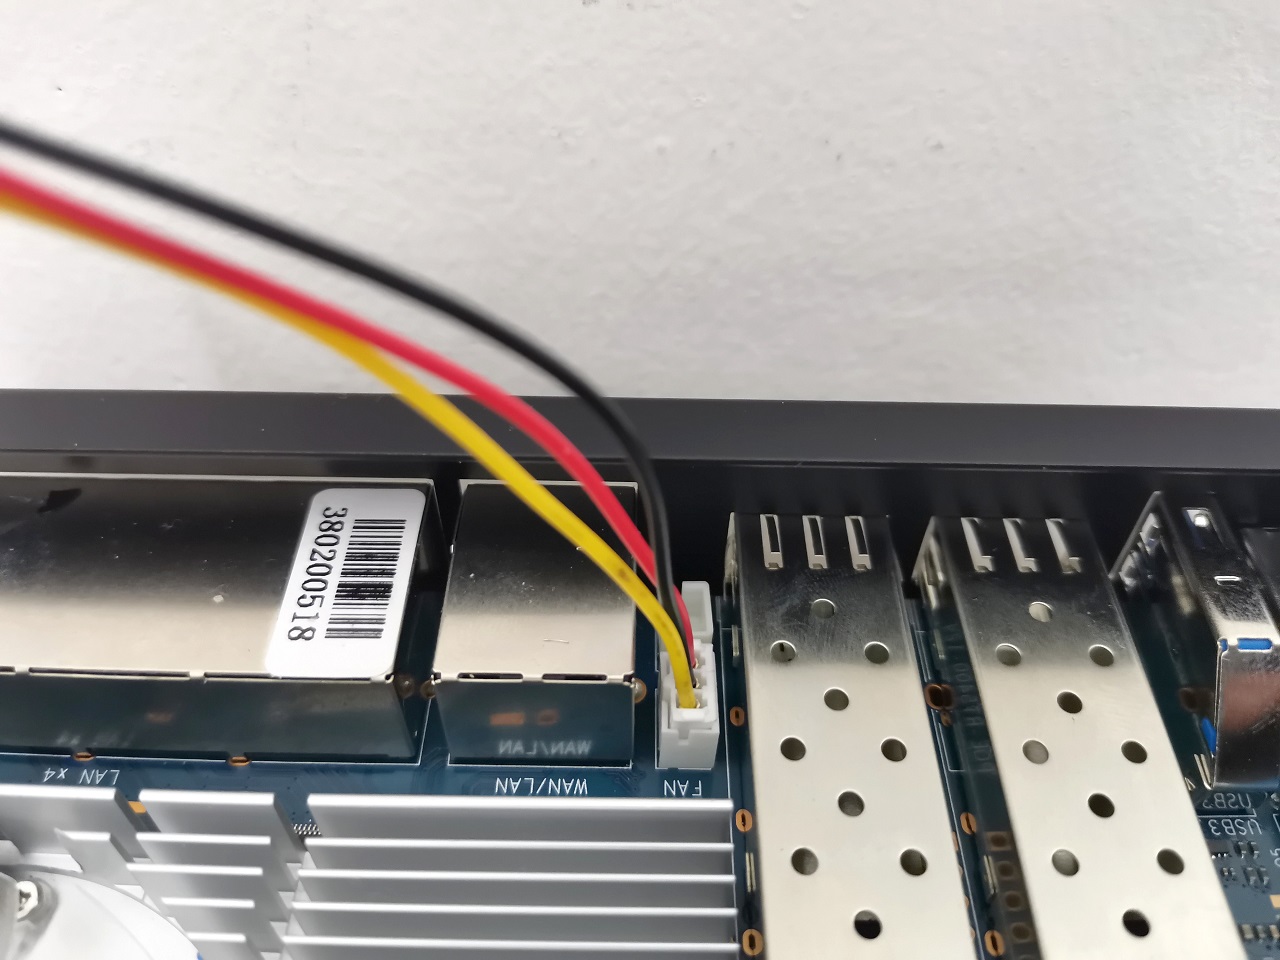
Connecting 4 Pins Cooled Heatsink wires w/ the XH2.54 4 PIN wires
| XH2.54-4PIN Color | FAN Wire Color |
| White | Black |
| Yellow | Yellow |
| Black | No need to connect |
| Red | No need to connect |
Final Step (Powering/Operating the FAN)
To check that everything is working and to power the FAN on using the GPIO Interface controller, you will need to execute the following commands:
echo 419 > /sys/class/gpio/export
echo out > /sys/class/gpio/gpio419/direction
echo 1 > /sys/class/gpio/gpio419/value
Option #1
You don’t want to turn the FAN on constantly. You can also create a script to time the FAN operation when reaching a specific temperature. For example, when the CPU temperature is above 45 °C, as shown below, the Fan starts to power for 30 seconds.
Fan Control bash script:
#!/bin/sh

pin_num=8
sleep_time=5 #seconds
fan_time=30 #seconds
fan_temp_threshold=45

gpio_num=$((pin_num + 411))
echo $gpio_num > /sys/class/gpio/export
gpio_sys_path='/sys/class/gpio/gpio'
gpio_sys_path="${gpio_sys_path}${gpio_num}"
current_dir="`cat ${gpio_sys_path}/direction`"
if [ "$current_dir" = "in" ]; then
	echo out > "${gpio_sys_path}"/direction
fi
echo 0 > ${gpio_sys_path}/value
while [ true ]
do
temp=$((`cat /sys/class/thermal/thermal_zone0/temp`/1000))
if [ "$temp" -gt "$fan_temp_threshold" ]; then
	echo 1 > ${gpio_sys_path}/value
	sleep $fan_time
	echo 0 > ${gpio_sys_path}/value
else
	sleep $sleep_time
fi
done
How to Automatically load the script
If you have already created the script file Fan.sh under /etc/init.d/ you will need to follow these steps:
- Step #1: Invoke the “enable” command to run the init script on boot: /etc/init.d/Fan.sh enable
- Step #2: Now, the script will automatically run on boot. You can check to make sure it’s running in the background by issuing the command: top
#!/bin/sh /etc/rc.common

pin_num=8
sleep_time=5 #seconds
fan_time=30 #seconds
fan_temp_threshold=45

gpio_num=$((pin_num + 411))
echo $gpio_num > /sys/class/gpio/export
gpio_sys_path='/sys/class/gpio/gpio'
gpio_sys_path="${gpio_sys_path}${gpio_num}"
current_dir="`cat ${gpio_sys_path}/direction`"
if [ "$current_dir" = "in" ]; then
	echo out > "${gpio_sys_path}"/direction
fi
echo 0 > ${gpio_sys_path}/value
while [ true ]
do
temp=$((`cat /sys/class/thermal/thermal_zone0/temp`/1000))
if [ "$temp" -gt "$fan_temp_threshold" ]; then
	echo 1 > ${gpio_sys_path}/value
	sleep $fan_time
	echo 0 > ${gpio_sys_path}/value
else
	sleep $sleep_time
fi
done
Option #2
To automatically control the speed of your fan base on Pulse-width modulation (PWM), you can install the Module and script according to the following steps:
for Example: /etc/init.d
The script file content:
#!/bin/bash
echo 419 > /sys/class/soft_pwm/export
echo 6000 > /sys/class/soft_pwm/pwm419/period
echo 1200 > /sys/class/soft_pwm/pwm419/duty_cycle
echo 1 > /sys/class/soft_pwm/pwm419/enable
(It’s important to add the & symbol at the end of the line, as it will run the script in the background, allowing the boot process to continue without waiting for the script to finish).
rc.local file should look like this:
!/bin/sh
@reboot /etc/rc.local/Fan.shexit 0
**Special Credits to elxyzad from HT magazine website (htmag.co.il) for writing the script & module**
Configuration Option No. 3
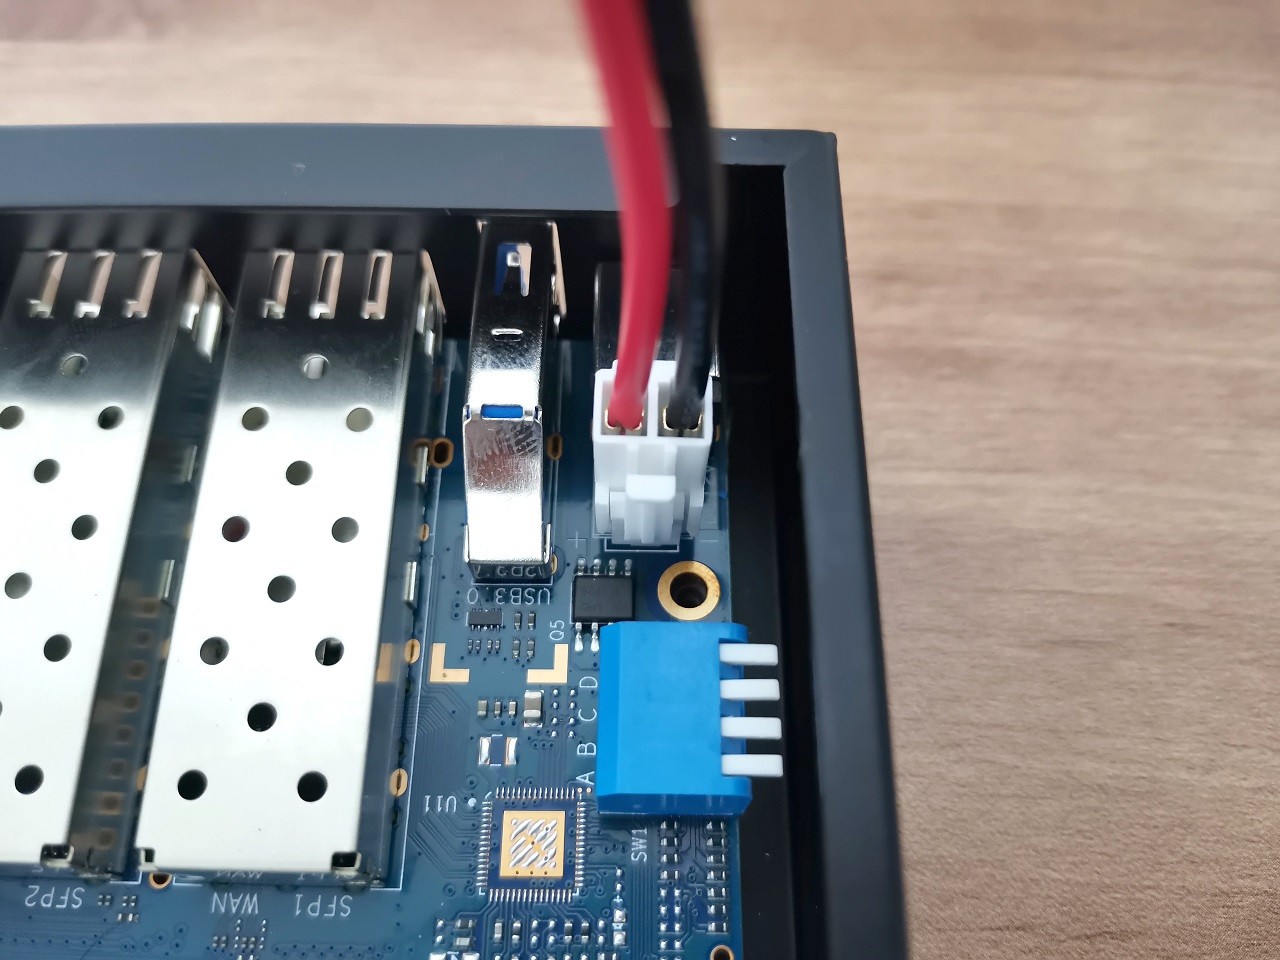
Using the CN22 (PH-2PIN) Connector as the fan 12V constant power source.
| ||||
Setting Up Fan Cooled Heat Sink (Items list) | ||||
Item No’ | Item Photo | Description | QTY | Buy Link |
1 | | Zotac 9400GT GT210 GT520 graphics card with 2 or 4Pin Connector. | 1 | |
2 |  | VH3.96- 2PIN Terminal wire | 1 | |
3 |  | Conductive Silicone Thermal Pad | 1 | |
4 | | Heat Shrink Sleeving Tubing Kit | 1 | |
Tools | ||||
Soldering iron | – | For Soldering the wires | 1 | – |
AndroidPIMP.COM will not be liable or responsible for any loss or damage caused by improper wiring/assembly of the above components. | ||||
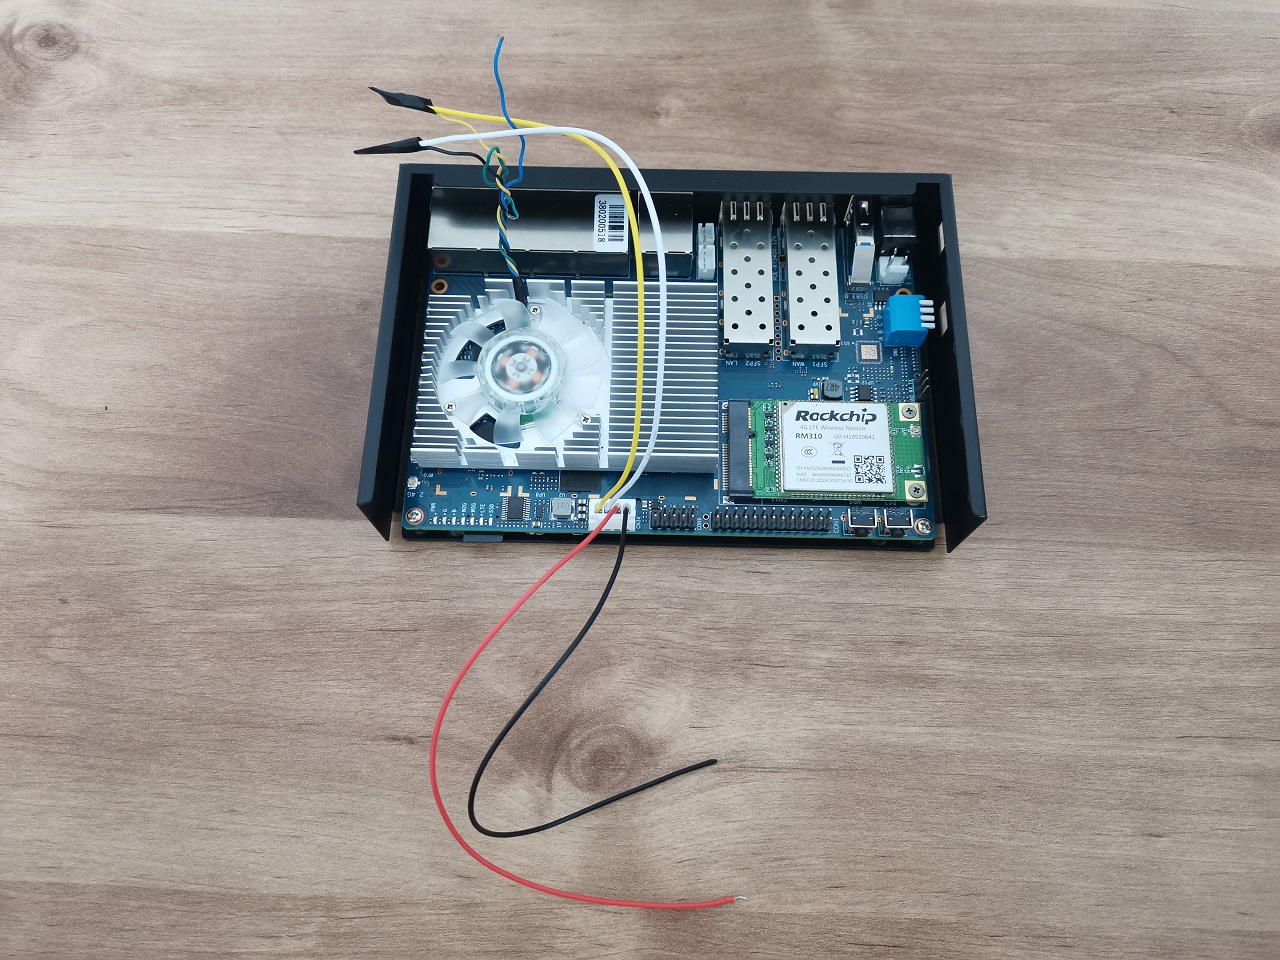
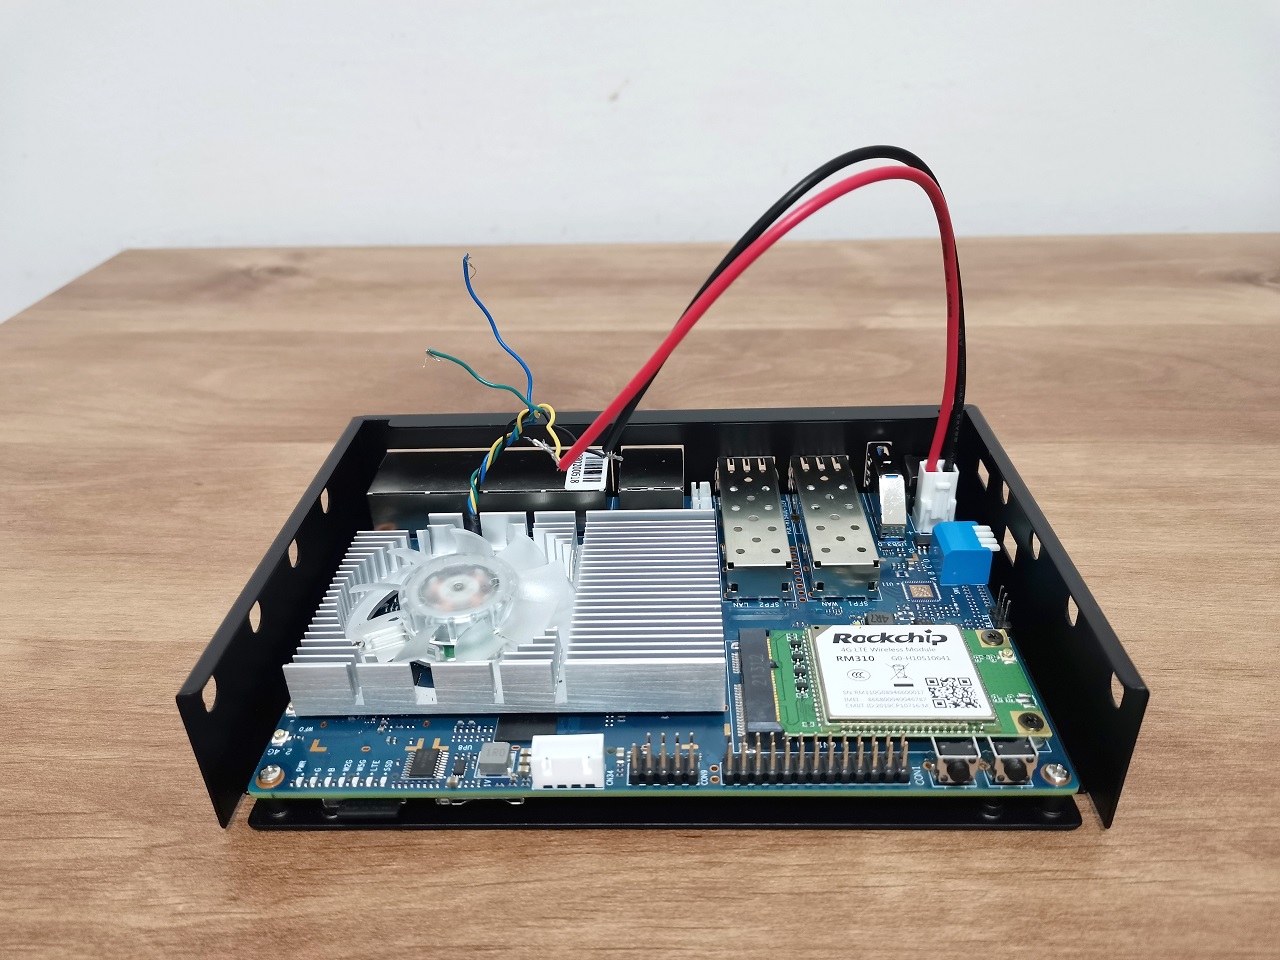
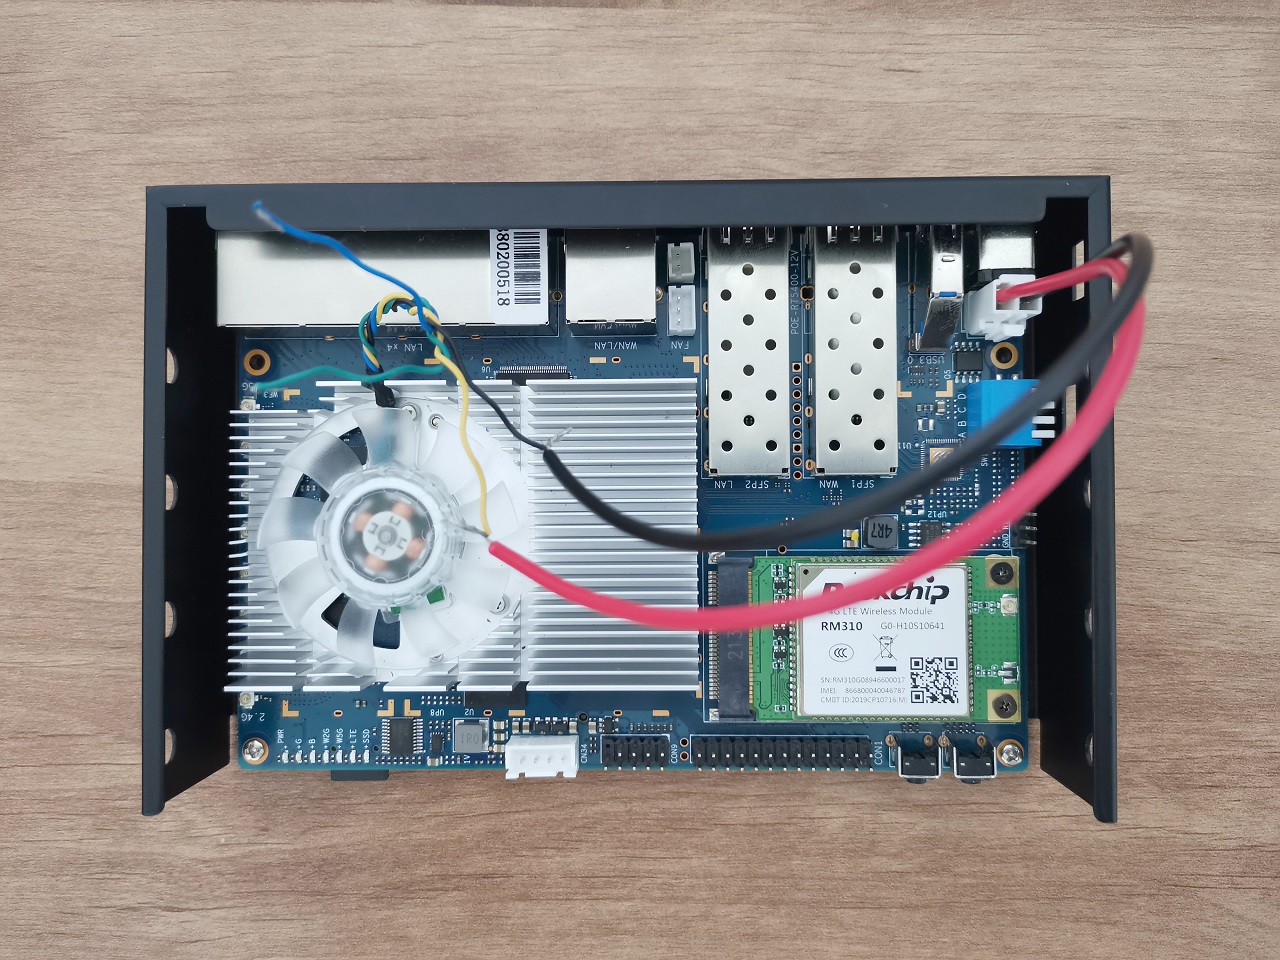
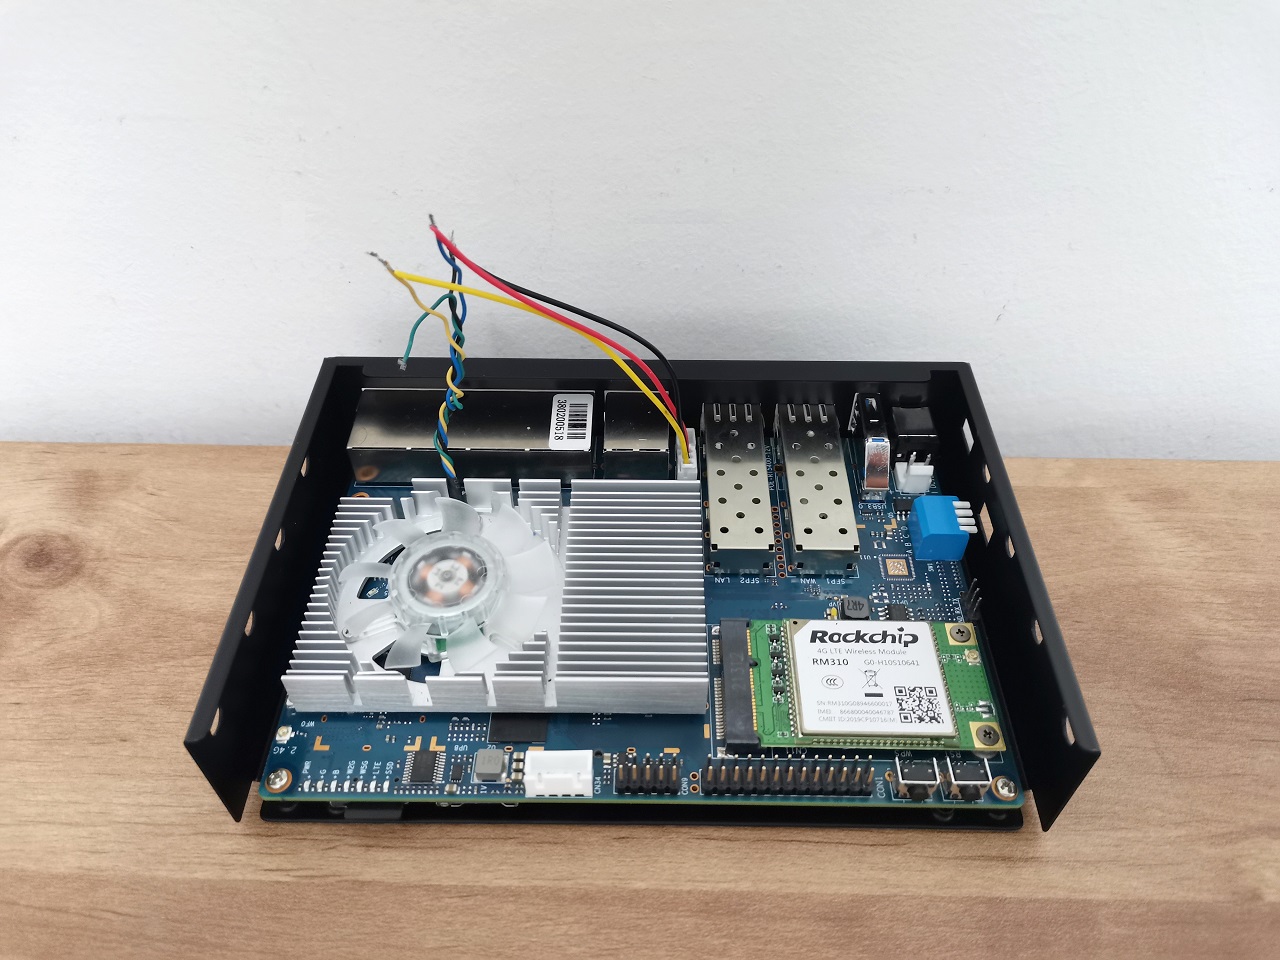
Connecting 4 Pins Cooled Heatsink wires w/ the VH3.96-2PIN wires
For a constant (Always on) 12V power source, you can use the VH3.96-2PIN DC input connector. We tested it, and it worked fine for us.
| VH3.96-2PIN Wire Color | FAN Wire Color |
| Black | Black |
| Red | Yellow |
Configuration Option No. 3 (With Support for PWM)
This wiring should work only with a 5V Fan with 3 or 4 wires, as it has a separate PWM wire colored in blue. We tried to power a 12V FAN, but we were unsuccessful. The FAN started working every few seconds and stopped, and vice versa. If the FAN spinning is correlated with the thermal sensor operation, it’s an annoying configuration we prefer to avoid.
Instead of using the 5V power source, If you order the Heatsink with the 12V Fan included, you should get the necessary “full” voltage from the XH2.54-4PIN SATA connector or the DC IN 12V VH3.96 connector.
Configuration Option No. 4 (Without PWM Support)
Connecting the 3-pin cooled heat sink wires with the XH2.54-3PIN wires is the simplest installation option. Just plug the fan power into the 5V 3PIN power socket and enjoy the added convenience of setting a maximum temperature threshold. Once this threshold is reached, the fan will automatically start spinning, ensuring effective heat dissipation.
Adjusting these trip points
These trip points are predefined temperature values at which the system triggers certain actions, such as adjusting fan speeds or activating cooling mechanisms, to prevent overheating and maintain safe operating temperatures.
Specifically, trips are numbered. For example, a “trip_point_4_temp” indicates the fourth thermal trip point temperature for the system. When the temperature sensor in the system detects that the temperature has reached or exceeded this specified trip point temperature, it triggers a response, such as increasing fan speed, to help cool down the system and prevent damage from excessive heat.
By setting and adjusting these trip points, users can customize how their system responds to temperature changes, ensuring optimal performance and preventing overheating issues.
Controlling the fan rotation speeds:
- You can essentially set a temperature threshold (in this case, 70000) at which the fan will adjust its speed.
echo 70000 > /sys/class/thermal/thermal_zone0/trip_point_4_temp
To lower the fan rotation speed, you can increase the temperature value in the command. For example, to make the fan rotate slower, you can set a higher temperature threshold. Here’s an example:
You can change the command to: echo 80000 > /sys/class/thermal/thermal_zone0/trip_point_4_temp
By increasing the temperature threshold to 80000, the fan will trigger at a higher temperature, causing it to rotate at a lower speed compared to when it was set at 70000. This adjustment can help regulate the fan’s rotation speed based on your system’s temperature needs.
In this example, we have set the tipping point temperature to be 50 °C. Once the CPU temperature reaches this temperature, the fan will automatically start spinning. Considering the temperature inside the case is high, especially in a closed case, the temp will be equal or exceed this threshold, therefore our fan to continuously spin.
echo 50000 > /sys/class/thermal/thermal_zone0/trip_point_4_temp
echo 50000 > /sys/class/thermal/thermal_zone0/trip_point_3_temp
echo 50000 > /sys/class/thermal/thermal_zone0/trip_point_2_temp
echo 50000 > /sys/class/thermal/thermal_zone0/trip_point_1_temp
Setting the trip points to load automatically when the OpenWrt OS boots is simple. You can copy and paste the command above into the Local Startup tab accessible under System -> Startup as shown in the photo below.


When you do recommend installing a passive (or active) heat sink to this setup? Passive cooling is I think a no brainer, it’s cheap and silent. Strange they don’t add passive heat sink to their package product, as part of the package.
“Strange they don’t add passive heat sink to their package product, as part of the package”.
They had some supply problems because of COVID.
If you have a large heatsink that will fit and cover all chips, it might be worth trying the passive cooling option. Just use a lower in height so you have the option to add a fan.
I just noticed that the “complete kit” also comes with heat sinks. Seperate heatsinks for each chip. If you buy a large heatsink, that will work as well, BUT keep in mind that the chips have different heights, meaning you should use different heat pads (1.5 mm and 0.5 mm) to have a good coverage of the heat sink on the different chips. I did read about performance issues on forum.banana-pi.org forum, when you don’t cool the chips enough. Especially with passive cooling, it might still be a good idea to add additional vent holes manually in the casing. Since… Read more »
So use 1.5-2 mm thermal pads. Nothing will happen. They are elastic, so it does not matter if you are using the highest type for all chips. It’s not rocket science. I agree about the vent holes. You can drill a few holes.. or you can also glue a small fan to the bottom of the case. And maybe use the GPIO header pins as a power source. Just to get the hot air out of the case.
Actually there is a fan header connnector on the R3 board. Which can do PWM.
Kindly Try it, and let me know if it works well.
you can email me with the info. Thanks
Ps. also add a link to the package deal of the Banana Pi BPI-R3? https://www.aliexpress.com/item/1005004886608696.html.
Since you mentioned the single board computer only on your last page.
Thanks. I added the link for the complete kit.
Which version of PCIe does the board support?
According to MediaTek website >> M.2 M-Key PCIe interface (2-lane PCIe 2.0)
Is there any nas software or docker image that will handle those multiple hdds ? Exampme if i want to raid, zfs or btrfs
1) OpenWrt has NAS support.
2) You can also try CasaOS.
3) OpenMediaVault should run on Debian.
I don’t get what is about the ONTi SFP. It is suposed to be a GPON ONT? In aliexpress I see that it comes in pairs (Tx 1310 and Rx 1550 the first one and other with Tx 1550 and 1310), like a pair which is meant to be connected together.
https://es.aliexpress.com/item/4000265957277.html?spm=a2g0o.productlist.main.17.5893oPf4oPf4kf&algo_pvid=54d3e4cb-00c6-4269-8acb-3ae1e2c40f54&algo_exp_id=54d3e4cb-00c6-4269-8acb-3ae1e2c40f54-8&pdp_npi=4%40dis%21ARS%217735.49%213867.74%21%21%2122.10%21%21%402132a26216964772264216569ed485%2110000001076765699%21sea%21AR%214647643211%21AB&curPageLogUid=VmCG7Kwqm2TR
This module is not compatible with GPON technology.
If the module information / specifications do not indicate it’s a GPON compliance, then it is safe to say that it is not GPON compliant.
Did you use anything to glue the copper-made sheet plates on chips?
I used a thermal silicone adhesive plaster.
This website doesn’t work. Whenever you click on a topic or try to love to Next page it refreshes the page and stays on page 1
Thank u. The problem was fixed.
Hello, I can’t read other 9 pages from 10 in the Banana Pi BPI-R3: Everything you need to know article. Now content is unavaible. Please to fix, it’s great portion of knowledge. Best regards
Hi, please check now.
Thanks
It’s working now, great, thank You:)
Above you mention that the XH2.54 4PIN SATA power connector can be used with a 12v fan. Would I lose PWM capacity?
It should work, but I didn’t try it with a 12V Fan. In a worst-case scenario, you can always buy a 5V separately from AliExpress and assemble it with screws on top of your existing heatsink.
If you choose to connect to the 3-pins FAN socket using Banana Pi original heatsink, PWM is also enabled by default or at least the option to
set a tipping temp point when the fan will stop or start working.