
Better and more cost-effective?
Chinese companies are great at keeping costs low, but is their hardware actually better than Nvidia’s?
When it comes to AI hardware, the story often boils down to one thing: Nvidia sets the bar, and everyone else is scrambling to keep up. In recent years, export bans and rising silicon prices have pushed Chinese chipmakers into a tough, defensive position.
It’s widely believed that Chinese tech companies shine most when it comes to cutting costs. They know how to trim excess, make the most of established manufacturing processes, and churn out hardware at prices Western silicon giants can’t compete with.
But as we look closely at emerging architectures in the edge-AI and embedded space—such as SpacemiT’s newly delivered Key Stone K3 RISC-V SoC—a deeper, more complicated question emerges: Is this hardware actually better than Nvidia, or is it just cheaper?
To answer that, we have to look past the marketing hype and examine the cold, hard engineering trade-offs.
Architecture: Heterogeneous vs. Homogeneous Fusion
To understand where Chinese design philosophy is taking a lead, let’s contrast how a classic Nvidia edge system (like the Jetson Orin Nano) processes data versus how an advanced Chinese RISC-V chip operates.
Nvidia design philosophy
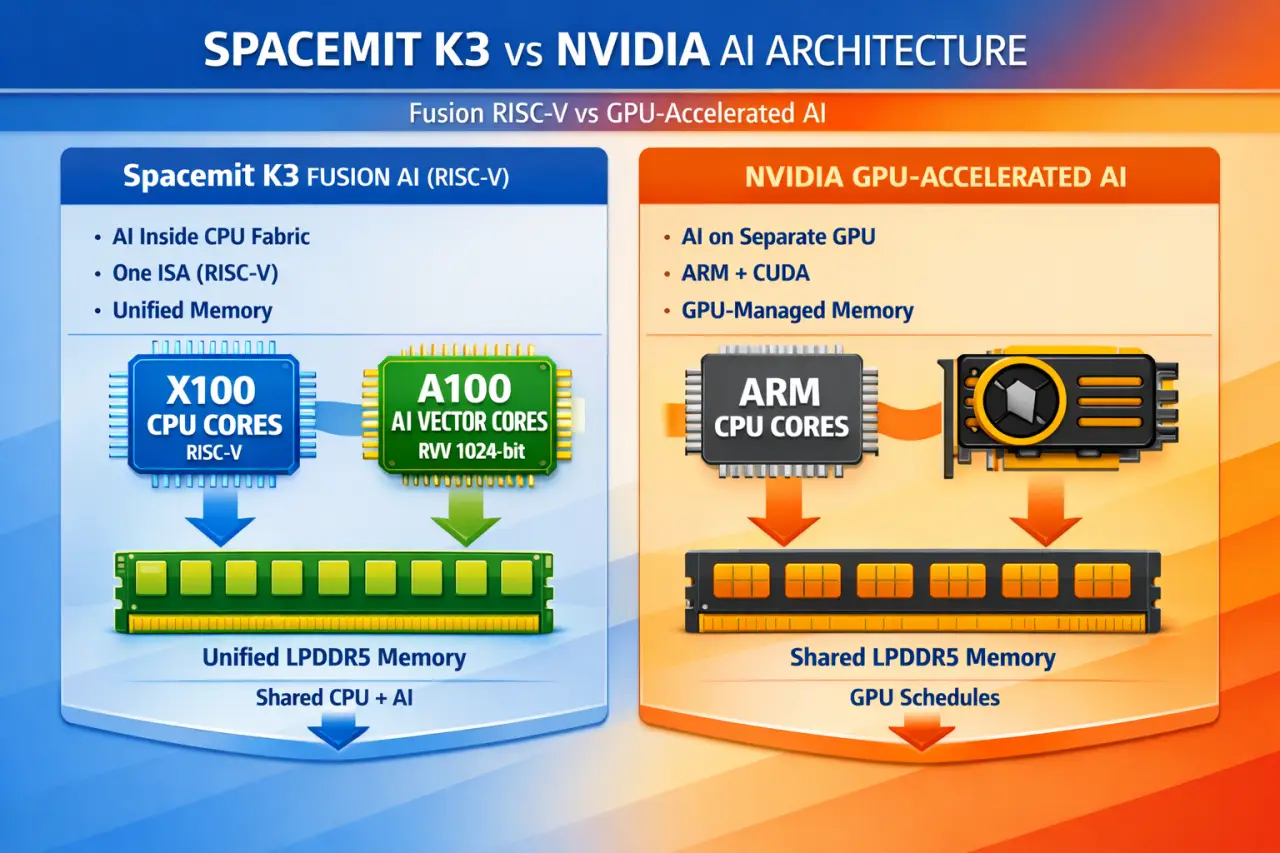
Nvidia’s approach uses heterogeneous computing, with an ARM CPU cluster managing the operating system and core logic, and a separate Nvidia Ampere or Blackwell GPU cluster handling parallel matrix calculations. Since these systems operate on different structural languages, data has to be constantly copied and transferred over the internal PCIe bus. This back-and-forth creates a “data transfer tax,” eating up valuable clock cycles and increasing power consumption.
SpacemiT K3 design philosophy
Now, consider a processor like the SpacemiT K3. Instead of pairing two entirely different computing architectures together, it employs what engineers call Homogeneous Fusion.
The K3 integrates eight X100 general-purpose CPU cores alongside eight A100 AI-oriented compute cores. Because every single core runs on the exact same unified RISC-V ISA (RVA23 Profile), they share a single coherent memory pool. The data doesn’t move across a bus to a GPU; it stays right in the CPU pipeline, executing tailored matrix extensions natively.
SpacemiT K3 Pico-ITX processor cores operating on Bianbu 4.0 (screenshot)
SpacemiT K3 Pico-ITX processor cores operating on Bianbu 4.0 (screenshot)
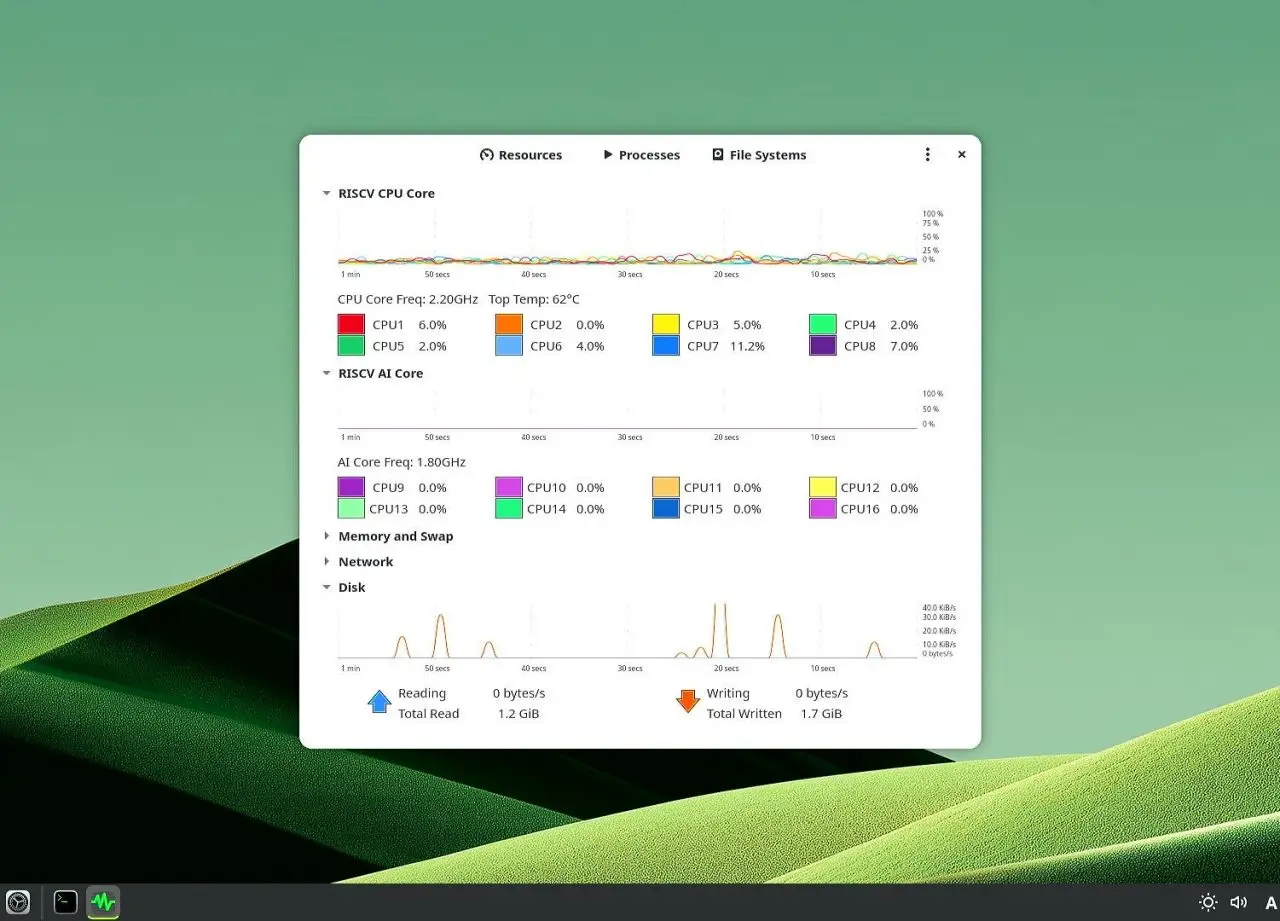
SpacemiT K3 CPU Architecture
- The Verdict: For raw architectural data flow at the edge, this unified-ISA approach isn’t just a workaround—it is fundamentally cleaner engineering than feeding a separate GPU.
Conclusion: Better is Relative
Is the hardware actually better?
If “better” means sheer brute-force computing power, massive memory bandwidth, and unlimited power consumption for training cutting-edge models, Nvidia still reigns supreme.
But if “better” is defined as architectural elegance, data-movement efficiency, power-to-performance scaling at sub-30W, and absolute cost-disruption at the edge, Chinese RISC-V AI hardware is no longer just a cheap knock-off. It represents a fundamental evolution in domain-specific silicon design—proving that clever architectural co-design can soundly defeat raw, expensive transistor scaling.


